Many people should know the fact that when you are forced to reinstall the system, USB media will be a super easy way to boot the computer into the "Windows Installation" wizard. On Windows, there is a software called Microsoft Media Creation tool and on macOS, there is a BootCamp provided by Apple. In many special cases, if your Windows system has broken down and unable to boot then you can only make a bootable install USB on a macOS if you have, by right, BootCamp should be your preferred tool for that, but in fact, feedback from the user point of view, BootCamp is not a perfect solution for handling ISO image on macOS and in practice however, there will still be a lot of problems. Such as: "Boot Camp only supports drives with a single partition", "Bootcamp can't recognize the Windows 10 ISO", "Not enough space on the Bootcamp intaller disk", "Boot Camp doesn't see Windows partiton" and more.
For those who can't create a Windows bootabe USB drive with Bootcamp, I'll recommend other alternatives that may work for you. Ceating a bootable Windows 10 USB without BootCamp is not nearly as complicated as it seems, depending on how you want to do it.
Table of Contents
Create Windows 10/8/7 Bootable USB on Mac without BootCamp
Method 1. Use Terminal on Mac
Making a USB bootable on macOS isn't as easy as formatting it in a Disk Utility and copying files to USB drive, you will need to mount the USB drive with Terminal. Since it's a command line-only utilty without interface, which may be difficult for some novice.
Step 1. Install Homebrew & Wimlib. You may not sure if you've already installed the Homebrew and wimlib. Run the following comamnd to intall it.

Then reopen teh Terminal applicatio and type the following command to install wimlib.
brew install wimlib
Step 2. Connect your USB flash drive or external hard drive to your Mac computer.
Step 3. We need to display all the list attached disk drives by runing the diskuti list in the Terminal. Your USB drive may be /dev/disk2 or /dev/disk3, in my case, it's "disk2"
diskutil list
Step 4. Now, we need to format your USB disk in the Termainal by running command. Make sure you've created a copy of your USB drive before formatting.
diskutil eraseDisk ExFat "WINDOWS10" MBR disk2
This command will format your USB drive and make it bootable for UEFI-based computer, and we name it as "WINDOWS10,".
Step 5. Now, let's start to mount your ISO file, type the command hdiutil mount in the Termainal then drive the ISO file from Download folder to the Terminal application, it should look like this. Then press the Enter to run the command, it will start to mount your Windows ISO image file, once the ISO file is mounted successfully it will print the path and volume name.
hdiutil mount /Users/your-username/Downloads/Windows.iso
Step 6. After mouting your ISO file then you will need to move the files to your USB drive, because install.wim is too large to copy, so don't move it in this step, just do it in the next step separately.
rsync -vha --exclude=sources/install.wim $WIN_VOLUME/* /Volumes/$DRIVE_NAME
Step 7. Use the following wimlib command to copy the install file to the USB drive:
wimlib-imagex split $WIN_VOLUME/sources/install.wim /Volumes/$DRIVE_NAME/sources/install.swm 4000
Method 2. Use WonderISO for Mac
As fast as I know that Boot camp utility only formats the USB drive as FAT32, however, if the install.wim file is larger than 4 GB limit then the ISO file will not be copied to your USB flash drive. What's more, if your computer's motherboard is embed with Unified Extensible Firmware Interface (UEFI) instead of the legacy MBR, then choosing a appropritate media is vital to boot a UEFI-based computer. Here we will highly recommend using WonderISO tool as your second choice, which makes it possible to make a Windows 10/8/7bootable USB on Mac without BootCamp assistant.
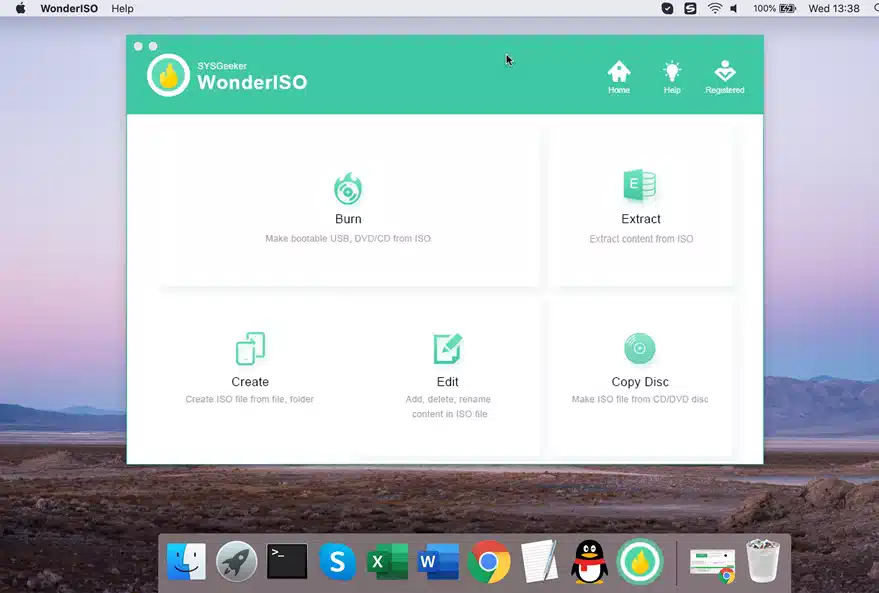
WonderISO is an integrated software that consists of 5 independent modules, such as Burn, Extract, Edit, Create and Copy ISO from Disc. It can be able to handle the ISO image that over 4 GB limit without partition your USB drive. In addition, it's perfectly compatible with both UEFI and BIOS interface.
WonderISO
Make Any USB Device Bootable
- An all-in-one ISO Burner tool that lets you burn ,extract, crate and edit ISO image file straightforwardly!
- Compatible with all Windows system including the latest version of Windows 10.
- Support UEIF+MBR and UEFI+GPU boot mode.
- Works with both USB flash drives and CD/DVDs.
Step 1. WonderISO is a desktop software that requires you to download and install it on a Mac computer. The latest version now supports macOS 11 (Big sur). After installation, launch it and you will see the main interface like below.
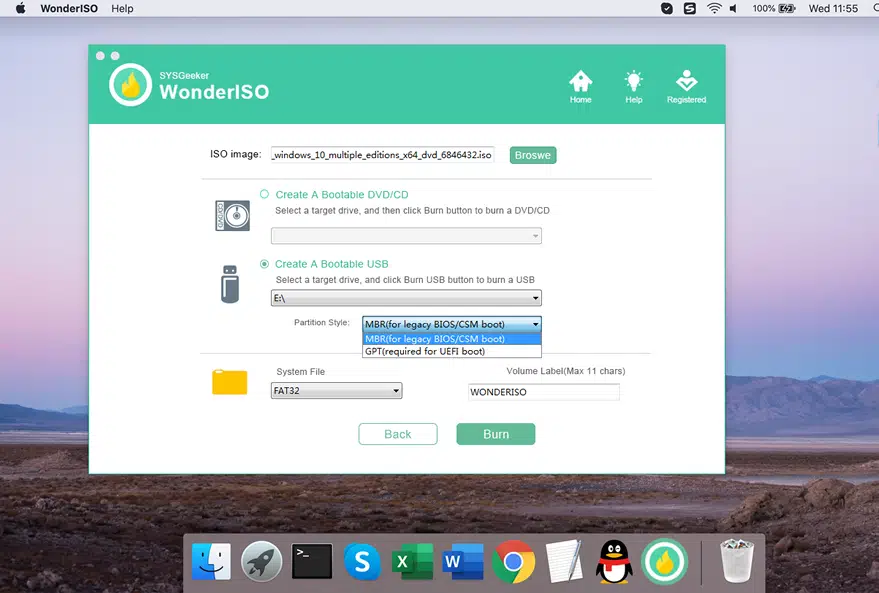
Step 2. To create a bootable USB drive on macOS, you need to select the first option "BURN" to write the ISO file. Don't forgot connect your USB flash drive to your Mac. In the Burn Window, click "Browse" button to load your Windows ISO image file, and select the GPT (UEFI boot) option. For the system file you can select any file format from the list.
Step 3. After reviewing the Settings, click BURN button to start to write the ISO image to your USB drive, a progress bar will appear and show the percent complete. It will take about 10 minutes to finish the copying process, please wait it to be done.
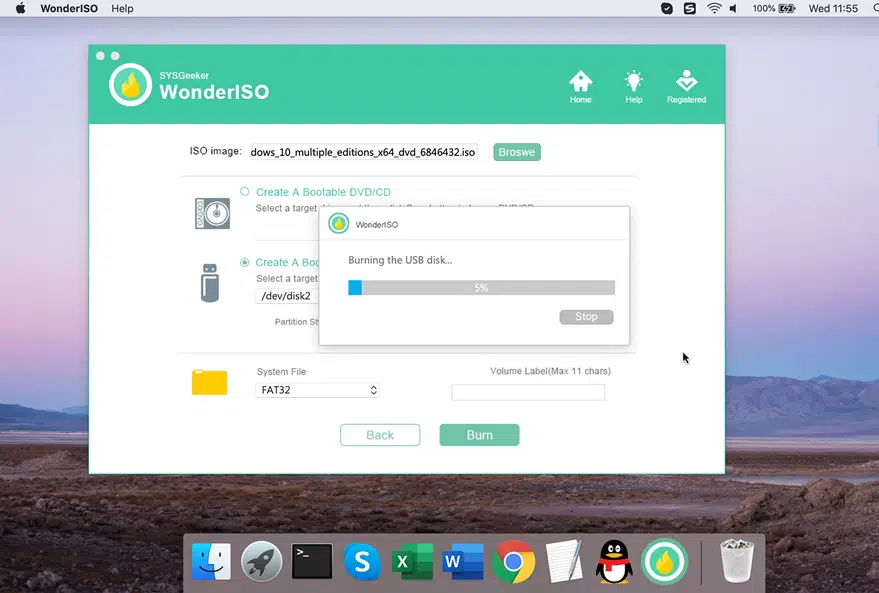
Once it shows 100% in the progress bar then eject your USB drive, and connect it to your Windows computer for system installation.
Method 3. Use VirtualBox
If Bootcamp don't work for you then virtual Machine also worth a try. It is also anther easy way that can be used to make a Windows bootable USB install on a Mac. This part we will run Windows 10 ISO image on VirualBox on a Mac and create a bootable USB installer with command line. There are many vrtual Machine Software out there like VirtualBox, VMware, Parallels Desktop, choose the one you're familiar with and continue. Here we will choose VirtualBox as an example to explain how to create Windows bootable USB without BooCamp.
Step 1. Firstly, download and install VirtualBox on your Mac computer.
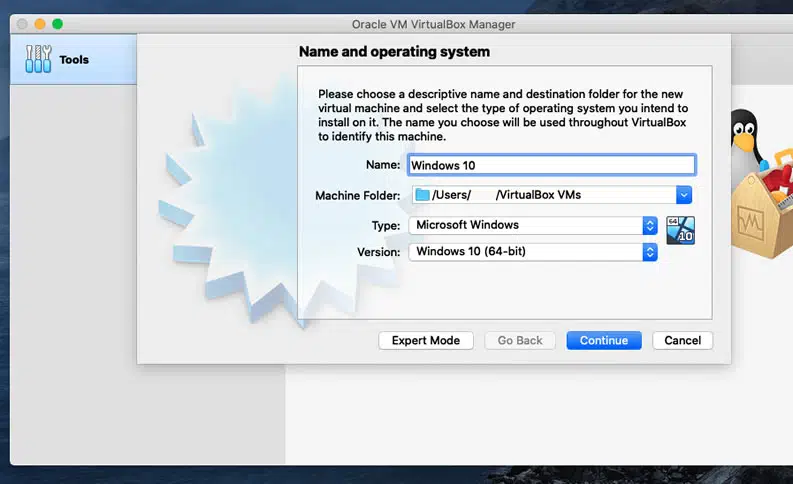
Step 2. In the VirtualBox Manager, you need to add your Windows 10, 7, 8 ISO image file to VirtualBox application. Click Settings > Storage and Open your Windows 10 ISO image.
Step 3. This step requires you to install VirtualBox Extension. We recommend you to download it from VirtualBox official site then run it. In addition, by default, USB 3.0 is not be supported in VirtualBox so you need to enable USB 3.0 Controller in VirtualBox. Go to Settings > Ports and enable USB 3.0 Controller.
Step 4. Now turn on your Windows 10 virtual machine, then insert your USB drive to your Mac, you will not VirtualBox will recognize your USB drive instead of macOS.
Step 5. In the windows installation interface, press the Shift + F10" to launch a CMD window. (NOTE: You don't need to install Windows completely, we just need to use its command utility. )
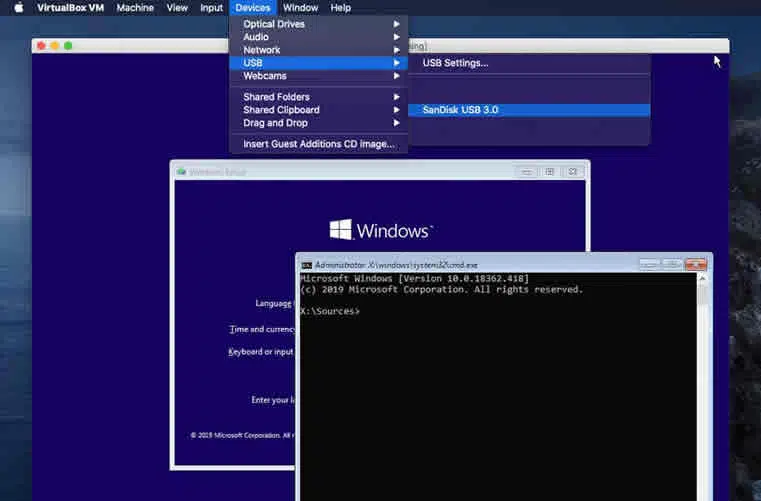
Step 6. We will use command prompt to create bootable USB installer with GPT boot. In fact, you can also try some other tools like Rufus to do this, but you need to complete the installation of the Windows 10 and do this on Windows 10.
> Diskpart
> List Disk
> Select Disk 1
> Clean
> Convert GPT
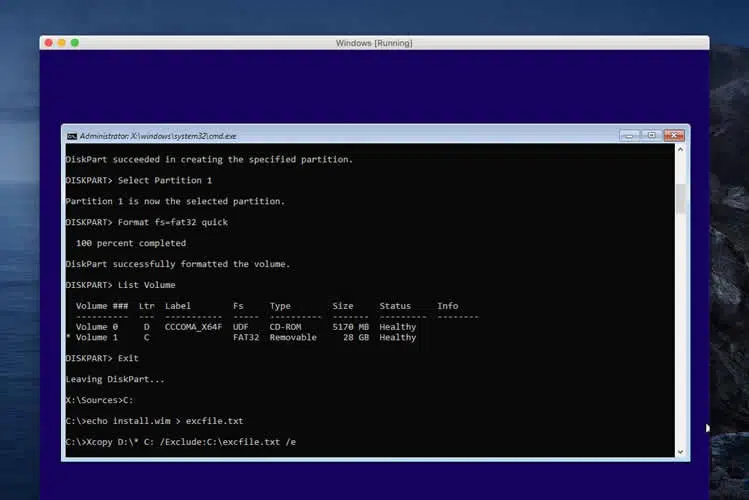
Step 7. Run the following command to create a new partition and re-format your USB drive as FAT32 with UEFI boot.
>Create Partition Primary
>Select Partition 1
>Format fs=fat32 quick
>List Vol (Volume D: is Windows ISO Image, Volume C: is USB Drive Installer)
>Exit
Step 8. Add the install.wim file into exclude list by running the following command and copy the Windows installer file to your USB drive.
> echo install.wim > excfile.txt
>Xcopy D:\* C: /Exclude:C:\excfile.txt /e
Step 9. Since install.wim file is larger than 4 GB which can't be copied to your USB drive, so we will split it into a 2 files less then 3 GB by following command, then copy it to your USB drive.
>Dism /Split-image /ImageFile:"D:\Sources\install.wim" /SWMFile:"C:\Sources\install.swm" /FileSize:3000
Remove your flash media when the command completes,then connect it to your Windows computer and make sure your windows computer is set to boot from UEFI mode.
Method 4. Use UNetbootin
This section brings you another easy way with graphical interface that can be used to help you create bootable Windows 10 USB on macOS without Bootcamp from an ISO image, UNetbootin, it's an open-source application that allows you to create a bootable USB on multiple platform including Windows, macOS and Linux. Let's how it works.
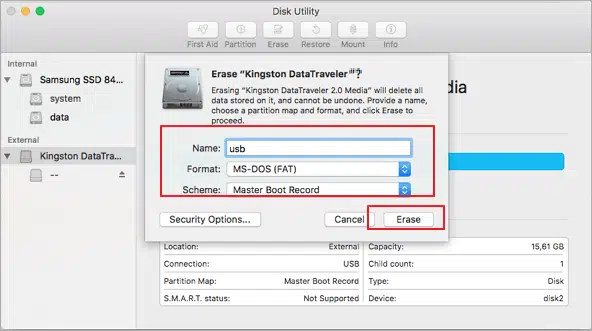
Step 1. Plug your USB drive to your Mac computer and open the Disk Utility.
Step 2. We also need to format your USB drive as FAT32. To do this, just select USB drive > Erase > MS-DOS (FAT32) > Master Boot Record > Erase.
Step 3. You need to check the path name of your USB drive, you can click the click on the information button of Disk Utility and it will show the partition information. Or you can use run the command (diskutil ) to see the list of the attached drives.
diskutil list
Step 4. Now, after you download and install the UNetbootin application on your macOS, run it.
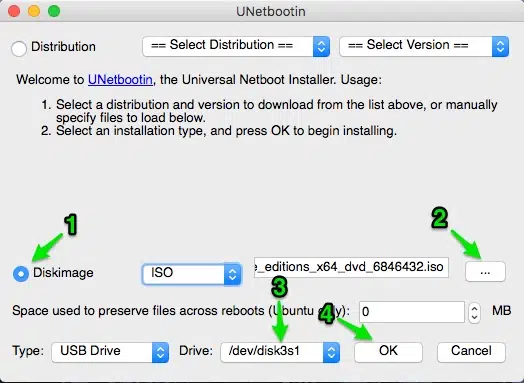
Step 5. Select your ISO image and your USB drive ID, then click OK to start to create.
Suggestion
When it comes to creating a Windows USB installer, you may be compelled to give up the Bootcamp due to various of strong issues, as an Mac's official utility, Bootcamp is actually not an ideal way to make a Windows USB installer. Although there are many ways to create a bootable Windows 10 USB without Boot Camp, but I personally prefer I personally prefer the WonerISO tool just because it's safe ,easy to use and high success-rate.