We understand that you want to burn an ISO file into a flash drive or may be any other USB storage device. Perhaps, you also want the flash drive to be bootable to install an operating system. So, in your mind, the solution is to copy the files from ISO image to the flash drive, right? Simple. Unfortunately, it's not that really easy. Burning an ISO file to a USB storage device is not similar to just copy and paste. Additionally, the complexity arises when you also want the flash drive to be bootable.
However, there are some nonchalant ways to burn ISO image files to USB flash drives on Windows 10 by using some free tools. We will be mentioning all of the techniques that you could use to make a bootable USB drive from an ISO image file.
Part #1: Burn ISO Image to USB with YUMI
YUMI is an abbreviation for Your Universal Multiboot Installer. It's a free ISO to USB software without any complicacies to understand. It's quite straight forward to use. Although, there are some challenges when you try to burn ISO image files more than 1GB. In addition, YUMI also offers multiple system tools including resuce CDs, dos, partition magicians, etc. These tools can be used normally after booting. Another core technology is when you're tying to write ISO image to USB with YUMI, the mbr file will be written into USB drive so that you can can effectively manage systems settings
Here's the guide to follow to burn ISO to USB with YUMI.
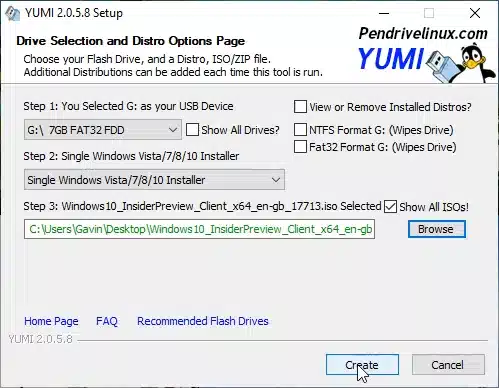
Step 1. Download the program and open it. It's plug and play type software. No need to install anything.
Step 2. Select the flash drive name from the drop down menu.
Step 3. Choose the version of Windows i.e Windows 7/8/10.
Step 4. Click "Browse" button to find the ISO image file from your computer and upload it.
Step 5.Now click on "Create" and let the software take care of the rest.
Part #2: Burn ISO to USB with WonderISO
WonderISO is the best Windows 10 ISO burner that not only helps to burn ISO to USB but it also helps to extract files from ISO images to computer, modify the files and even create an ISO image file using your personal computer data. The highlight of this software is not only the easement to use it but the high writing speed. An ISO image hardly takes 90-180 seconds to burn in a USB flash drive. Let us highlight some features quickly so that you can understand the software more clearly.
WonderISO
Make Any USB Device Bootable by Burning ISO to USB!
- An all-in-one ISO Burner tool that lets you burn ,extract, crate and edit ISO image file straightforwardly!
- Compatible with all Windows system including the latest version of Windows 10.
- Support UEIF+MBR and UEFI+GPU boot mode.
- Works with both USB flash drives and CD/DVDs.
Steps to Burn ISO to USB on Windows
Step 1. Go to the official website of WonderISO and download it for free in your Widnows PC., select the right version based on your computer OS. After installation, double click to launch the software directly.
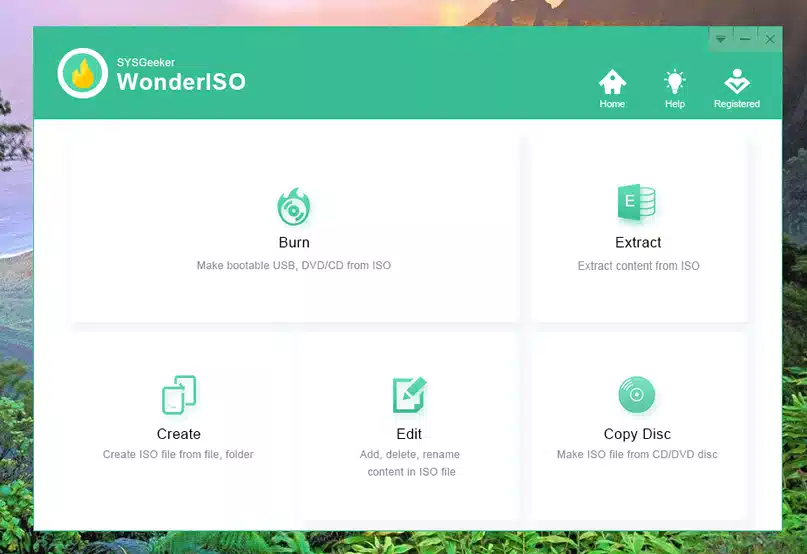
Step 2. There are five features in the main interface, just select the "Burn" option and next. Insert the flash drive to PC and the software will automatically detect it.
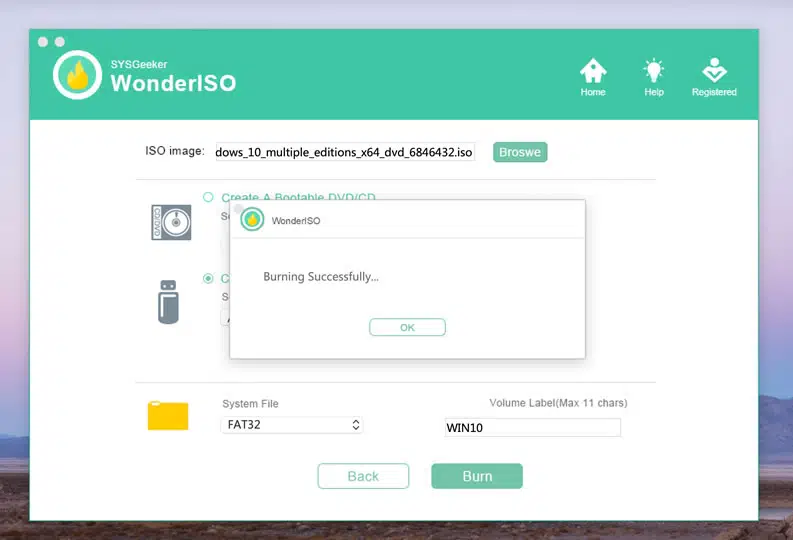
Step 3. Select the ISO image files from the computer and choose "GPT for UEFI boot" if you are burning Windows 10 ISO to USB. And select a system file from the list like FAT32, NTFS,exFAT, FAT.
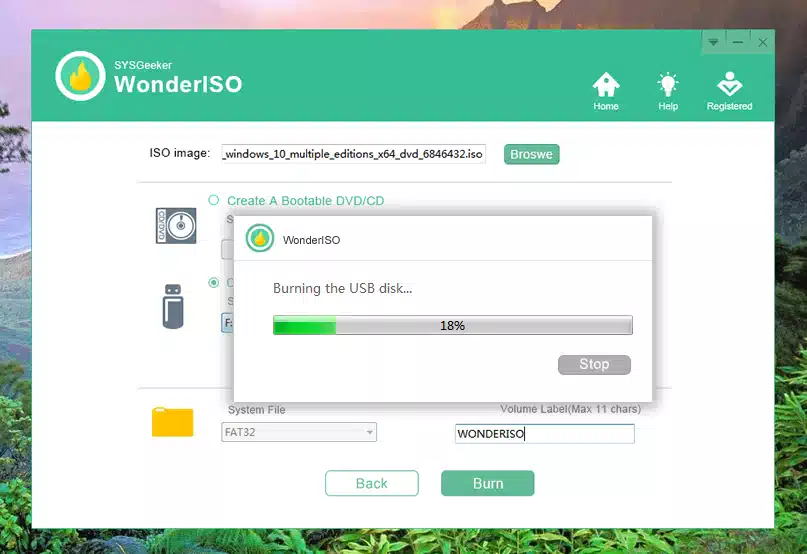
Step 4. Now, simply click on "Burn", wait and watch because the software will finish the task for you!
After burning ISO file to USB drive, your USB drive is now a bootable device and you can use it to install a system on your device. Did that sound like complicated at all like other software? Not really like. Everything is pretty self-explanatory. Go ahead and try it today and play with the software as you like.
Part 3. Burn Windows 10 ISO to USB with RMPrepUSB
RMPrepUSB is yet another Windows program that helps you to burn ISO to USB as well as help you to format the USB drives quickly. You can create bootable disks with this tool but generally it works great with Windows XP, Vista, Windows 7 and Windows 8. Windows 10 is still having some unknown issues that the developers are trying to fix. It's not light weighted like WonderISO as you will have to separately install the program, run it and then you will be able to burn ISO to USB. The process is a bit complicated but if you can follow the below guidelines then you should be able to go through this as well. This software is a lot slower as well because it uses the old MS DOS technique to write the files. However, we wouldn't recommend this software to computer newbie.

Step 1. Download and install the program in your computer.
Step 2. Click on "Start" > "RMPrepUSB" > "RMPrepUSB", to start the software.
Step 3. The software has a ton of confusing options and make sure to choose the right options or else you will completely mess up your flash drive and the ISO file. First click on "File -> USB" option.
Step 4. Choose the bootable option as "XP" and the file system to be "NTFS".
Step 5. Select the ISO file from your computer and check if the path is written correctly.
Step 6. Now, click on "Prepare Drive" and wait for the software to write the ISO file to USB drive.
Part 4. Burn Windows 10 ISO to USB with WinSetupFromUSB
WinSetupfromUSB is a powerful ISO burner tool that can be able to make a bootable installation USB from multiple different system at the same time, in other words, it gives you ability to create a multi-system installation U disk. This program fully supports multi-booting and works with most system, like XP, Win 7, Win 8, WinPE, Linux and server, but it doesn't support any editions of Windows 10. we don't know why! Like WonderISO program, it also allows users to modify FAT 32 or NTFS, add custom hardware drivers (such as SATA, wireless network card). If you are using it for the first time then you will need some preparations and knowledge to use this software. Let's see how it burns Windows 10 ISO to USB.
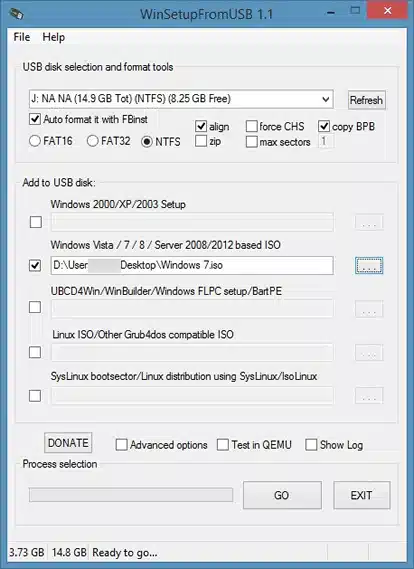
Step 1. Visit the official website and download the installation file in your PC. It's a zipped file so, you will have to extract the files to your PC before installing it.
Step 2. Now, connect the flash drive and make sure it's empty because the tool will erase everything out.
Step 3. Run the program and the tools should automatically list the USB flash drive from your PC. But if you don't see it then just select it manually.
Step 4. Choose the ISO file from your PC by clicking on the three dotted option in the UI of the software.time.
Step 5. That's it, now click on "GO" to start burning ISO to USB drive. You will see a lot of warning messages, just keep clicking on "OK" but also understand the consequences by reading the instruction.
As soon the process is completed, you will see a pop up message saying "Job Done". This would indicate your USB flash drive is now ready to use. WinSetupFromUSB also comes with its own complicacies and it's really out of date and it doesn't support Windows 10 ISO. We would recommend checking the compatibility of the tool before using it.
Part 5. Burn ISO File to USB on Windows with XBoot
XBoot is a multiboot ISO to USB creating software that still uses Linux based technology to create and burn ISO files. It comes with a built in QEMU emulator that allows you to boot the files directly from Windows computer.
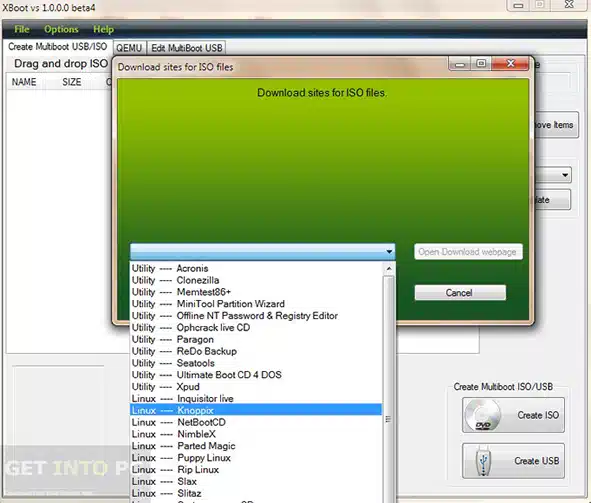
Step 1. Go the Xboot official download link, save the program in your PC, extract the files and install the software like any other utility.
Step 2. Xboot allows drag and drop, so you can drag the ISO image file into the software. You will get notification if it's done successfully or you can try adding the file manually too.
Step 3. Tick the Checksum option with "MD5" and click on "Create USB".
Step 4. In the next page you will see the USB Drive name then choose the bootloader as "Syslinux" and press "OK".
Xboot will now write all the files from ISO to USB, do not use any other program during this time as it uses a ton of resources of your PC. Any interruption will cause the termination of the program.
Part 6. Burn ISO File to USB on Windows with Unetbootin
Unetbootin is the short form for Universal Netboot Installer. It is the final program in our recommendation list that helps to create and burn ISO to USB easily. It even helps to create bootable disks without any issues at all. The positive advantage of this program is that it is made for all operating systems whether it's Windows, MacOS or Linux. It has multipurpose usage but in this tutorial, we will show how to burn ISO to USB with this tool.
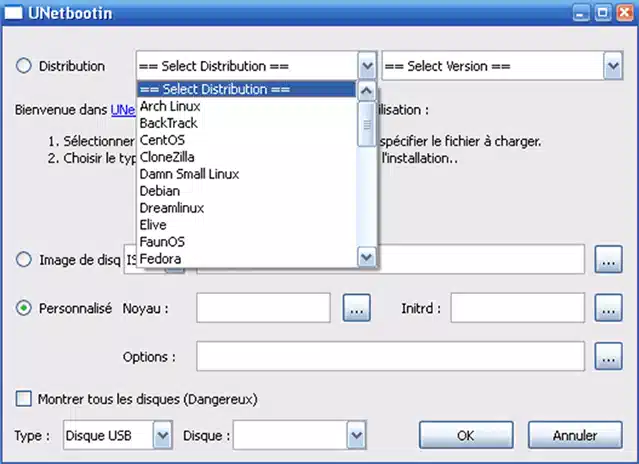
Step 1. The installation of this program is typical like any other tool. You just have to download it, open the installation launcher and the let the program take care of the rest.
Step 2. Once the program is installed, open it and you will see the following user interface.
Step 3. Choose the Diskimage as "ISO" and select the ISO file from your PC.
Step 4. Select the flash drive in which you will burn the ISO file from the "Drive" dropdown option.
Step 5. This should be the pretty basic setup, once it's done, click on "OK". And that's all. Once the file is completed burnt, you will be able to use the flash drive without any problems.
We understand, this was a long guide to show you the best 6 tools to burn ISO to USB on Windows 10 and other operating systems as well. However, we would recommend using WonderISO as this is the fastest and safest program in this list to rely on. Plus, none of the software will provide any customer support after you download them. But, we had still recommended quite a few more options to go with. And do let us know which software did you use to conquer this task.