Creating a Windows bootable USB on macOS is usually more complicated than expected. Terminal commands, partition issues, and Windows 11 restrictions often make the process frustrating. Fortunately, the SYSGeeker WonderISO application simplifies everything — no command line, no technical risk. Below is a step-by-step guide showing how to create a Windows bootable USB on a Mac using WonderISO.
After launching the program, you will see several built-in functions. Choose Burn ISO to start creating a Windows bootable USB.
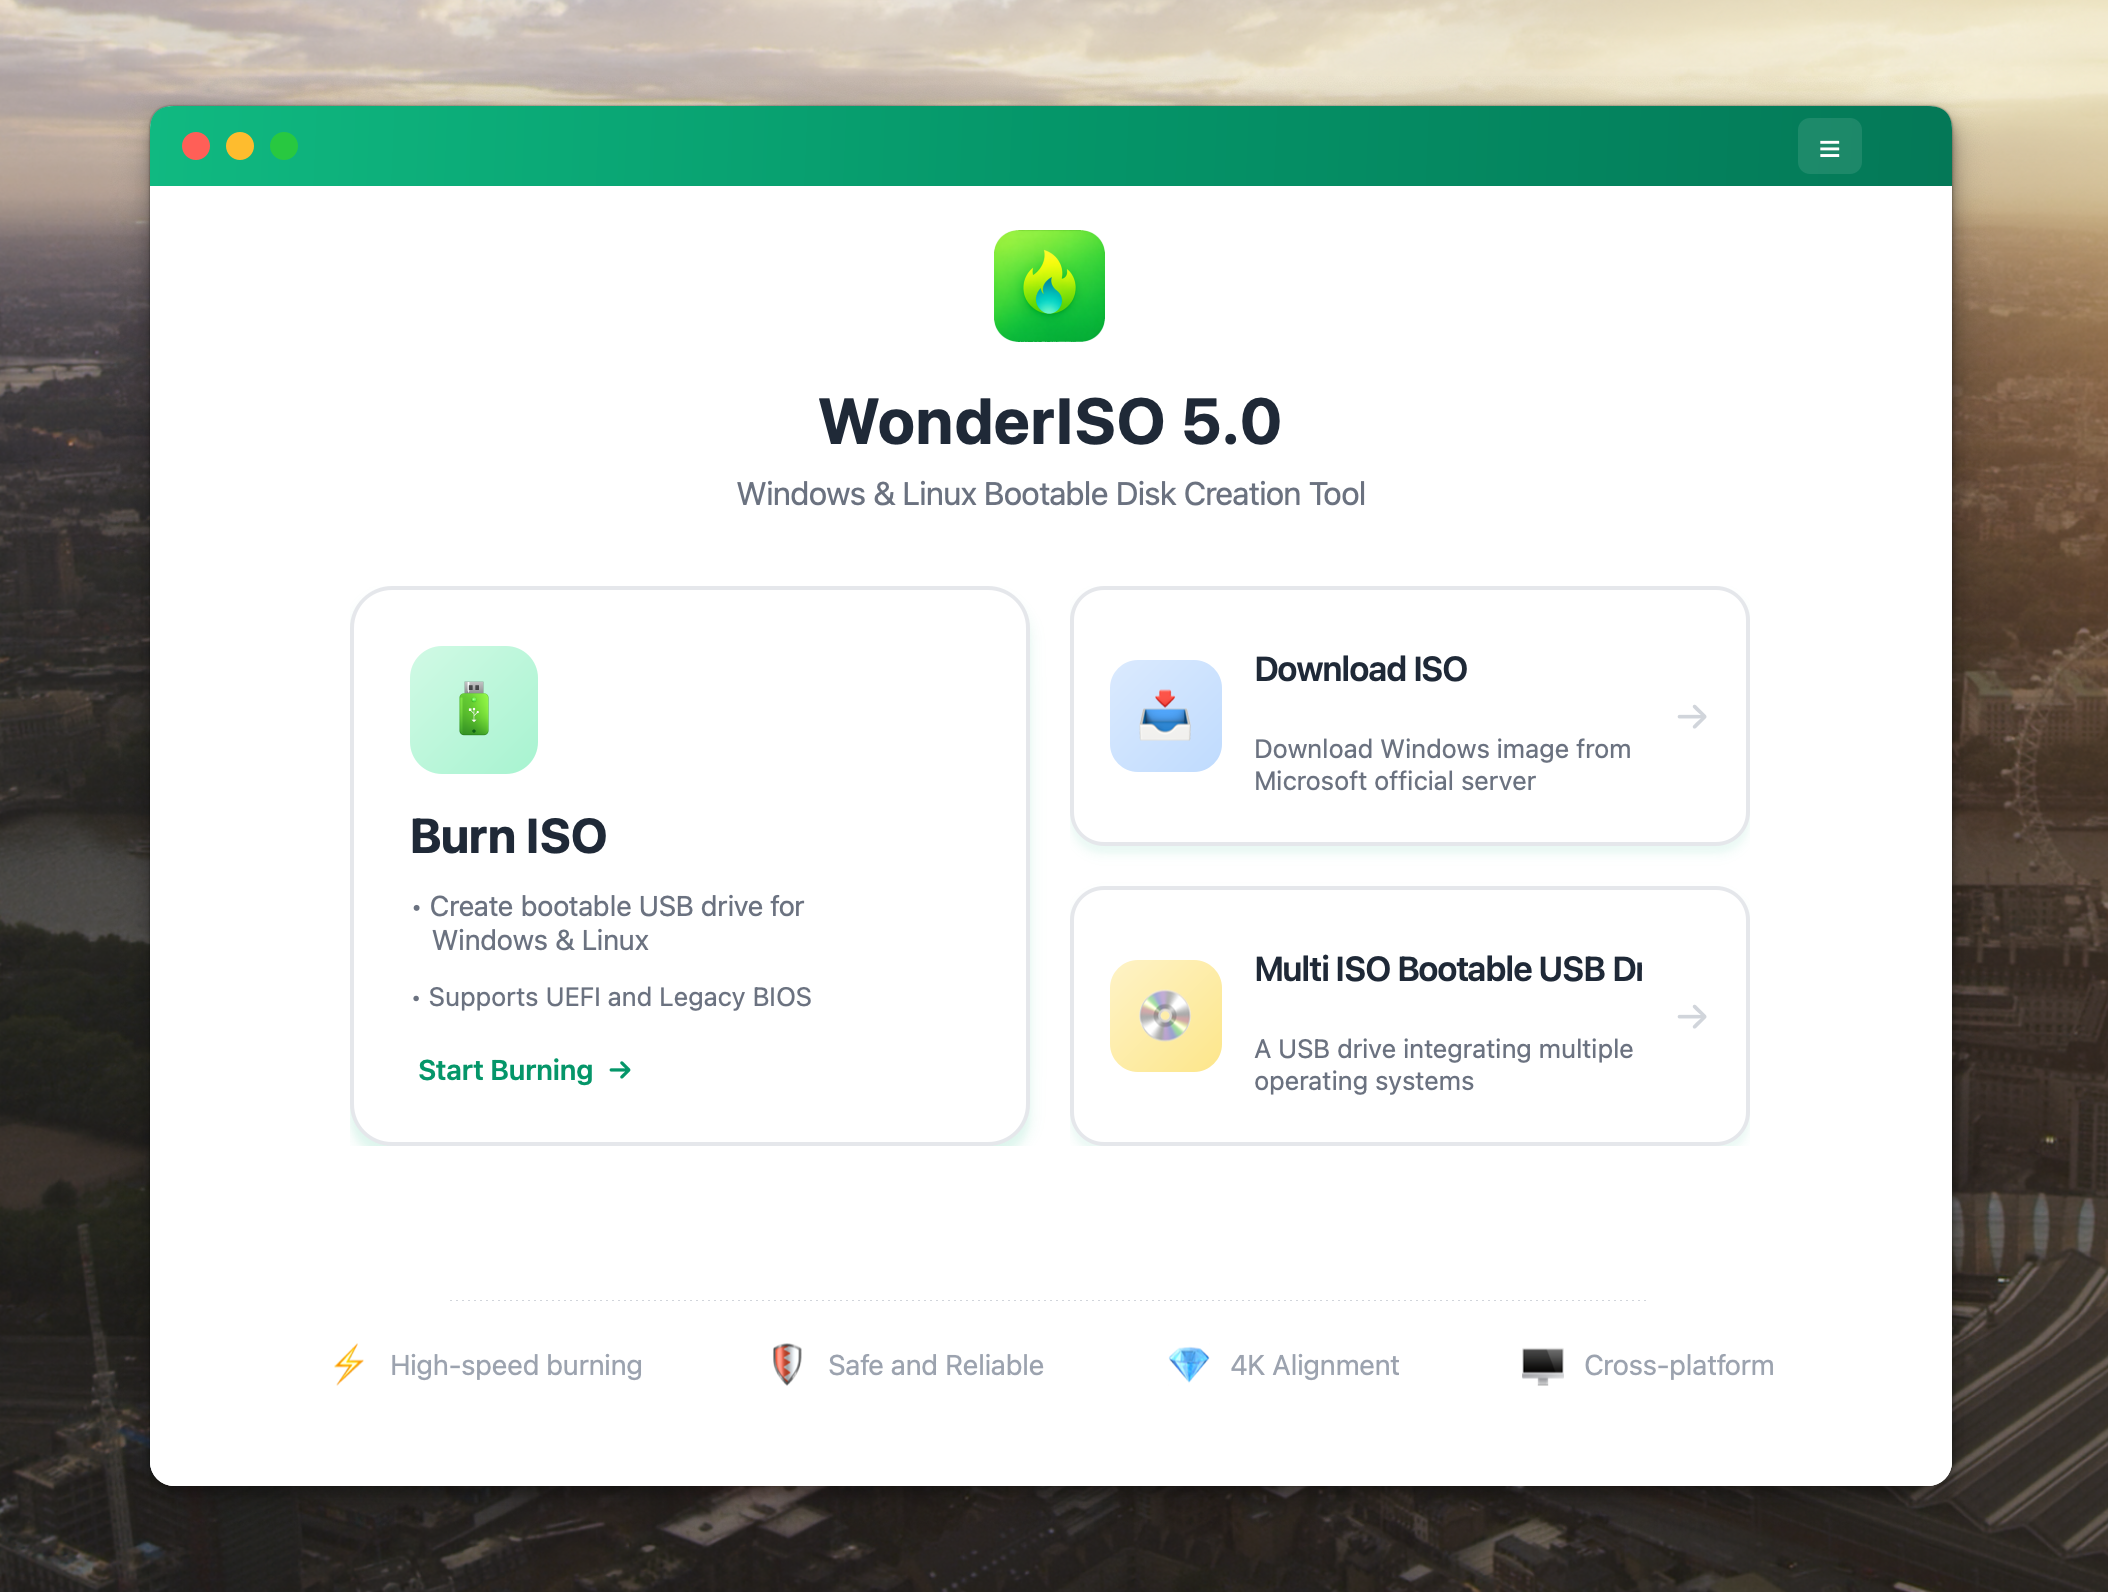
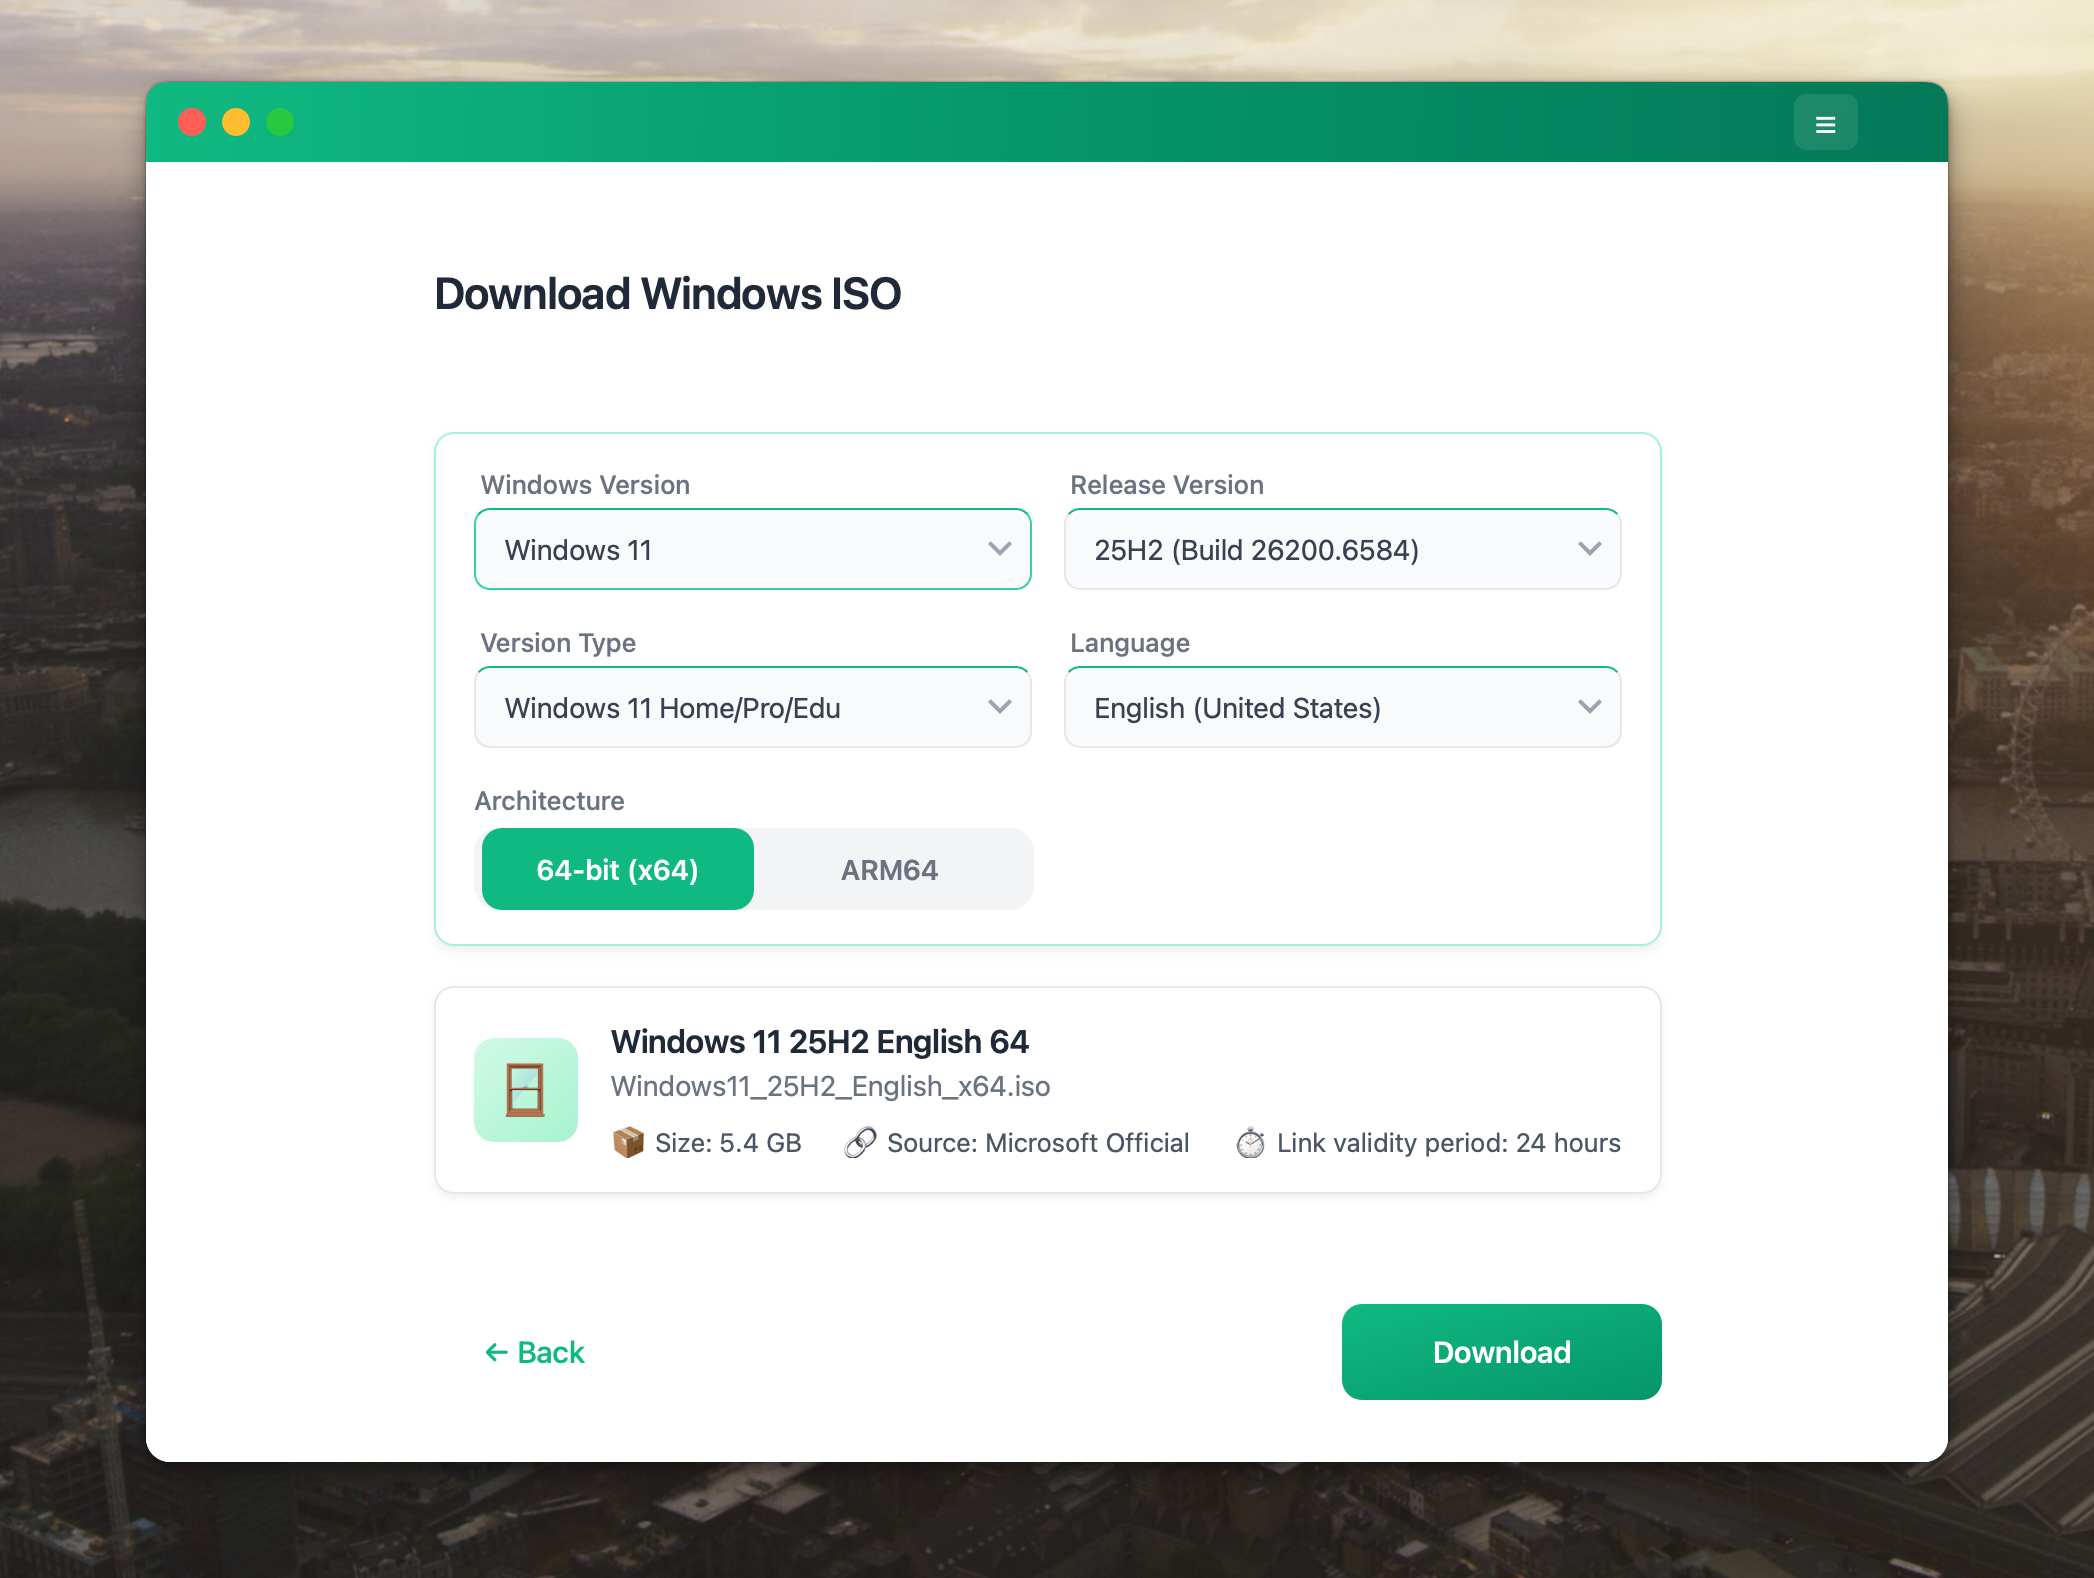
If you already have an ISO, you can use it directly. If not, WonderISO provides a built-in Download ISO feature, allowing you to download official Windows ISO files directly from Microsoft servers.
Now, you need to import the Windows ISO file, insert your USB flash drive, select the boot mode (MBR or UEFI).
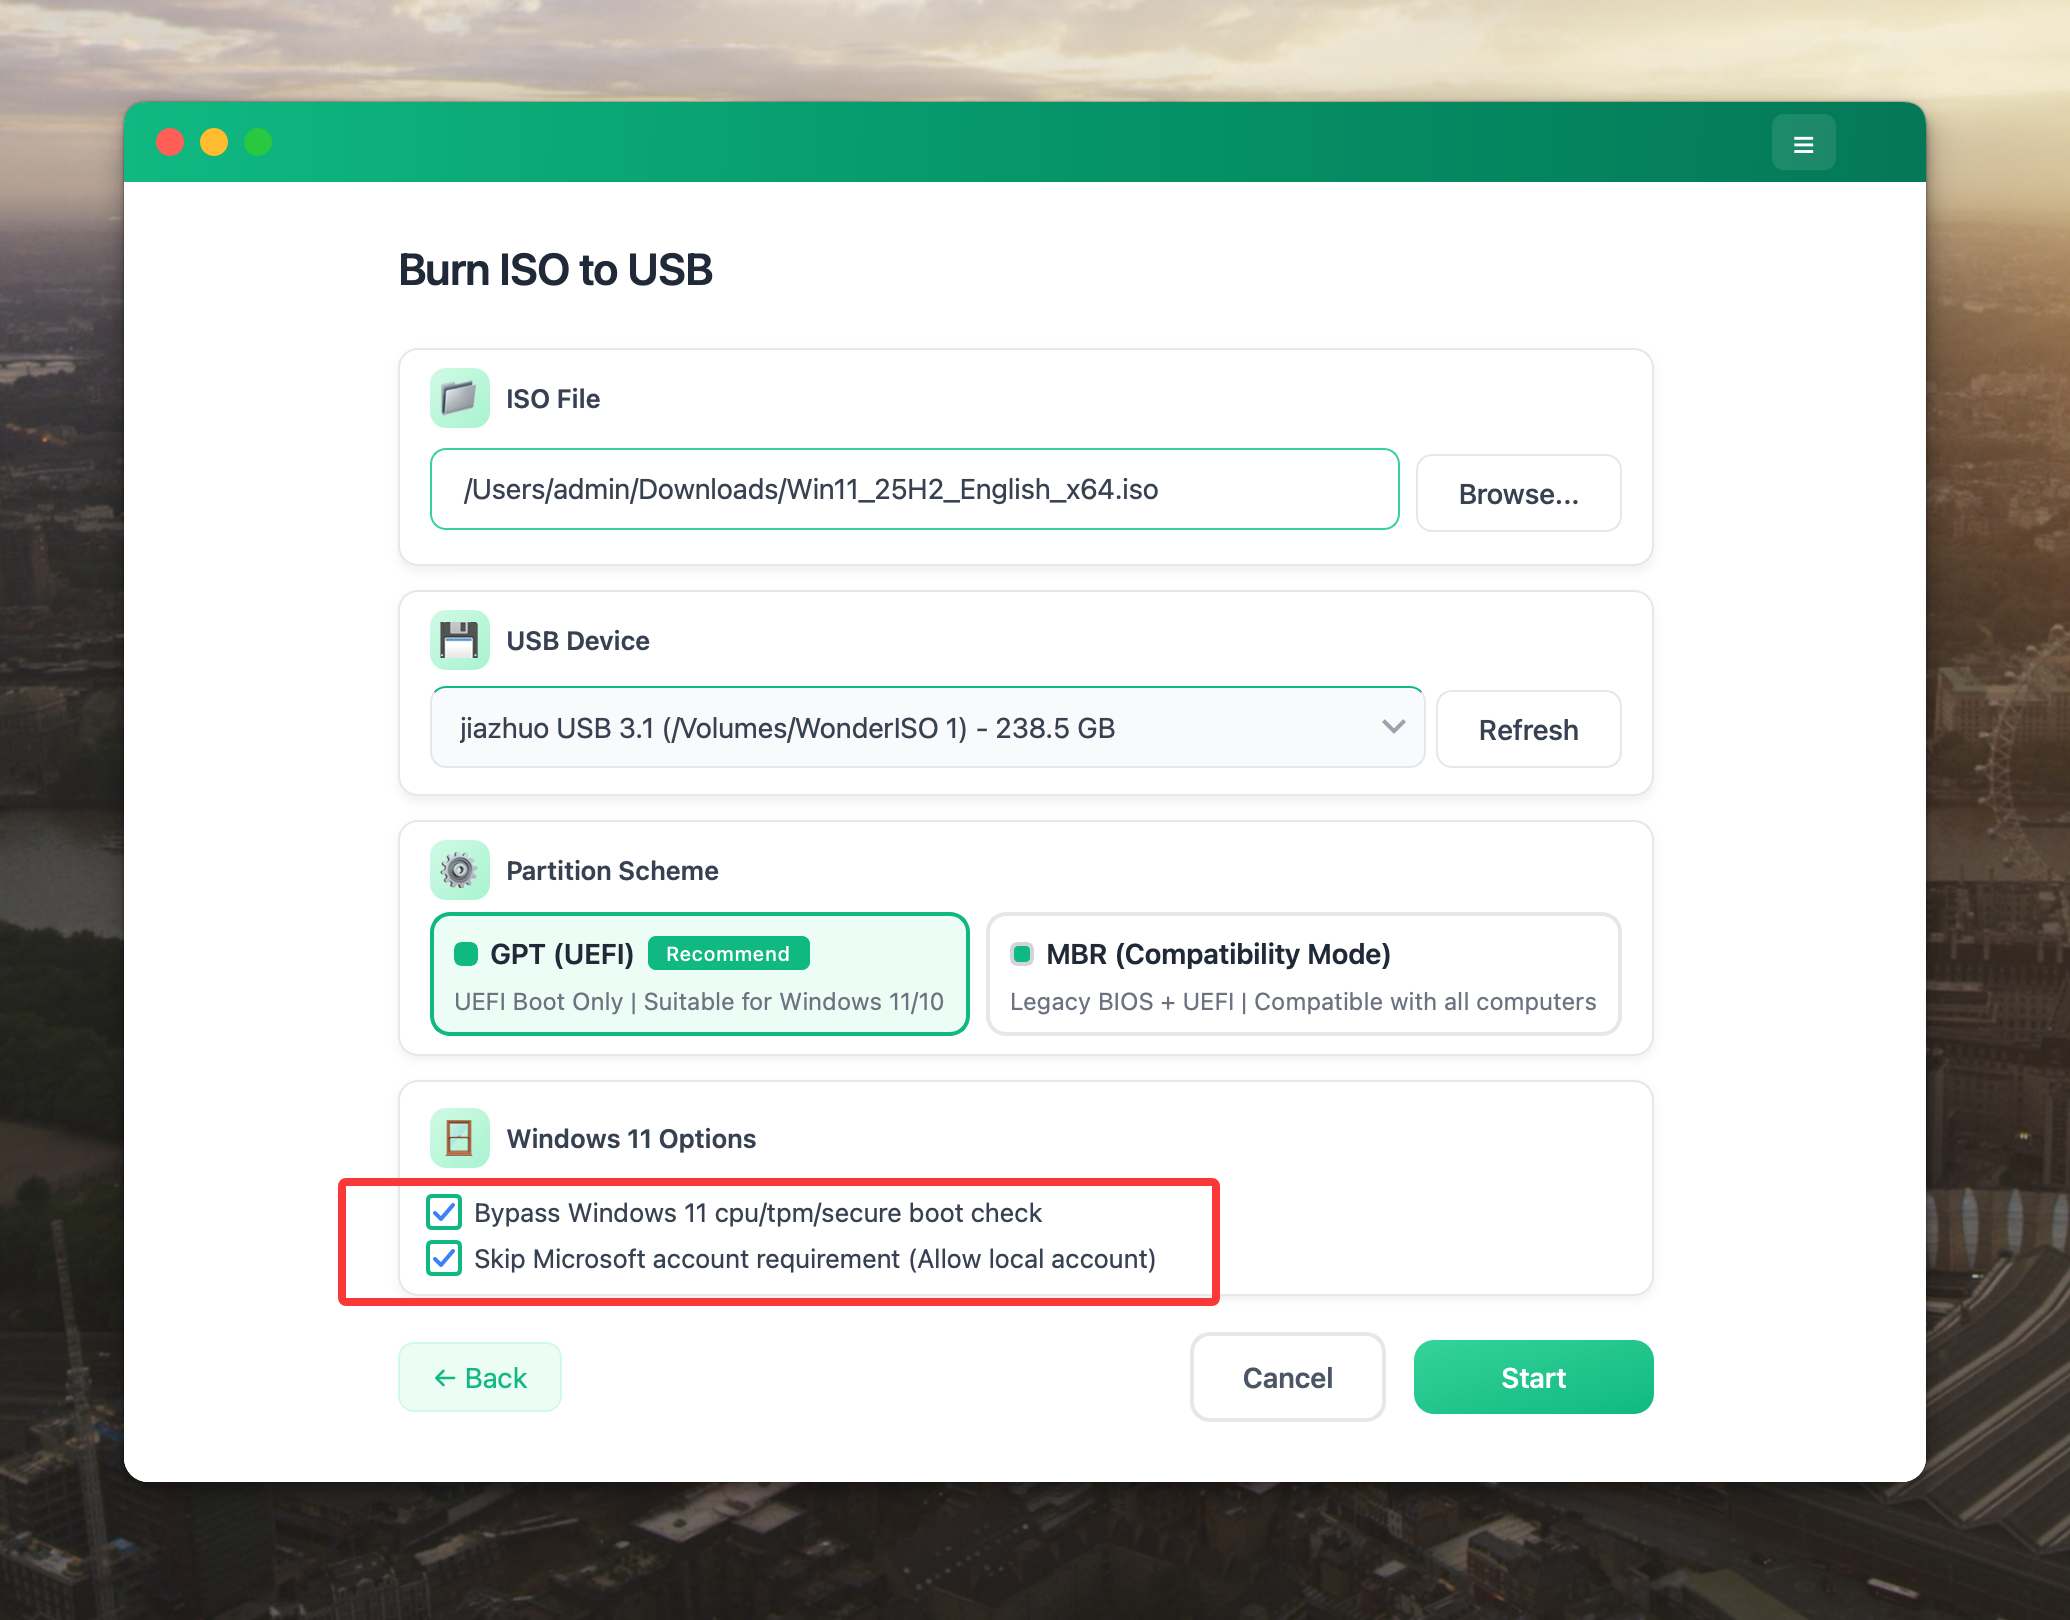
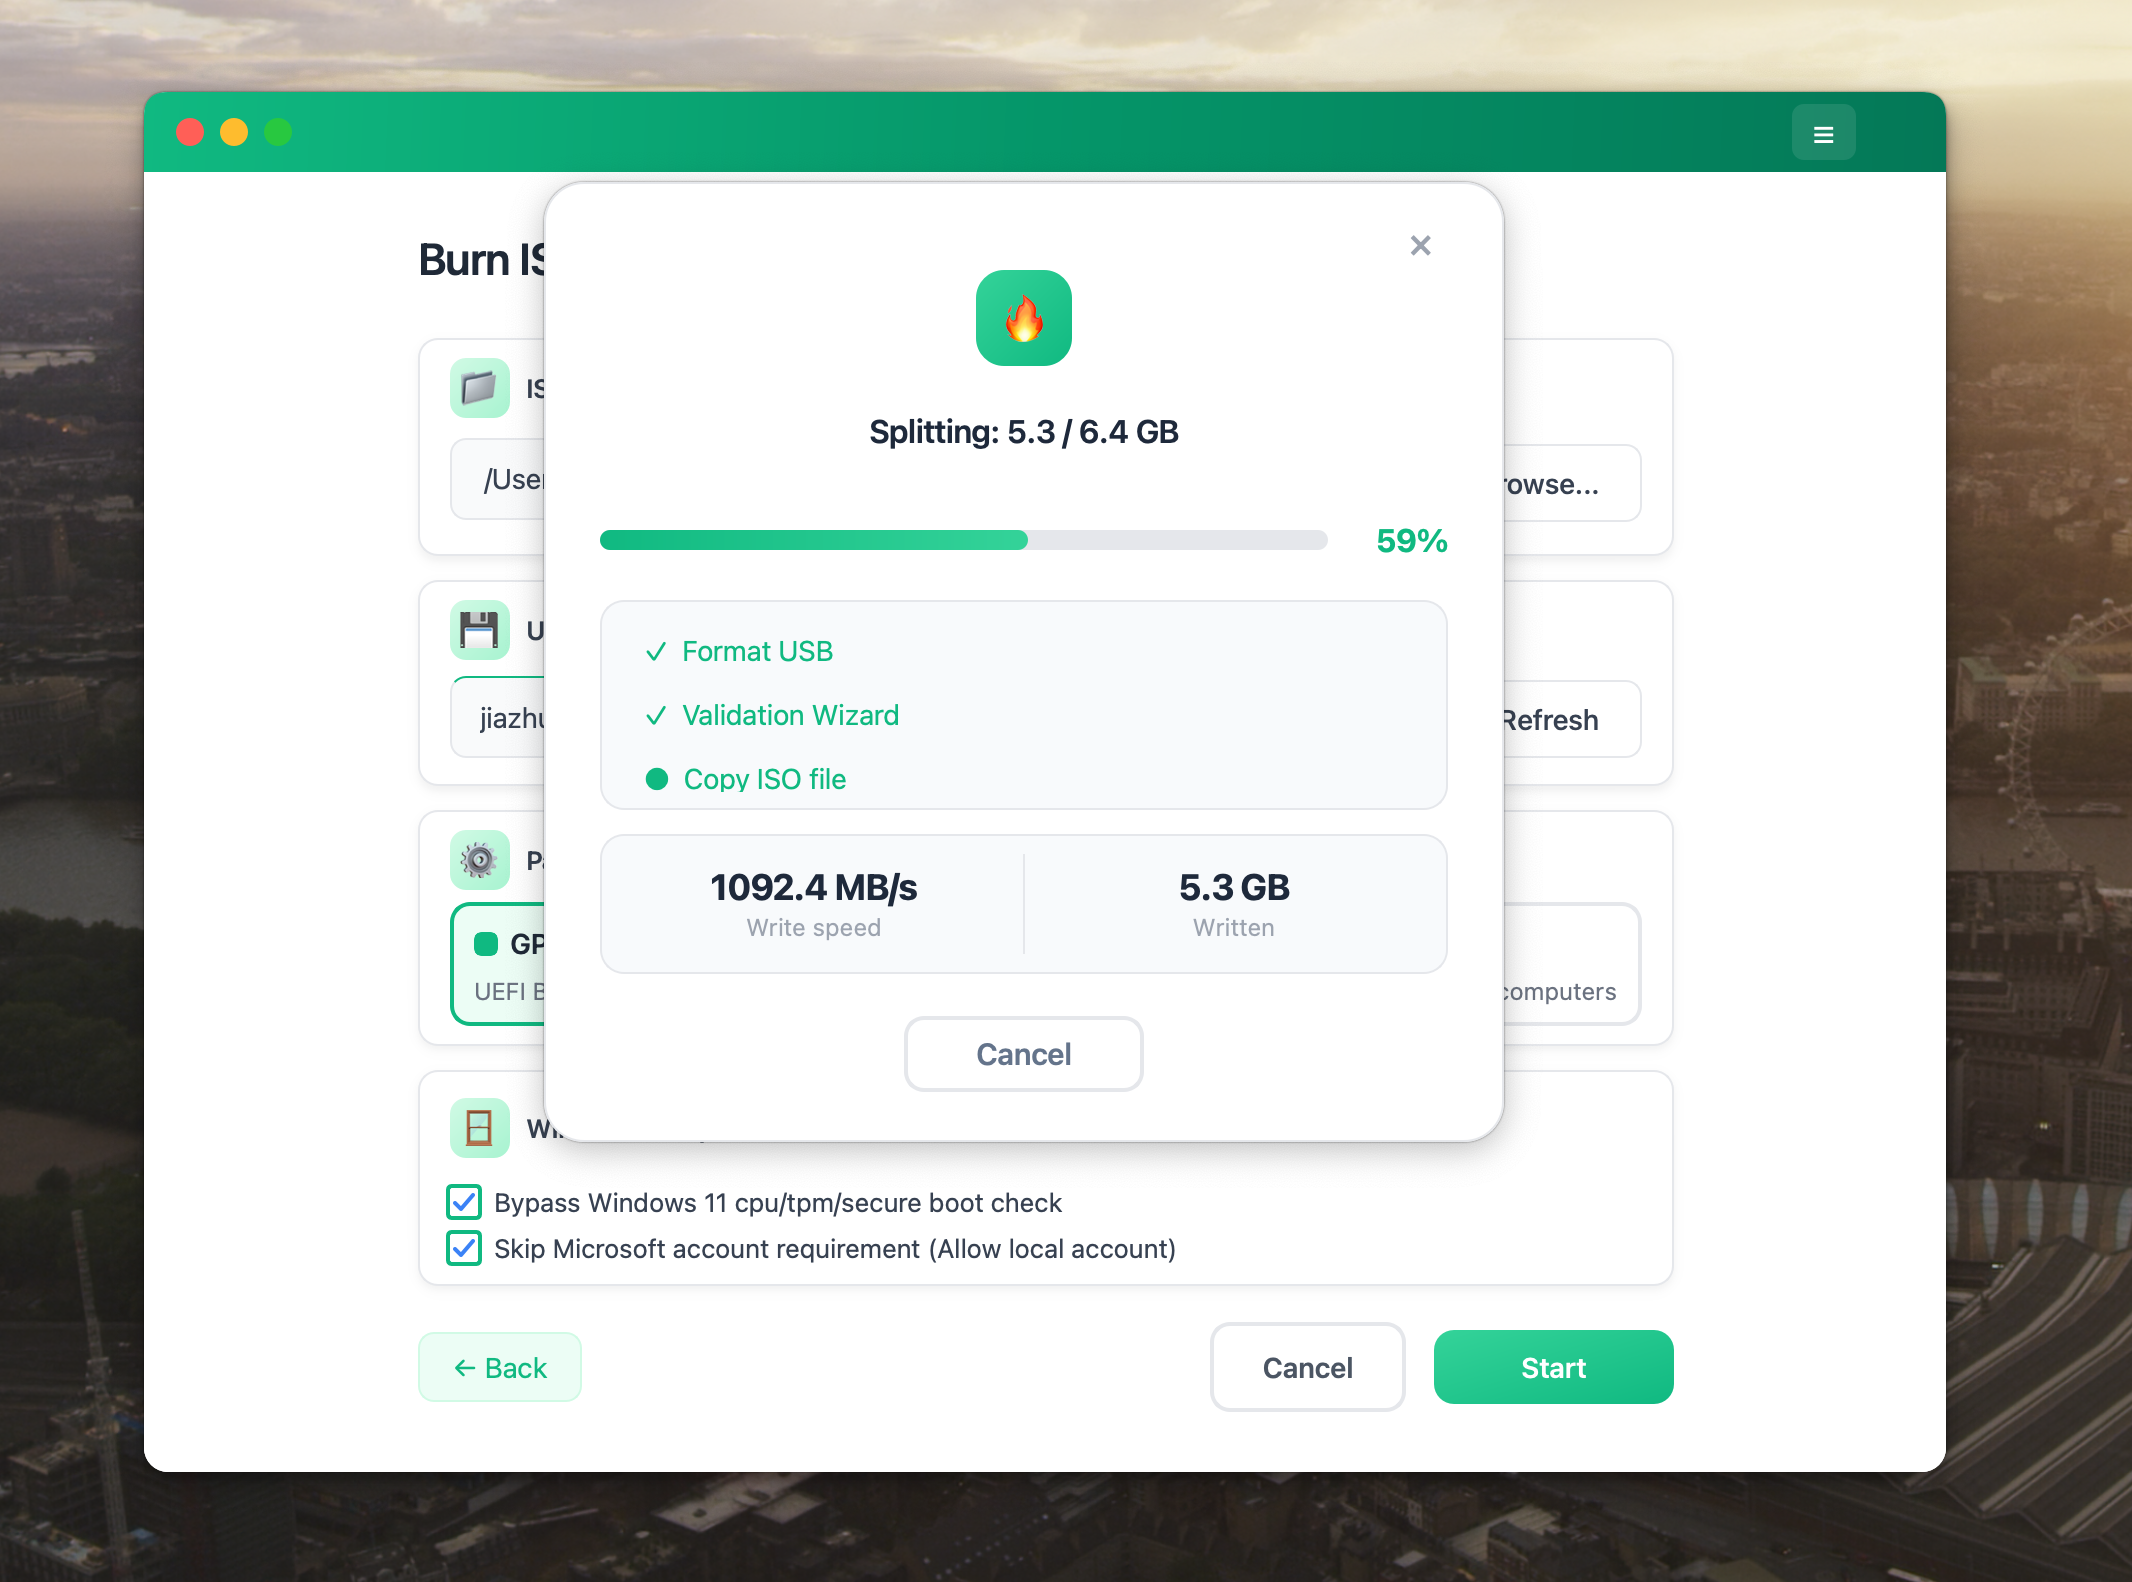
After confirming the partition scheme and Windows 11 options, click Start to begin the burning process. WonderISO will automatically format the USB, apply all selected compatibility settings, and start writing the ISO file without any manual intervention.
WonderISO provides built-in Windows 11 compatibility options. You can enable settings to bypass TPM, CPU, and Secure Boot checks, and also skip the Microsoft account requirement to set up Windows 11 using a local account. All changes are applied automatically during USB creation.
The entire writing process usually takes about 5 minutes. If the ISO file is larger than 4 GB, WonderISO will automatically handle and split it as needed. Please do not unplug the USB during the process.
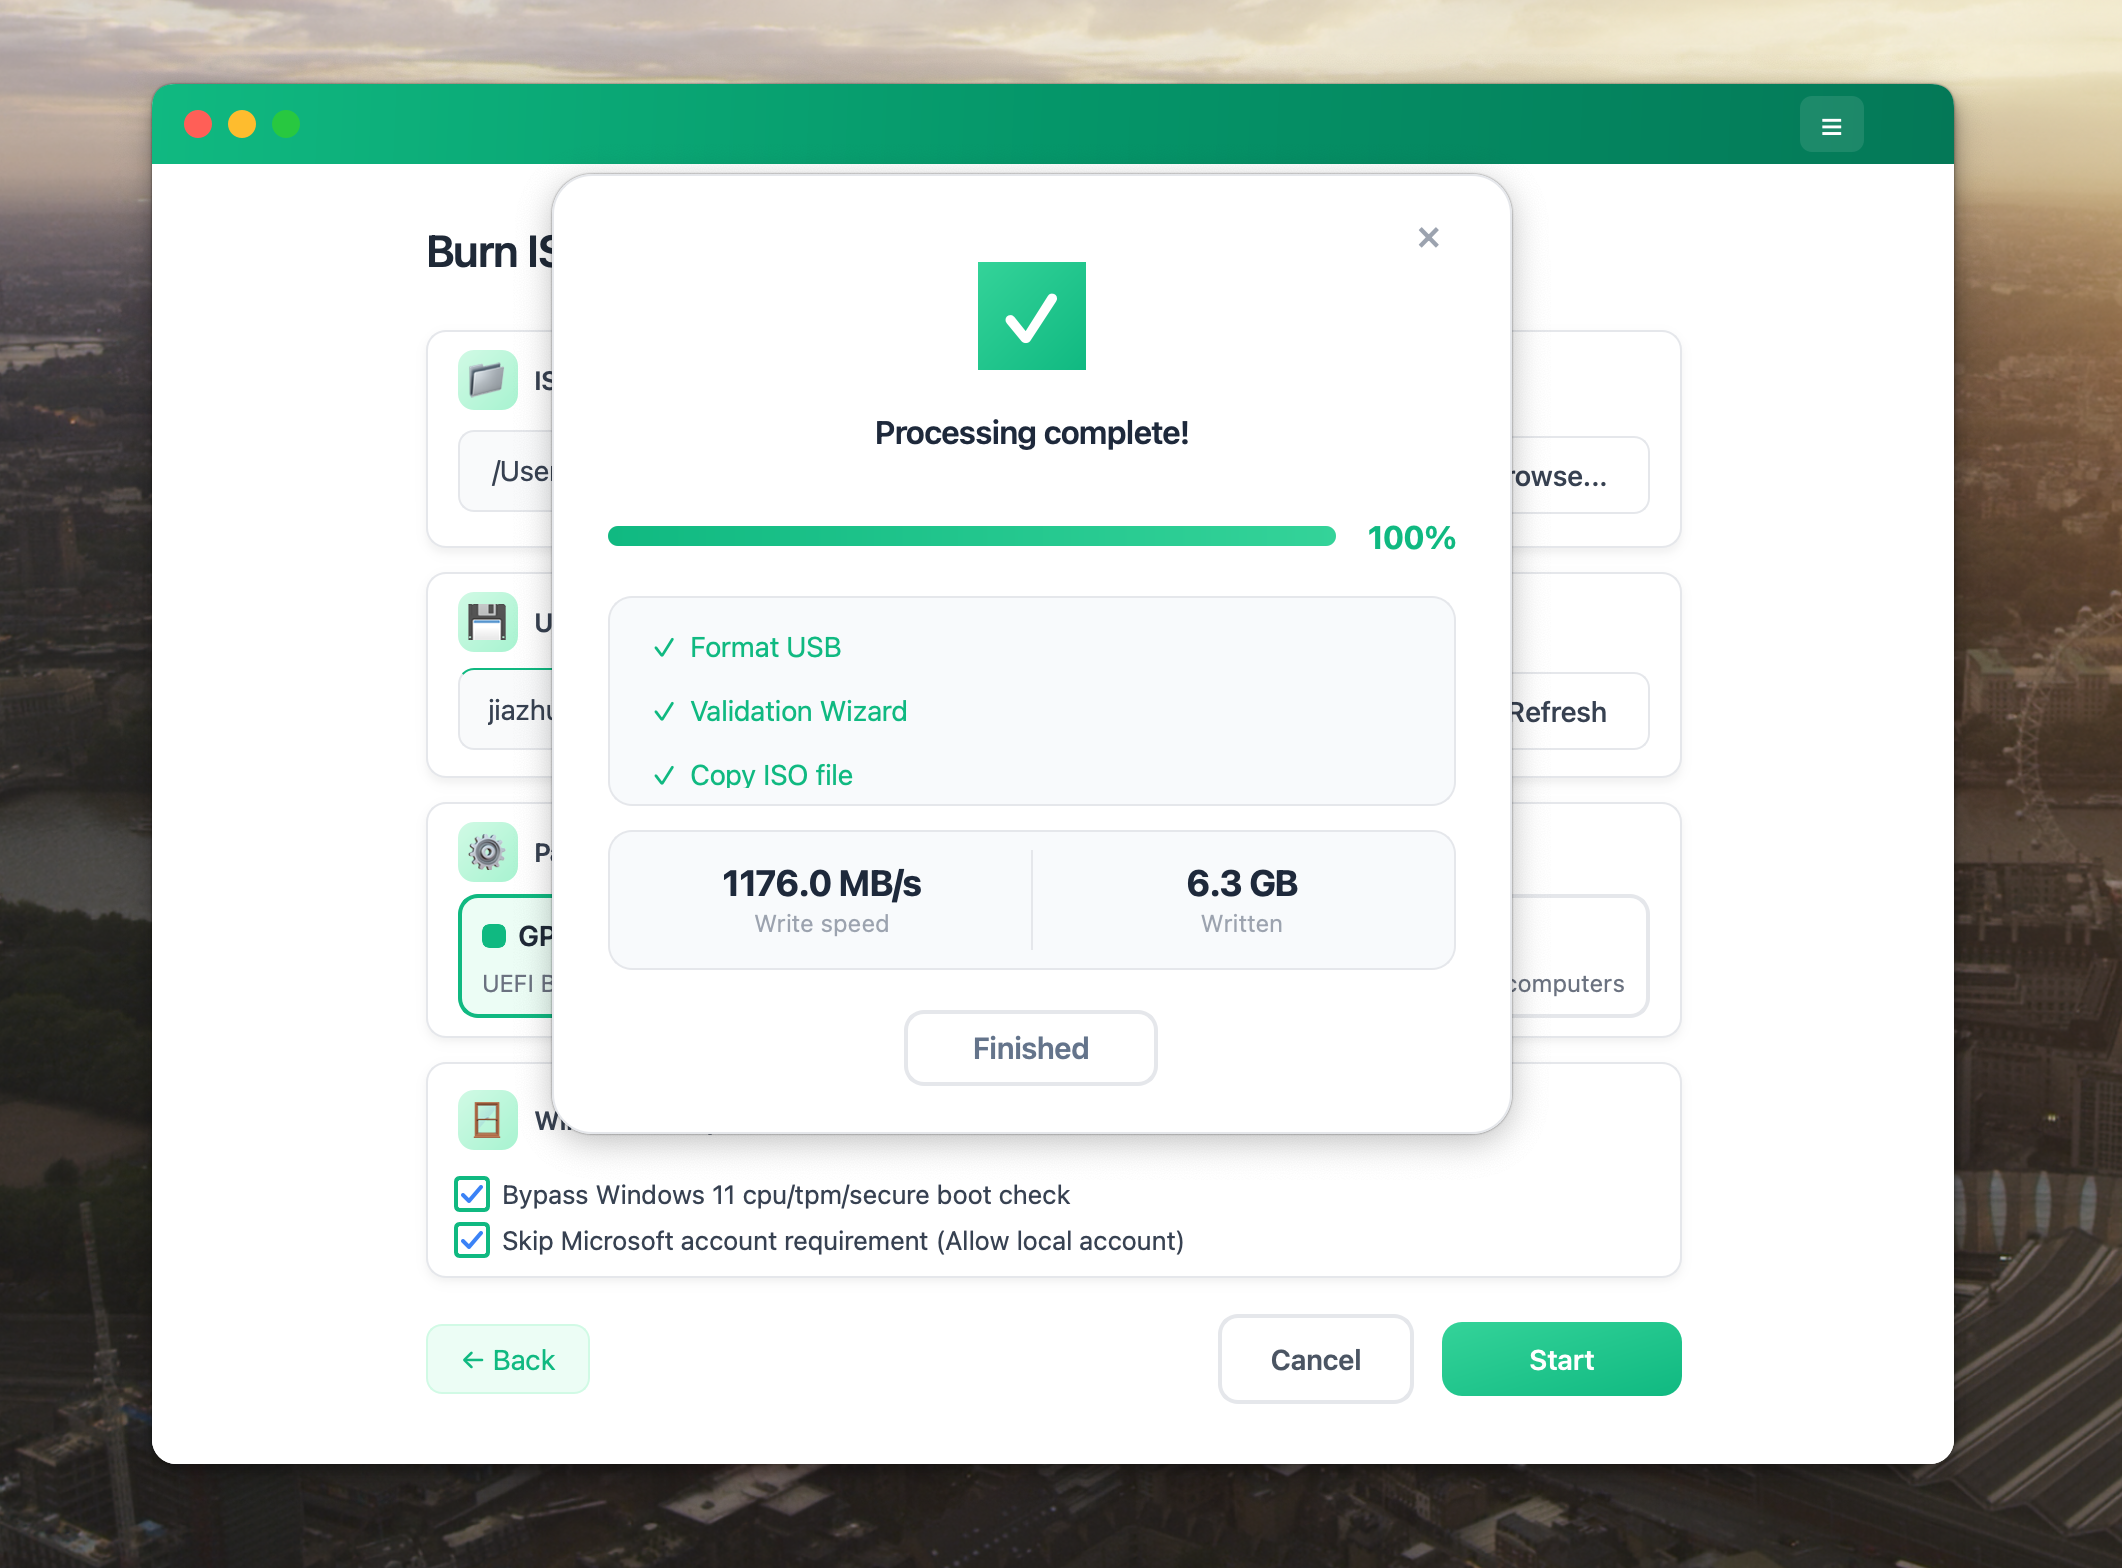
Once the process is complete, your Windows bootable USB is ready. Eject the USB safely, connect it to another computer, set the system to boot from USB, and begin installing Windows.
After the boot disk is created, insert it into the computer and set it to boot from USB. Generally, press and hold F2, F11 or Del key during startup. At this time, you will enter the installation interface of the Windows system like below.
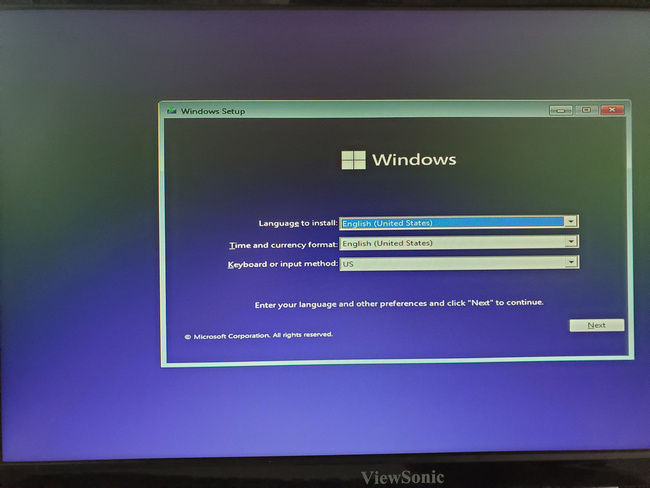
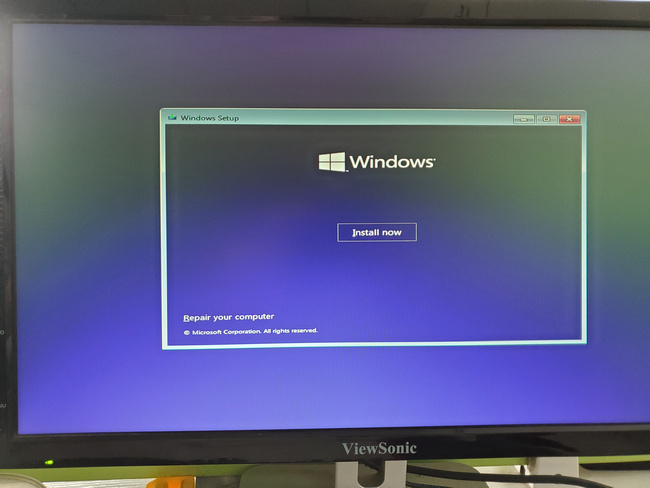
Select language, country, etc. and select Next, then click install now button.
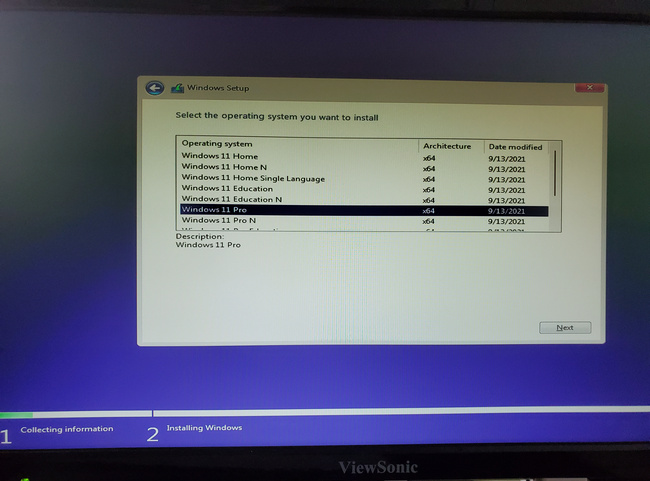
Different Windows system versions will be listed at this time, including 64 and 32-bit. You can select the version you need and click Next to start installing the system.
You can download and use it for free now. This graphical interface software is perfect for users who don’t know how to use the command line.
💬 Reviews