If you are getting the pinch as the hard drive is running out of space and you are wondering what exactly is taking so much space on your Mac hard drive, you should better give a search for large sized files on Mac and if you find them unnecessary, simply delete them. The search can be done using the built-in search tool.
But there are other ways around where you can use third party tools to scan the large sized files and eliminate them. Well we would come to that portion later on. Firstly we would discuss the matter of how to find out large sized files and delete those using built-in Mac features.
Find & Delete Large Files using Finder on Mac
If you have been daily digging into Mac, then you must be aware of this search pattern. Here we would define a certain size limit to make the specific sized files to appear on the screen thereby you can delete afterwards. To do it, this is what you have to do:
Step 1. Open a new Finder Window on your macOS desktop and then hit "Command + F" to bring up the Search box.
Step 2. In the list of search filters on the left, choose "Other" option and check "File Size" and click OK.
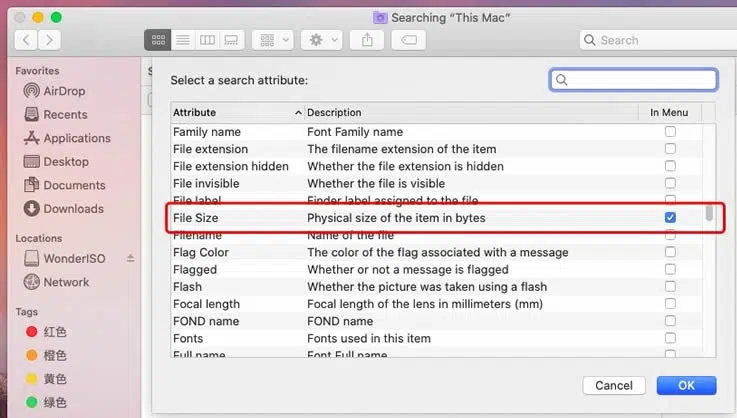
Step 3. Now here click on "Kind" filter and then choose "Other" and "File Size" at last from the attribute list, then select "Greater than" from the list, and enter the size of files to search. You're allowed to select KB, MB, or GB in a final filter field.
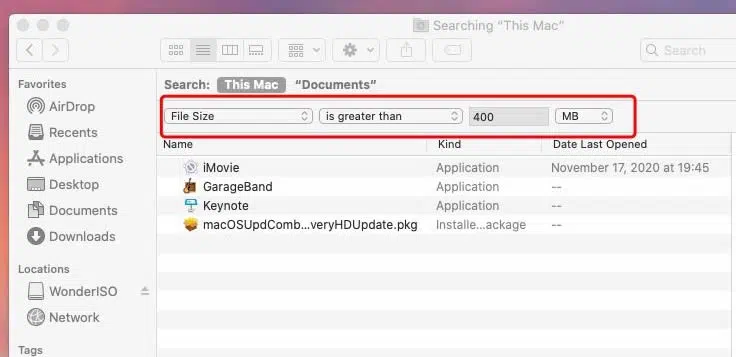
Step 4. Now the applications lists below will be update all the files greater than the specified value in the hard drive. Make sure to select "This Mac" if limited results are being shown.
Step 5. Now select the large sized files, and right click on it. Choose "Move to Trash" to send them to the Trash.
Though this method is very precise in selecting the files on the basis of their size, but is quite tedious as you have to continue to search for the files one after another by changing the size value in the filter. Moreover the files are usually single folders which make the work much more laborious. Thus using a third party tool to handle the situation will not be a bad idea. Isn't it?
Find and Delete Large Files on Mac using Disk Inventory X
Disk Inventory X is a free Mac tool for visualizing disk space. And we would use this very tool to first scan the sectors in the directories which are taking a lot of space and then delete the large files accordingly. The way of using this tool is very simple to implement, just keep reading to know the details:
Step 1. Download and install the Disk Inventory X on your Mac.
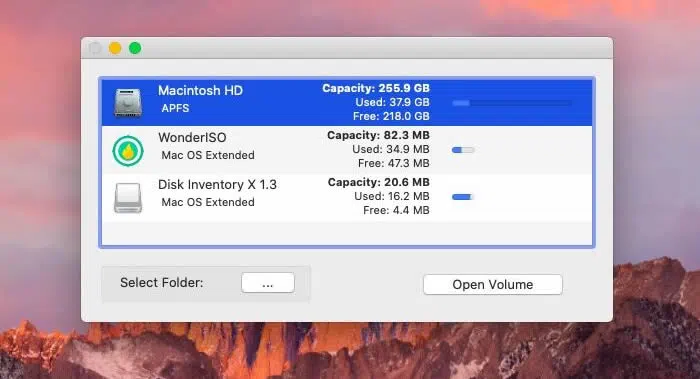
Step 2. Once you open up the tool screen, it will display all the drives attached to Mac. So select any one of them and then click on "Open Volumes" to explore the contents within the results.
Step 3. After the tool is done with reading the files of your system, you will be presented with an organized map of all its contents.
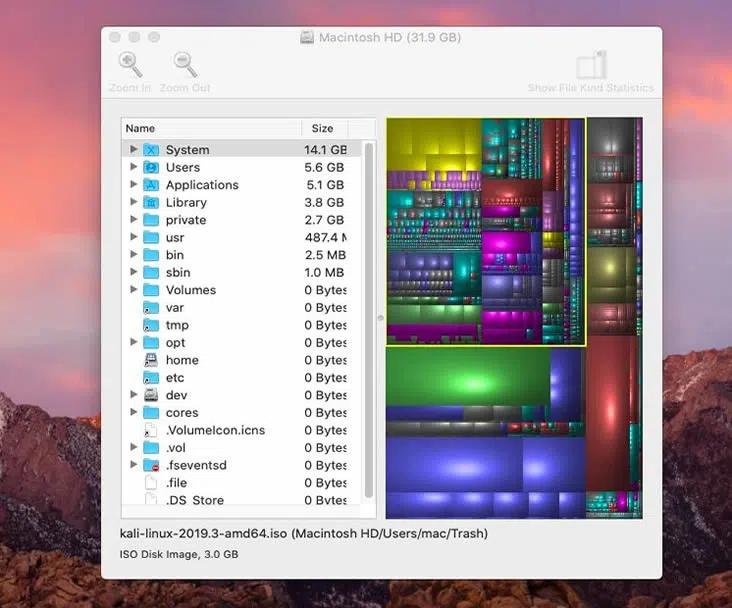
Step 4. Now here each color would correspond to a particular folder the percentage shows the space it takes up.
Step 5. In order to delete any file or group of files, right click on the icon in the "File List" or "color map" and then choose "Move to Trash" from the context menu.
The major disadvantage of this tool is that here also you cannot be completely certain about the large sized files or you have to put a great effort to search for them from the list of files shown on the screen.
Find and Delete Large Files on Mac using Terminal
In fact, Terminal is an alternative way to find and remove the large files and folders on your Mac computer without losing data. But sometimes it is risky if you're not familiar with command prompt, and most people would stop here. But if you the follow the steps below properly then you will be able to find the biggest file on your mac and remove them easily.
Step 1. Open the Utilities and open the Terminal window on your Mac
Step 2. On the Terminal window, type the Find command. If you want to find the files greater than 1 G int eh /home directory, you should type: find /home -size 1G.
find /home -size 1G.
Step 3. After the files are found, then delete these large files by typing the command:
find /home -type f -name *.avi -size +2G -exec rm {}
This commands also can be used to remove the specified size range of files, the command is going to start looking like this: find /home -size +30M -size -100M.
Find and Remove Large Files on Mac using CleanGeeker
One of the benefits of this tool CleanGeeker is that you don't have to SEARCH the so called large files; rather you only have to delete it. That's it. Amazing right? Indeed it is. The profundity of CleanGeeker is such that all type of junk files is just one click away. So your duty lies in deleting the large files and not searching for them. All types of junk and unwanted files can be removed, ranging from large sized files to duplicate files, junk files, app caches and session files, etc.
Step 1. Get the software installed on the Mac system in which the large files are stored.
Step 2. Open up the tool screen and then click on "Home" section to get an idea of how much space is available and how much is already used up.
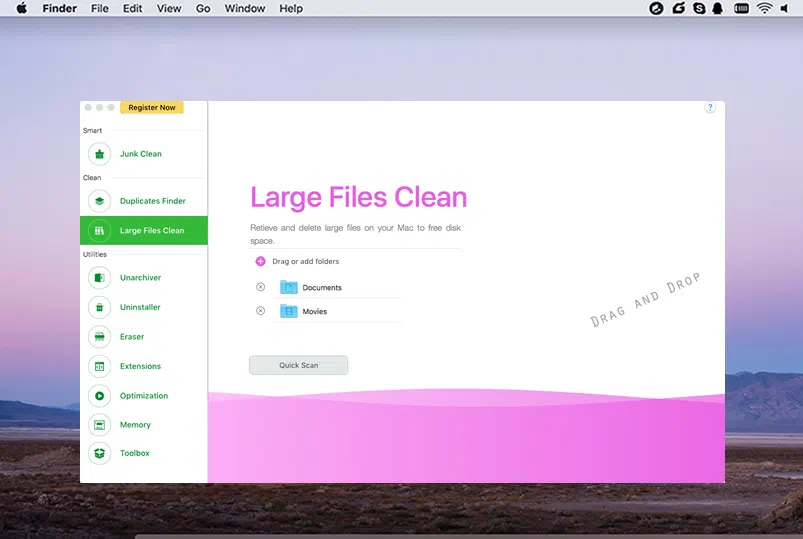
Step 3. Now just few options below the "Home" option, click on "Large Files Clean" option and all the large sized files will automatically be shown on screen. There is no manual search required to do the job and that is the magnificence of CleanGeeker.
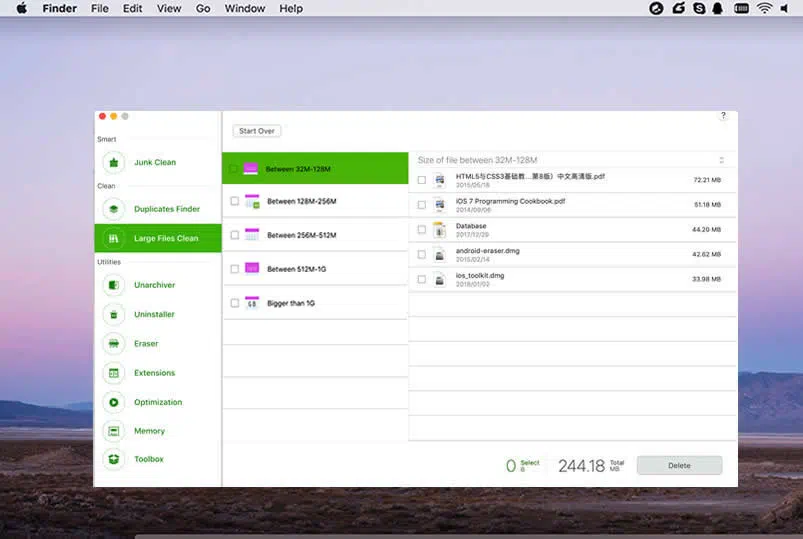
Step 4. Select the files that you wish to delete or select all by checking the checkboxes next to them and finally click on "Delete" button to eradicate them once and for all.
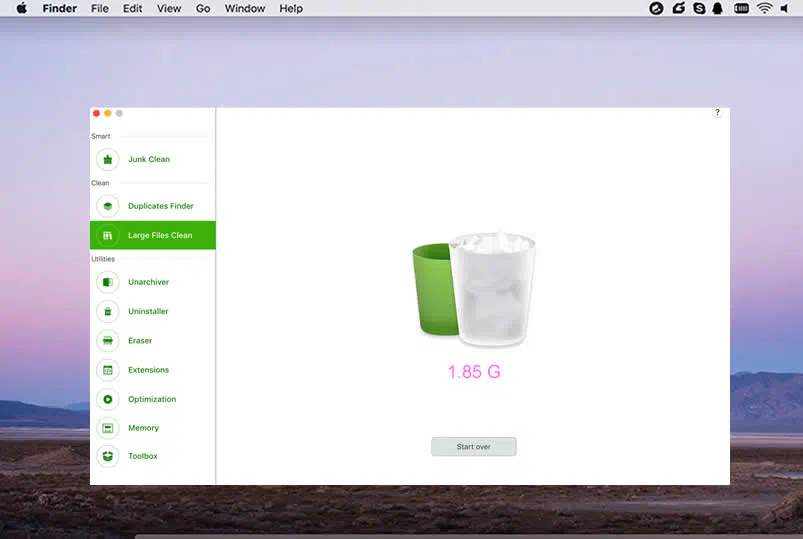
As you can see, CleanGeeker tool can be able to deeply find all large files from your macOS and delete them quickly. Making it possible to free up more space for your important documents.
All the methods can be attributed as functional and helpful and when it comes to finding and deleting large files on macOS, you can't settle down less than the CleanGeeker. The first two methods can be implemented on certain occasions as per the requirement, but it would be better to save your time by using CleanGeeker.