Table of Contents
Rufus is a popular open-source tool for creating bootable USB drives on Windows. However, some users have reported an issue with Rufus not showing extended options on Windows 11. This can be frustrating, especially if you need to create a bootable USB drive with specific options.
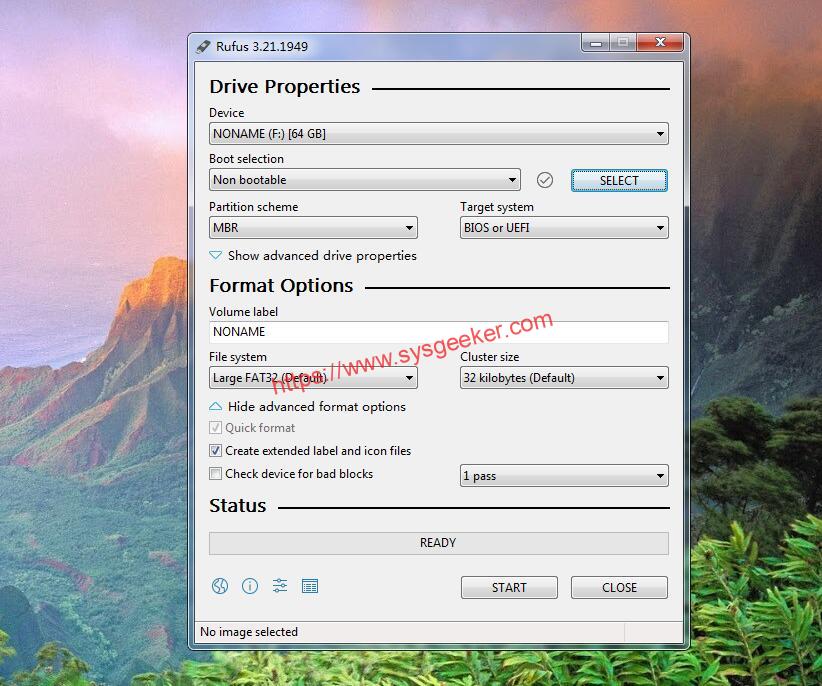
What’s Extended Windows 11 Installation in Rufus?
The "extended" installation option in Rufus for Windows 11 refers to an advanced installation mode that provides additional options and configurations for the installation process. When using the "extended" installation mode, you can configure various settings such as the partition scheme, file system, and cluster size. This option is useful if you need to create a custom Windows 11 installation that requires specific settings or configurations.
The extended mode in Rufus allows you to create a bootable USB drive for Windows 11 that is optimized for your specific use case. For example, you can configure the partition scheme to be compatible with UEFI or legacy BIOS systems. You can also choose between different file systems, such as NTFS or FAT32, and configure the cluster size for optimal performance.
Why Rufus Not Showing Extended on Windows 11:
There can be several reasons why Rufus is not showing extended options on Windows 11. Here are a few common ones:
Permissions: If you don’t have administrative privileges on your Windows 11 account, Rufus may not be able to show you the extended options. This can occur because these options require access to system-level resources.
Outdated Rufus Version: If you’re using an outdated version of Rufus, it may not be compatible with Windows 11. In this case, you should update Rufus to the latest version.
Corrupted Rufus Installation: If the Rufus installation on your system is corrupted, it may not function properly. This can prevent you from seeing the extended options.
Possible Ways to Fix Rufus Not Showing Extended on Windows 11
Method 1. Run Rufus as Administrator:
As mentioned earlier, one of the reasons why Rufus may not show extended options is due to insufficient permissions. To resolve this, you can run Rufus as an administrator.This will give Rufus the necessary permissions to access system-level resources and display the extended options.
Step 1: Right-click on the Rufus icon on your desktop and select "Run as administrator" from the context menu.
Step 2: If prompted by the User Account Control (UAC), click "Yes" to allow Rufus to make changes to your device.
Step 3: Once Rufus is running with administrative privileges, select the options you need for your bootable USB drive, including extended options.
Step 4: Click the "Start" button to create your bootable USB drive.
Method 2. Update Rufus to the Latest Version:
The "no TPM / no Secure Boot" option in Rufus refers to a setting that allows users to create bootable USB drives for Windows 11 on systems that do not have a TPM (Trusted Platform Module) chip or Secure Boot enabled. This option was added as a selection in "Image option" starting with Rufus 3.16. If you’re using an older version of Rufus, it may not have the extended options available for Windows 11. To fix this, you can update Rufus to the latest version.
Step 1: Go to the official Rufus website (https://rufus.ie/) and download the latest version of Rufus.
Step 2: Run the Rufus installer and follow the prompts to install the latest version of Rufus.
Step 3: Once Rufus is installed, launch the application and select the options you need for your bootable USB drive, including extended options.
Step 4: Click the "Start" button to create your bootable USB drive.
Method 3. Missing Windows 11 ISO or Image
If you’re missing the Windows 11 ISO or image, Rufus may not show the extended options. Make sure that you have the correct Windows 11 ISO or image, and that it is located in a folder that Rufus can access.
Step 1: Open Rufus and select the Windows 11 ISO or image.
Step 2: Make sure that Rufus can access the folder where the ISO or image is located.
Step 3: Select the options you need for your bootable USB drive, including extended options.
Step 4: Click the "Start" button to create your bootable USB drive.
Method 4. Reinstall Rufus
If Rufus is installed incorrectly or is corrupted, it may not show the extended options. To fix this, you can uninstall and reinstall Rufus.
Step 1: Uninstall Rufus from your system using the "Add or Remove Programs" feature in Windows 11.
Step 2: Download the latest version of Rufus from the official website.
Step 3: Run the Rufus installer and follow the prompts to install the latest version of Rufus.
Step 4: Once Rufus is installed, launch the application and select the options you need for your bootable USB drive, including extended options.
Step 5: Click the "Start" button to create your bootable USB drive.
Method 5. Use an Alternative Tool:
If none of the above methods work, you can try using an alternative tool to create a bootable USB drive. There are several other open-source tools available, such as WonderISO, BalenaEtcher, UNetbootin, that can create bootable USB drives with ease.
WonderISO is a software that can be used as an alternative to Rufus for creating bootable USB drives. It allows you to create bootable USB drives from ISO image files for installing operating systems or running live systems.
Here are the steps to use WonderISO to create a bootable USB drive:

- Download and install WonderISO from their official website.
- Insert a USB drive into your computer.
- Launch WonderISO and click on the "Burn" tab.
- Click on the "browse " button and browse to the location of the ISO file you want to create a bootable USB drive for.
- Once you have selected the ISO file, click on the "Burn" button to begin the process.
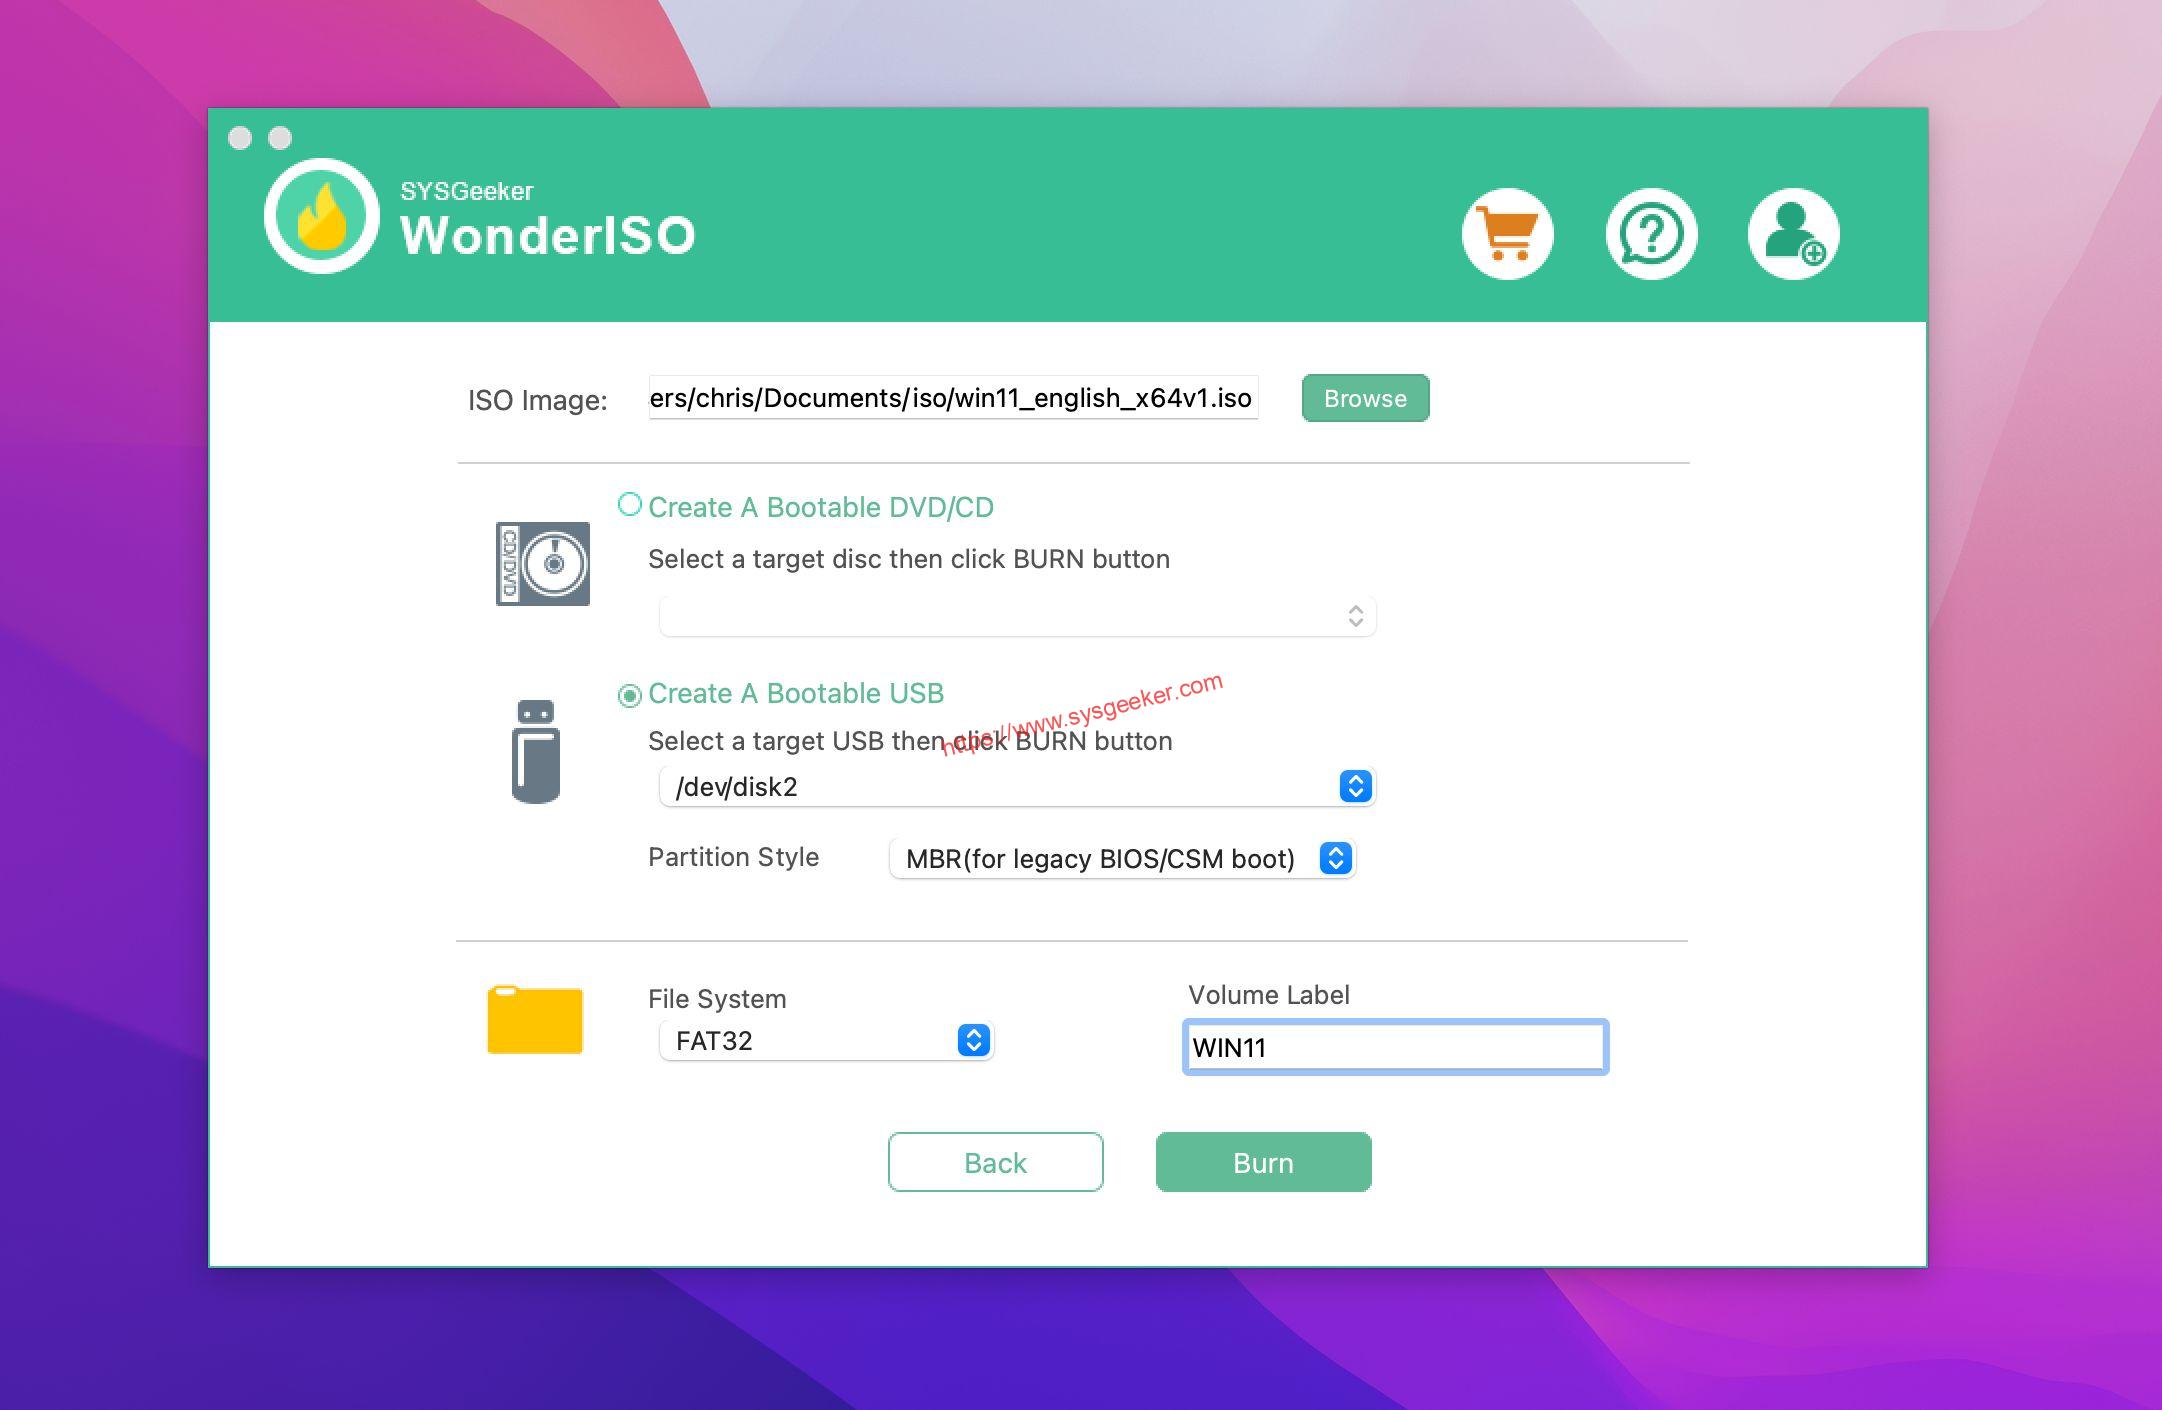
- Select the USB drive you want to use from the dropdown list and make sure that the "Create a bootable disk using" option is checked.
- Choose the file system you want to use for the USB drive (FAT32 is recommended).

- Click on the "Burn" button to begin the process of creating a bootable USB drive.
- Once the process is complete, you can safely eject the USB drive and use it to install or run the operating system.
WonderISO is a user-friendly and efficient tool for creating bootable USB drives from ISO files. However, it is always a good idea to make sure that you download the software from a reputable source and to follow best practices for safe computing, such as using antivirus software and keeping your system up-to-date with the latest security updates.
Method 6. Upgrade Your Windows OS
If Windows 7, no, you cannot see the options. Rufus extended options are specifically designed for Windows 8 or later versions, including Windows 10 and Windows 11. Therefore, if you are using Windows 7, the extended options will not be available in Rufus, and you will not be able to see or select them. You will need to upgrade from your Windows 7 to Win 10 or Win 11, then you will see the extended options.
In Conclusion
In some cases, when you attempt to boot from a USB flash drive on a Windows 11 system, Rufus may not show the extended partition as an option. This can be a frustrating issue as it can prevent you from being able to boot from the USB drive. Fortunately, there are a few solutions that can help you work around this issue.