Table of Contents
If you want to install Windows 10 on a Mac M1 or M2 chip, or if you want to install Windows 10 on another computer, you will need to create a bootable Windows 10 USB drive. While this can be done using a variety of methods on a Windows computer, like Windows USB/DVD Download Tool, but it is not as straightforward with a Mac.
In this article, we’ll show you how to create a bootable Windows 10/11 USB drive on a Mac M1 or M2 chip.
What’s Mac M1/M2 Chip?
The M1/M2 chip is a new type of processor from Apple that offers significantly faster performance than previous generations of processors. The M1/M2 chip is based on the ARM architecture and is manufactured using a 7nm process. It is the first processor from Apple to use this architecture and process.
The M1/M2 chip offers up to 8 CPU cores and up to 16 GPU cores. It also features a new type of neural engine, which is designed for machine learning applications. The M1/M2 chip is used in the new MacBook Air, MacBook Pro, and Mac mini.
Why You Need A Windows Bootable USB Installer?
A Windows bootable USB drive can be extremely useful for a number of reasons.
1. A bootable USB drive allows you to boot your computer from a USB drive, instead of from the hard drive. This can be useful if you want to install a new operating system, or if you want to troubleshoot a problem with your computer. A bootable USB drive can also be used to run a live version of a Linux operating system, which can be useful for testing or recovery purposes.
2. A bootable USB drive can also be used to troubleshoot a Windows computer that is having issues.
3. Another reason is if you need to install Windows to use specific Windows-only software or to play Windows-only games.
4. Maybe you’re trying to repair an existing installation of Windows. Whatever the reason, creating a bootable USB is a relatively simple process.
5. Finally, you might need to create a bootable Windows USB if you are having trouble installing Windows from a DVD or CD.
What You Need
There are a few requirements for creating a bootable USB on Mac M1/M2.
– A blank USB flash drive with at least 8GB of storage
– A copy of the Windows 10 installation media (ISO file)
– A Mac computer running macOS with M1/M2 chip
How to Create Windows 10/11 Bootable USB on Mac M1/M2 Chip
1. Using WonderISO Tool
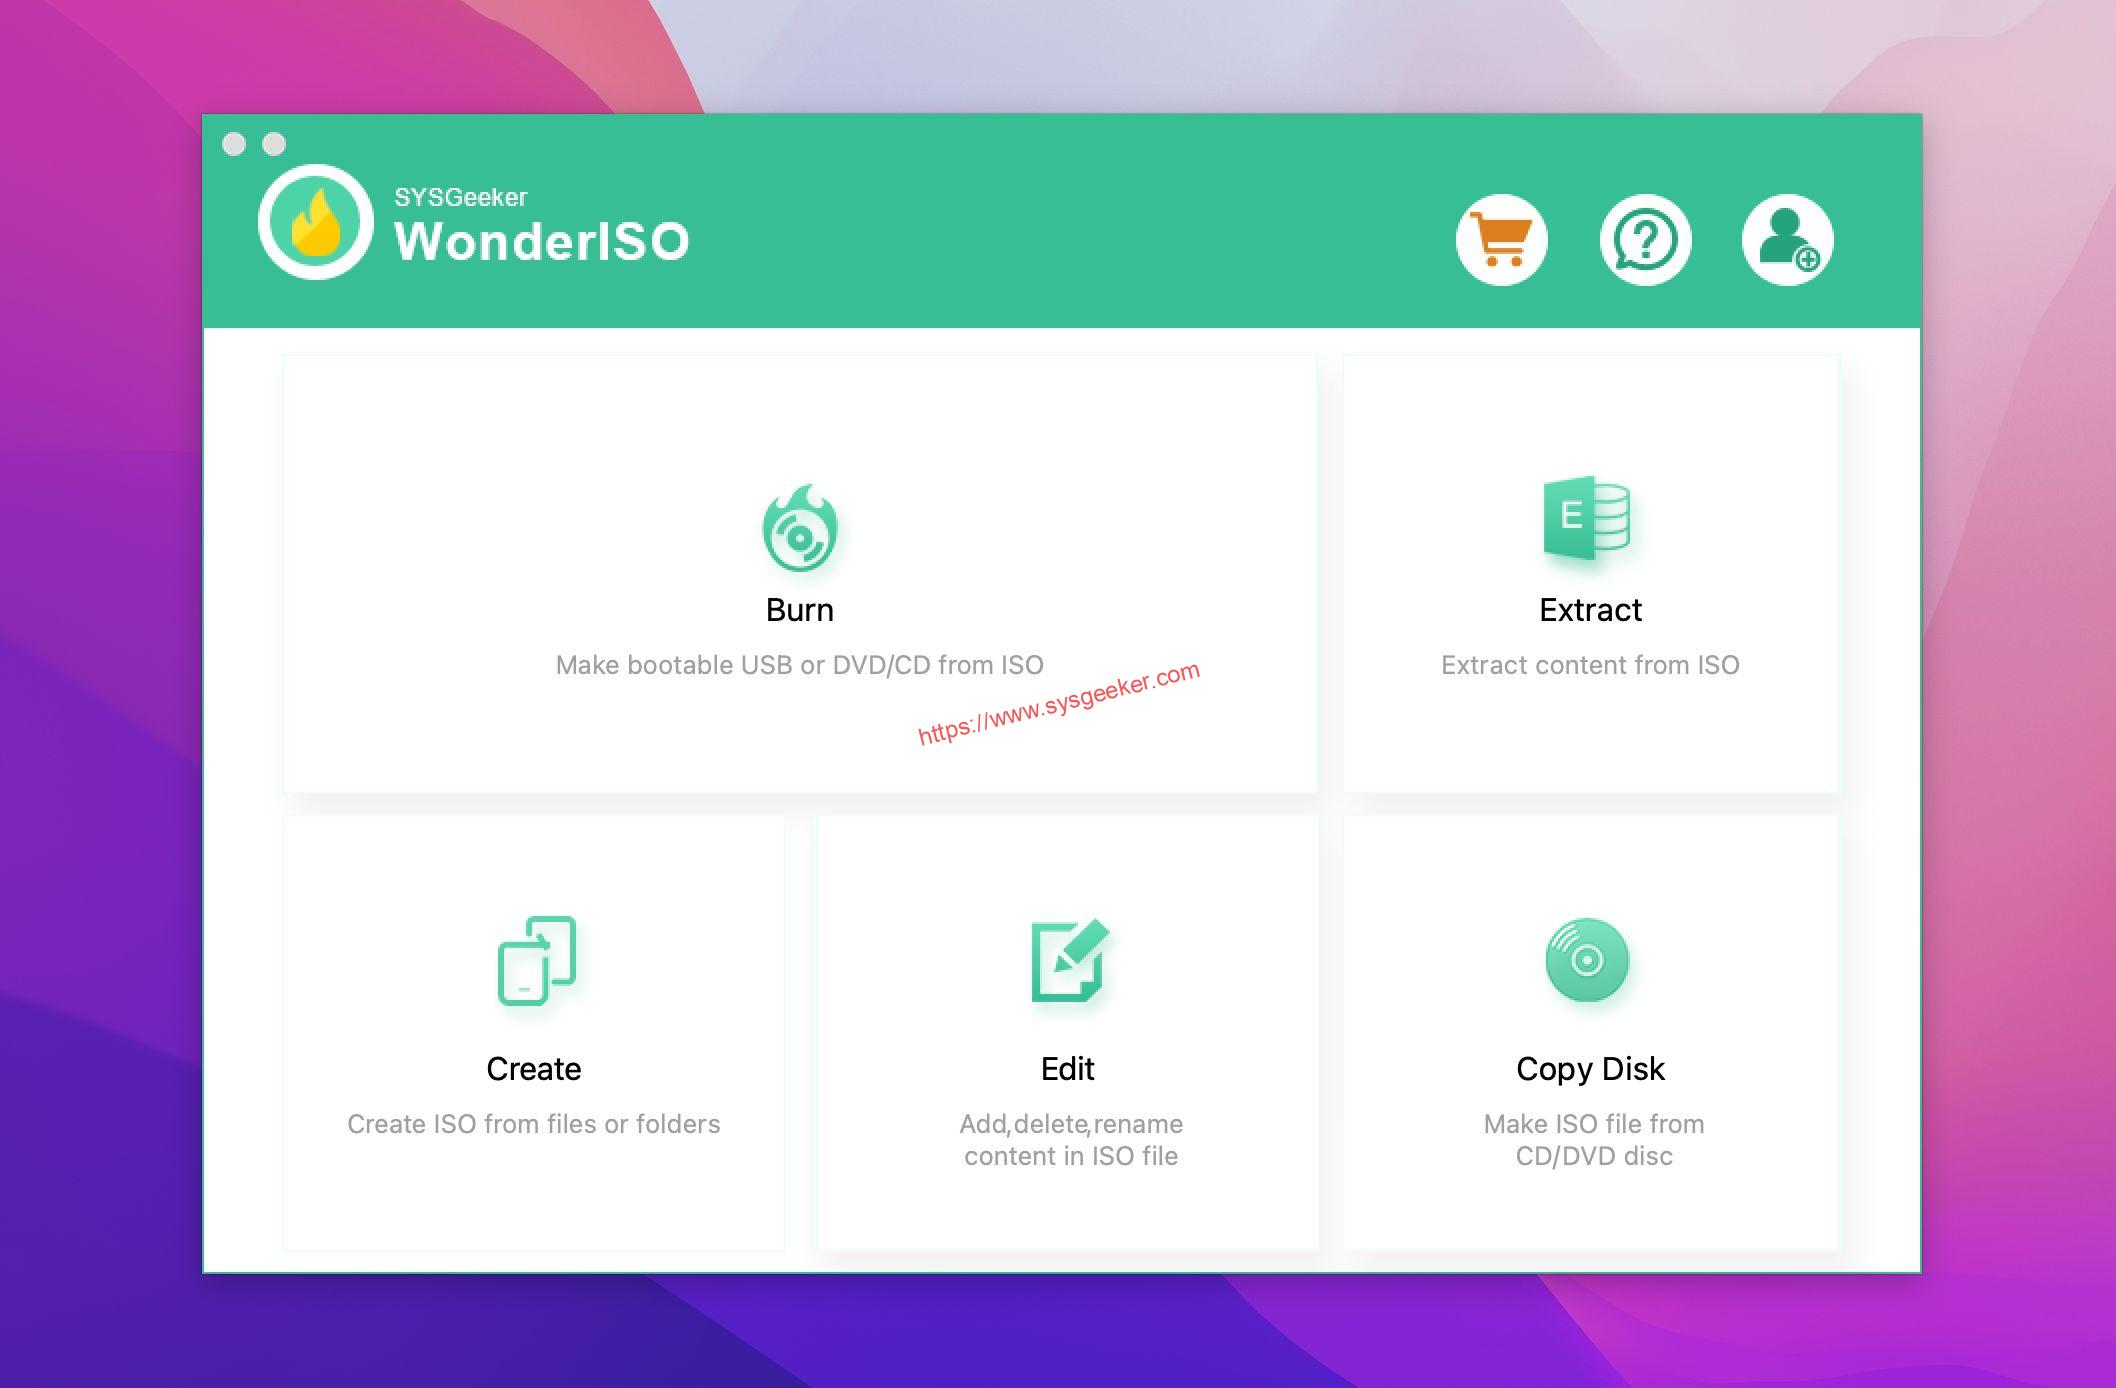
WonderISO is a software that allows you to create and manage ISO files. It is available for Windows and MacOS. With WonderISO, you can create ISO files from your own files and folders, or extract files from existing ISO files. WonderISO can also split ISO files that are larger than 4 GB into multiple files, making them easier to manage and transfer.
1. Download and install WonderISO on your macOS computer.
2. Connect your USB drive to the computer.
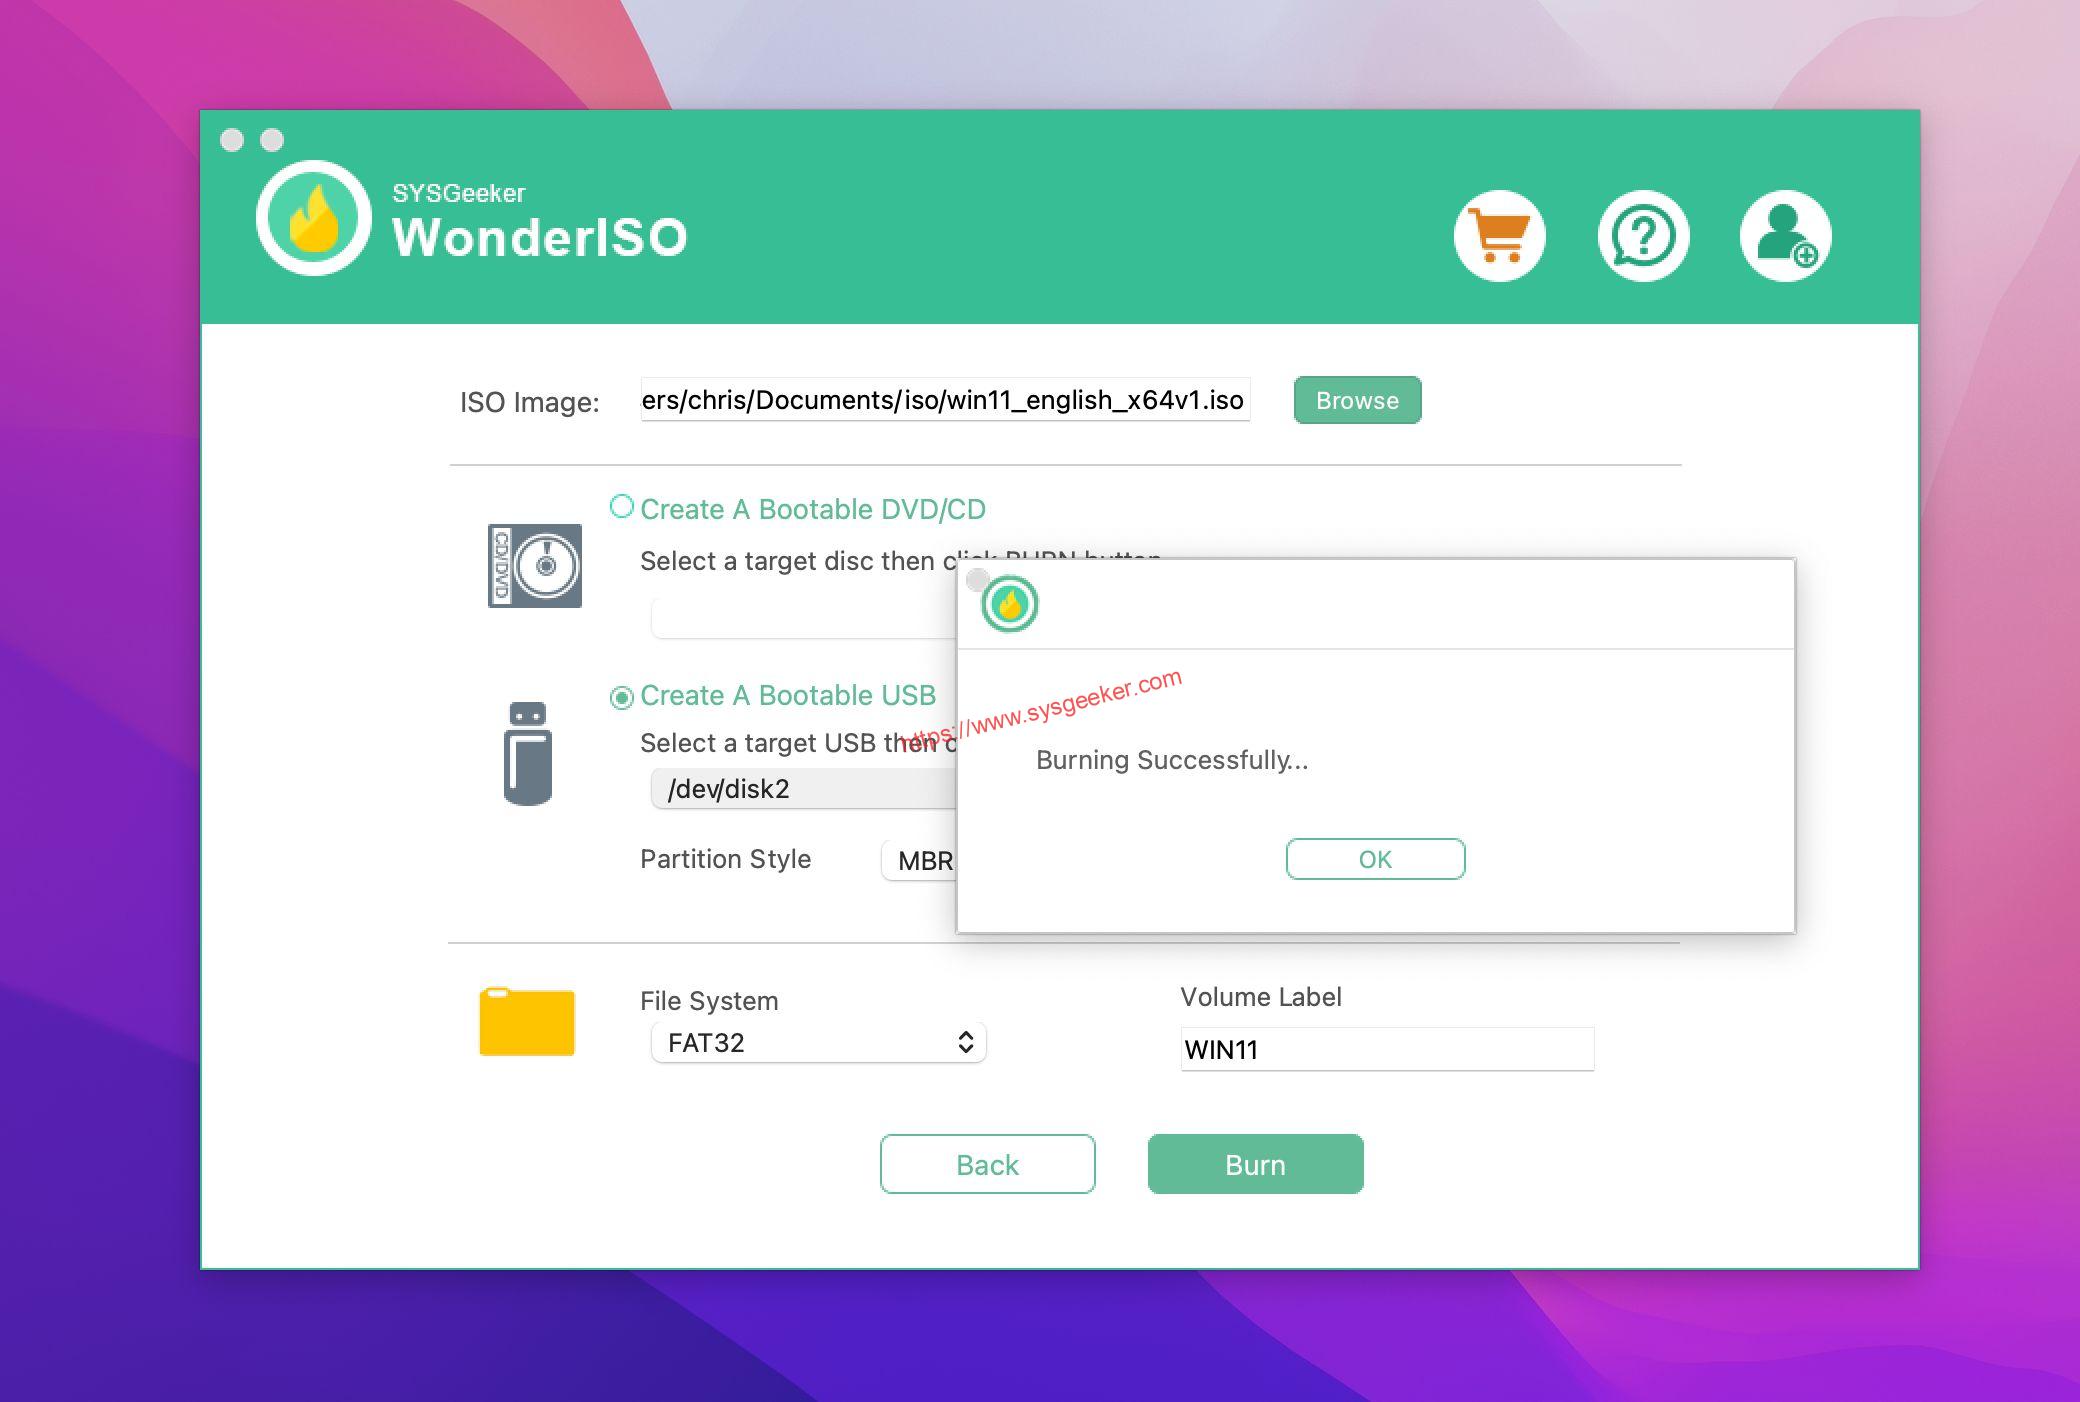
3. Launch WonderISO and select the "BURN" option to create a bootable USB drive for Windows 10 or Windows 11. Follow the on-screen instructions to complete the process.
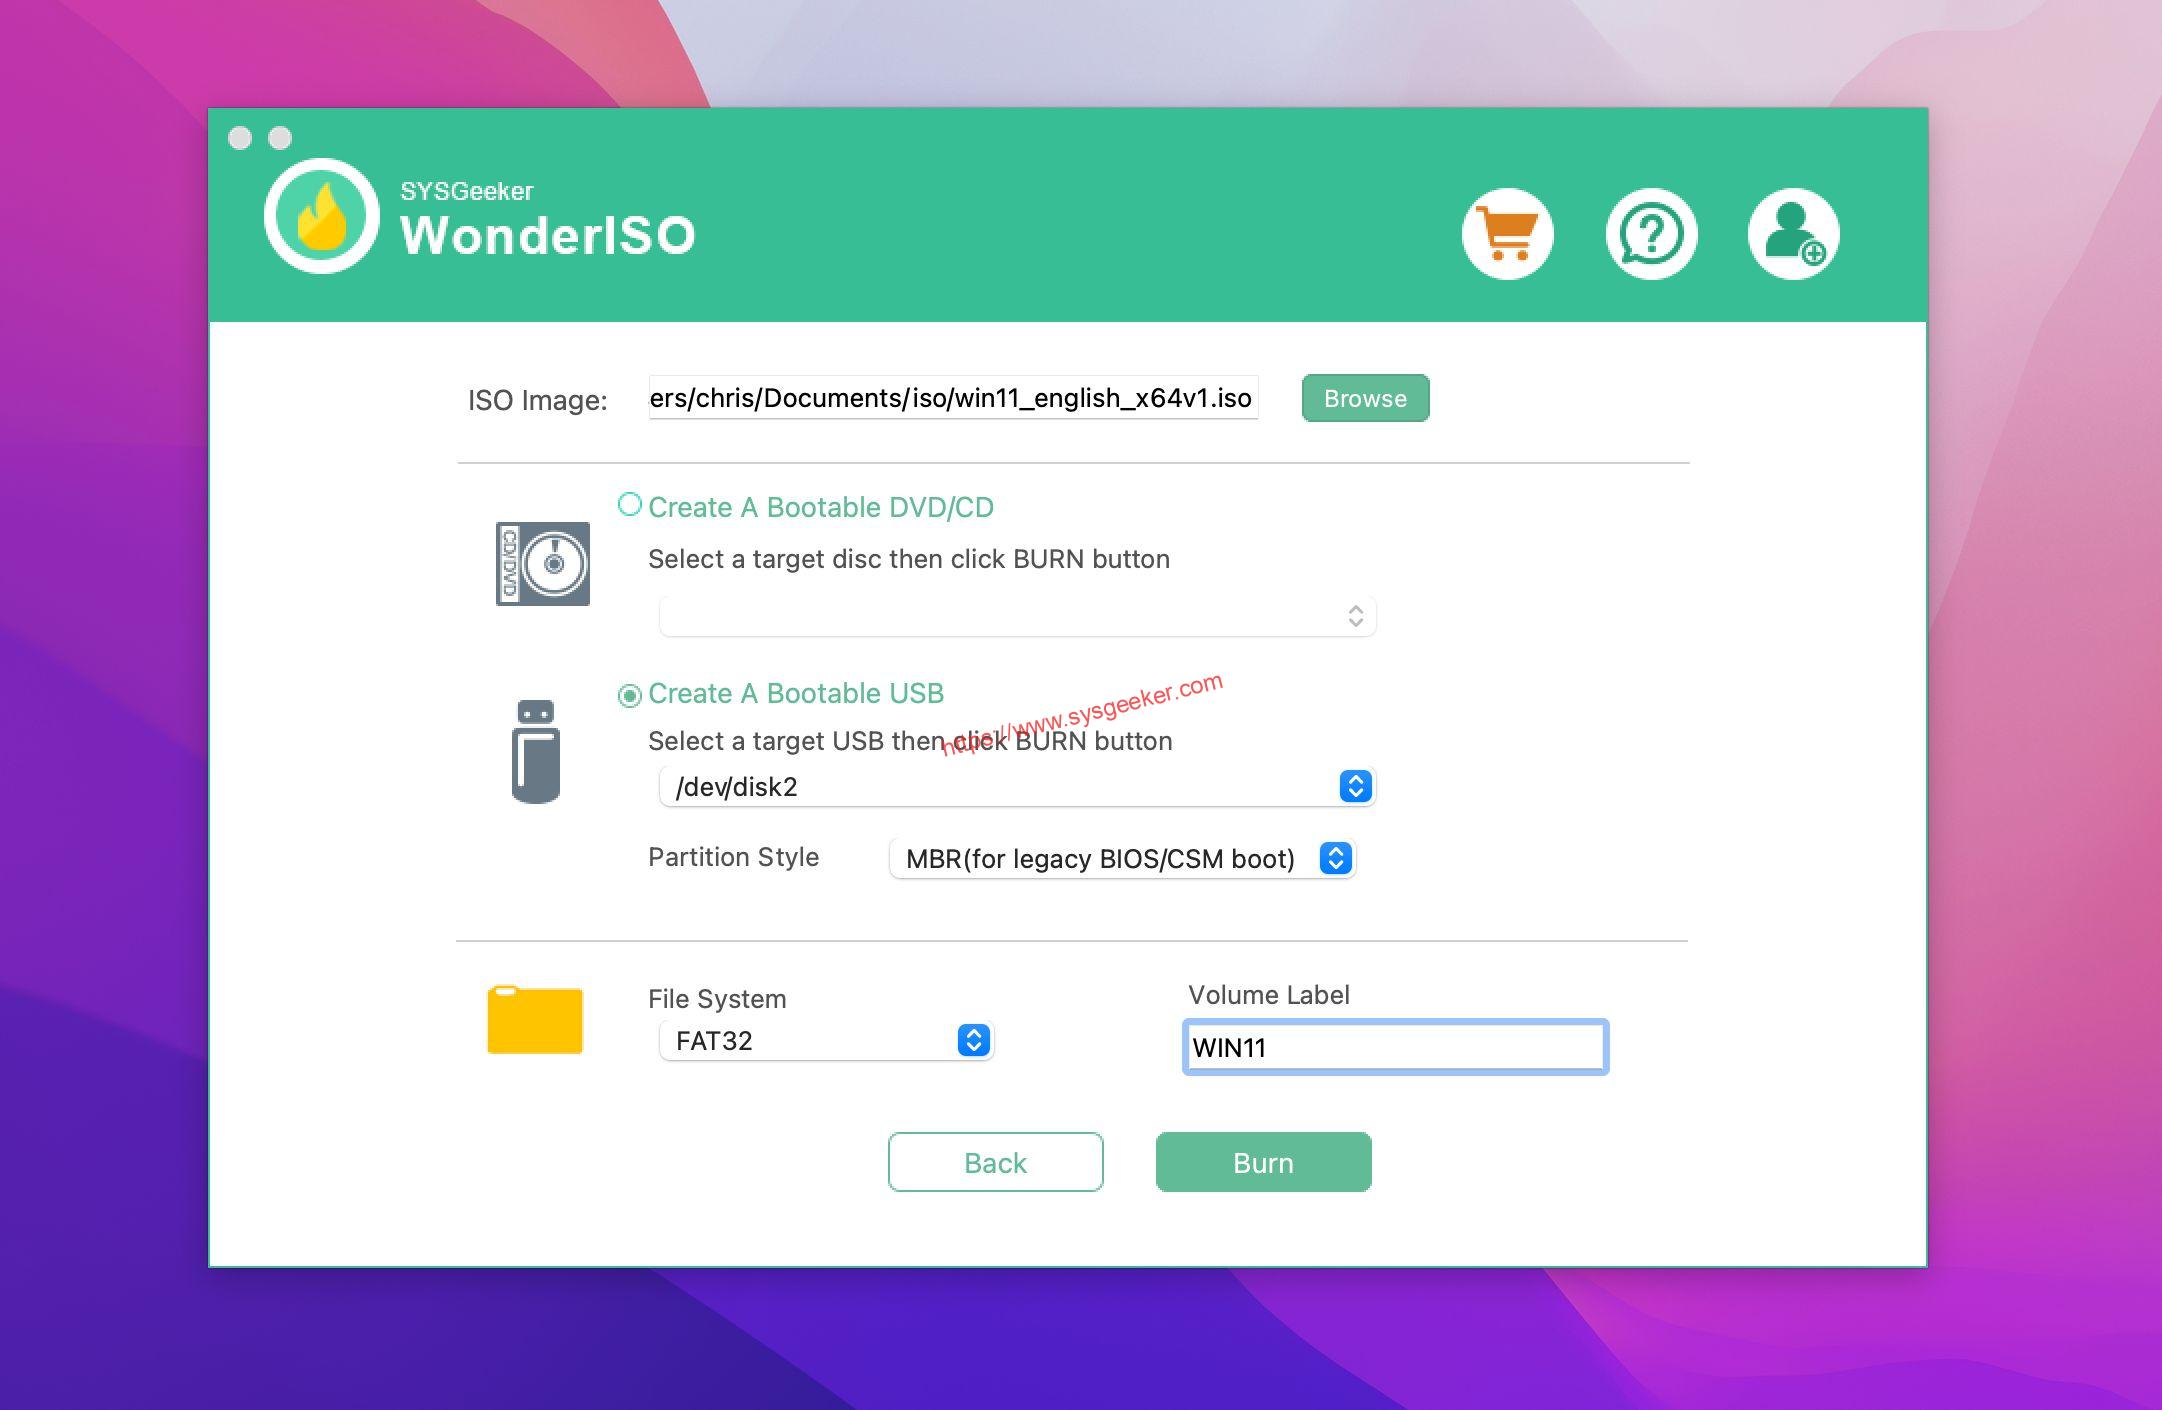
In terms of partition style, we recommend that you choose UEFI partition, because most computers now support UEFI.
4. Once the all settings are complete, click "BURN" button to start writing ISO file to USB drive. Depending on the writing speed of your USB drive, it may take about 10 minutes to complete.

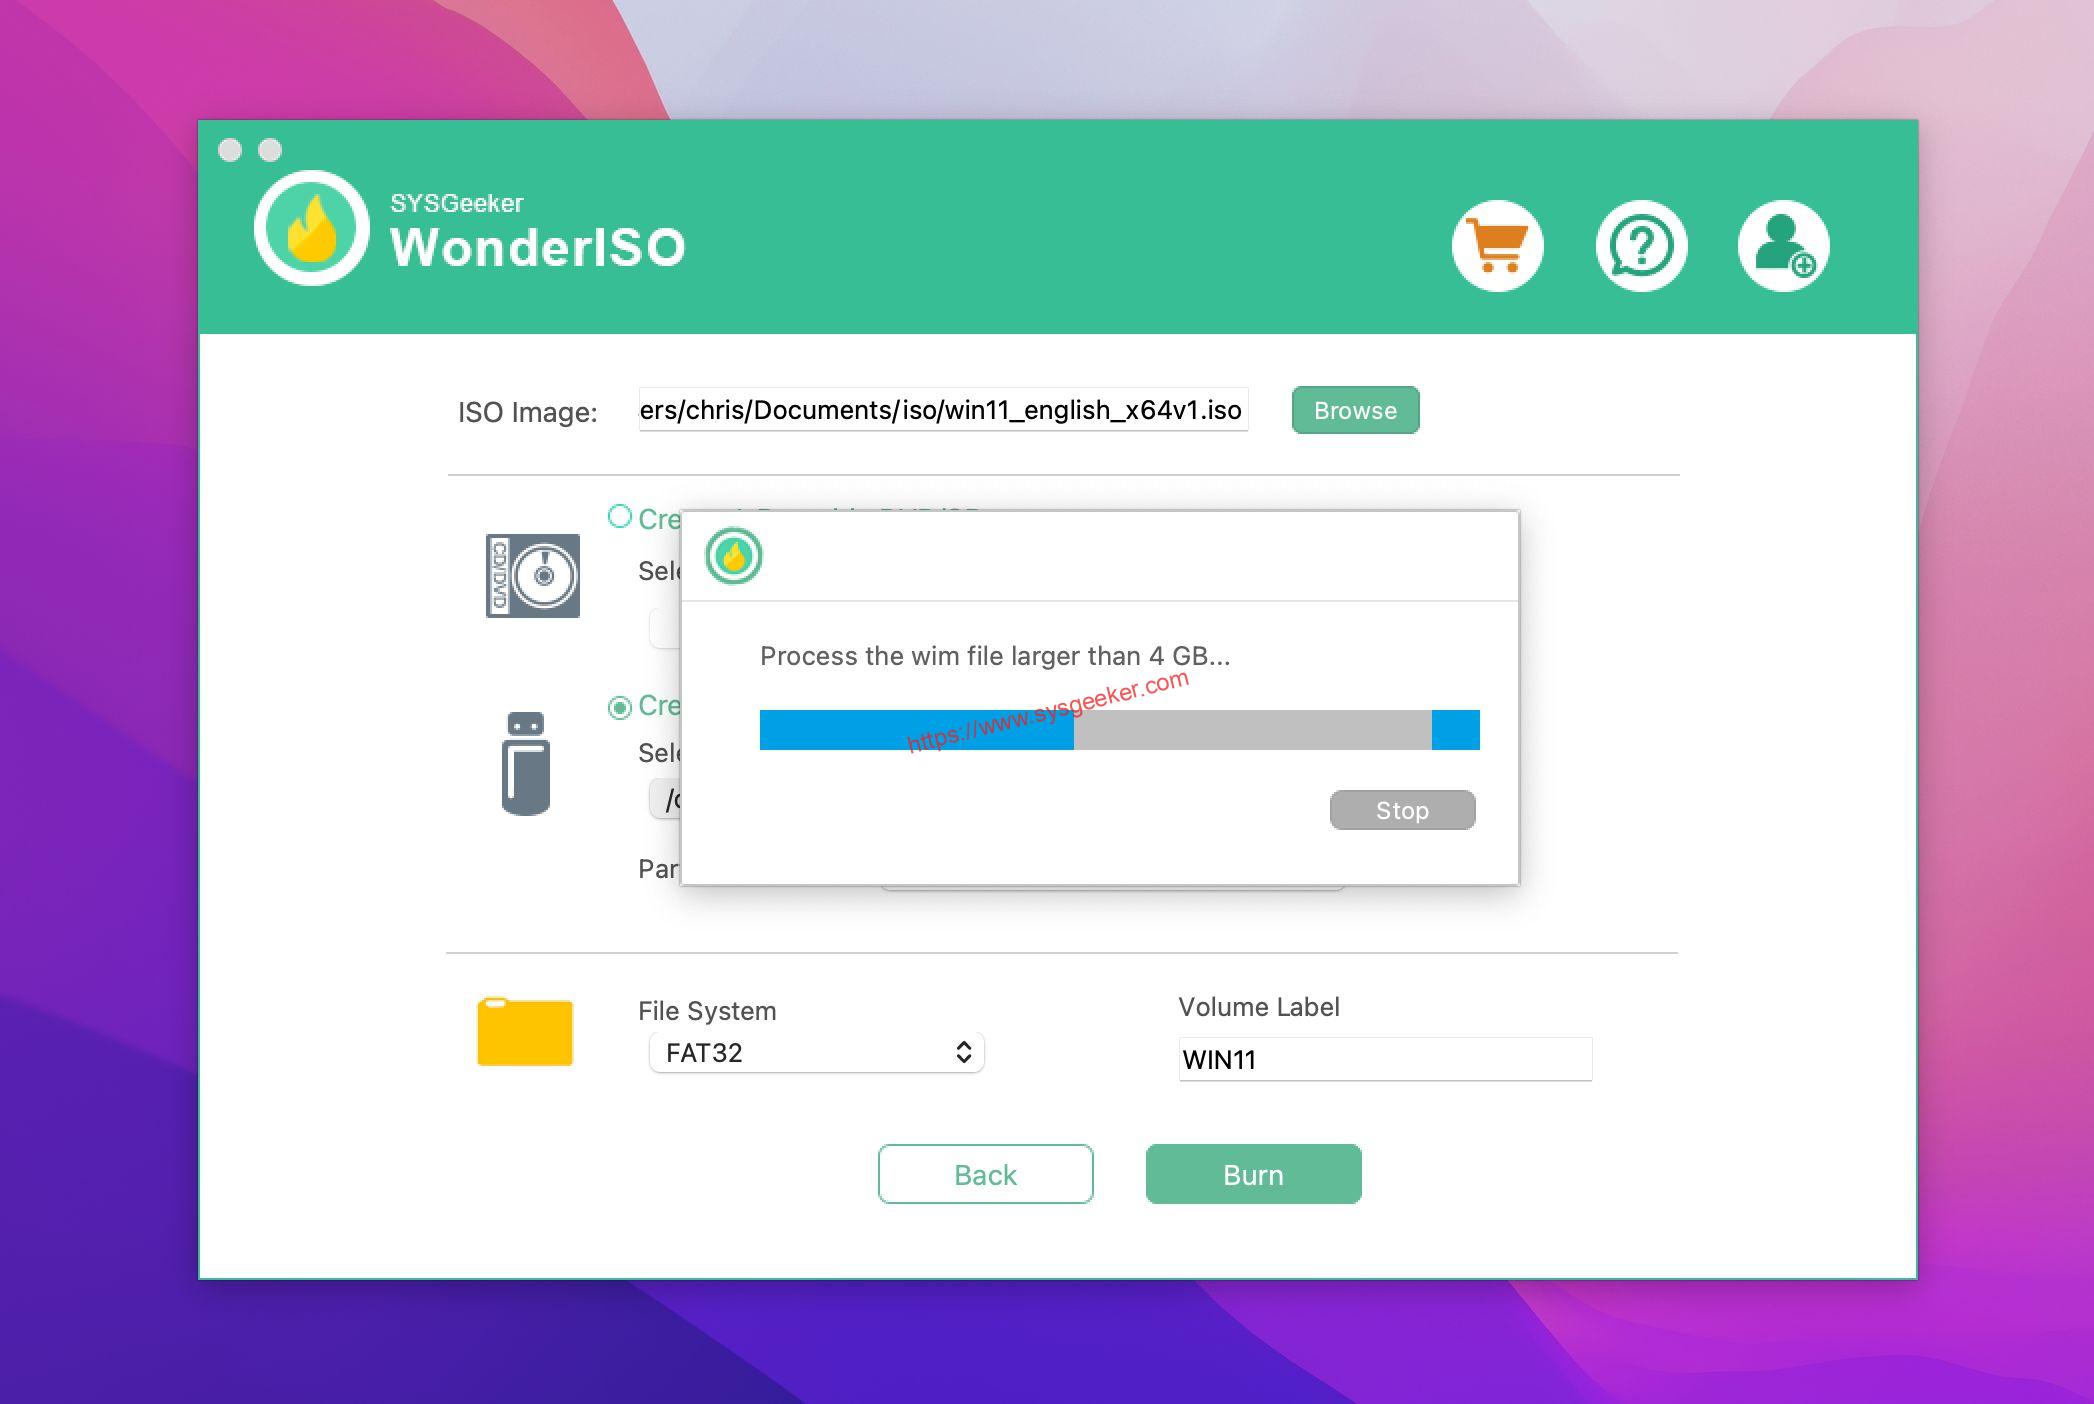
Step 5. Since NTFS does not support ISO files larger than 4GB, the program will automatically split the ISO file larger than 4GB into two smaller ISO files after writing. This process also takes a few minutes
Step 6. When the ISO file split is complete, you should see a success message, which means you have successfully made a bootable installation USB.
Now, you can eject your USB flash drive and try to install Windows 10/11 on your computer.
Pros:
-Allows you to create a bootable USB drive for Windows 10 on macOS
-Simple and easy to use
– Support latest macOS Ventrua.
Cons:
-None that we could find!
Knowledge:
Now the ISO files of Widnows 10 and Windows 11 are larger than 4GB, only the NTFS file system supports files larger than 4GB, but the Mac cannot recognize the NTFS file system. So you have to format it as FAT32. However, WonderISO perfectly solves this problem. It can split ISO into two FAT32 files smaller than 4GB. After the writing is completed, it will be spliced into a complete ISO file.
2. Using Boot Camp
Creating a bootable Windows 10 USB on a Mac with M1 or M2 chip can be done using the Boot Camp Assistant software. It is a utility that comes with your Mac. This software is designed for users who want to install Windows on their Mac computer. The process is simple and only takes a few minutes to complete.
Once you have all of the necessary materials, follow these steps to create a bootable USB drive with Boot Camp Assistant:
1. Open Boot Camp Assistant on your Mac.
2. Click the "Create a Windows 10 or earlier install disk" button.
3. Select the Windows 10 installation media that you downloaded earlier.
4. Click the "Create disk" button.
5. Follow the on-screen instructions to create a bootable USB drive.
3. Using Terminal
Assuming you have a Windows 10 ISO file and a USB drive with at least 8GB of free space, you can create a bootable Windows 10 USB on M1/M2 Mac using Terminal with the following steps:
1. Open Terminal and insert your USB drive into your computer.
2. Type in the following command to find out the disk number of your USB drive:
diskutil list
3. Unmount the drive by typing in the following command, replacing N with the disk number of your USB drive:
diskutil unmountDisk /dev/diskN
4. Type in the following command to create the bootable Windows 10 USB, replacing N with the disk number of your USB drive and PATH/TO/WINDOWS.ISO with the path to your Windows 10 ISO file:
sudo dd if=PATH/TO/WINDOWS.ISO of=/dev/diskN bs=1m
5. Once the process is complete, type in the following command to eject the USB drive:
diskutil eject /dev/diskN
You can now use the bootable Windows 10 USB to install Windows 10 on your computer.
Be aware that this will erase anything on the USB drive, so make sure to back up any important files before proceeding. And make sure you use the correct name for your USB drive, as using the wrong name could result in data loss.
If you are new to using Terminal, this process may seem a bit daunting. However, it’s actually quite simple once you get the hang of it. If you have any questions, feel free to leave a comment below and I’ll do my best to help you out.
4. Using DiskMaker X
DiskMaker X is a bootable USB creator for macOS. It allows you to create a bootable USB drive from a DMG file, which is a common file format for macOS software. DiskMaker X is a free and open source tool, and it is available for download from the developer’s website.
- Creating a bootable USB drive with DiskMaker X is simple.
- First, you need to download the DMG file of the macOS software you want to install.
- Next, open DiskMaker X and select the DMG file.
- Finally, select the USB drive you want to use and click ‘Create Bootable USB’.
How to Boot Your Computer from USB Drive?
Your bootable USB flash drive is now ready to use. To install Windows 10, insert it into your PC, and then follow the on-screen instructions.
-
Boot Mac M1/M2 from USB
- To do this, you need to connect the bootable USB drive to your computer and turn it on.
- Then, you need to hold down the Option key and select the bootable USB drive.
- Finally, you need to follow the instructions on the screen to install macOS on your computer.
-
Boot Widnows from USB
Here are the steps to boot Windows from a USB drive:
1. Connect the USB drive to your computer.
2. Restart your computer.
3. Press the key that allows you to enter your computer’s BIOS settings. This key is often F2, F10, or Del.
4. Use the arrow keys to navigate to the Boot Order section of the BIOS.
5. Change the order so that the USB drive is listed first.
6. Save your changes and exit the BIOS.
7. Your computer will now boot from the USB drive.
Creating a Windows 10/11 bootable USB on Mac M1/M2 is a great way to install the operating system on a new computer, or to reinstall it on an old one. It’s also a good way to try out a new version of Windows without affecting your current installation. This article introduced a few ways to do this, and the method you choose should depend on your needs and preferences.