Creating a Windows bootable USB on a Mac is more difficult than it should be.
I ran into this problem when I needed to reinstall Windows 11 on an old PC. My Windows computer could not boot, so I had to prepare the installation USB using my Mac.
At first, I tried Disk Utility and a few online tutorials. Most of them involved Terminal commands, mounting the ISO manually, formatting the USB, and splitting large Windows files. I did not want to spend an hour troubleshooting commands, so I tried WonderISO instead.
It gave me a much simpler way to create the bootable USB.
What You Need
Before starting, prepare:
- A Mac
- An 8 GB or larger USB drive
- A Windows 10 or Windows 11 ISO file
- WonderISO for Mac
I recommend using a 16 GB USB drive if possible. Also, back up anything stored on the USB because it will be erased during the process.
Step 1: Install WonderISO
Download and install WonderISO on your Mac. Open the program and choose Burn ISO from the main screen. This is the option used to create a bootable Windows installation drive.


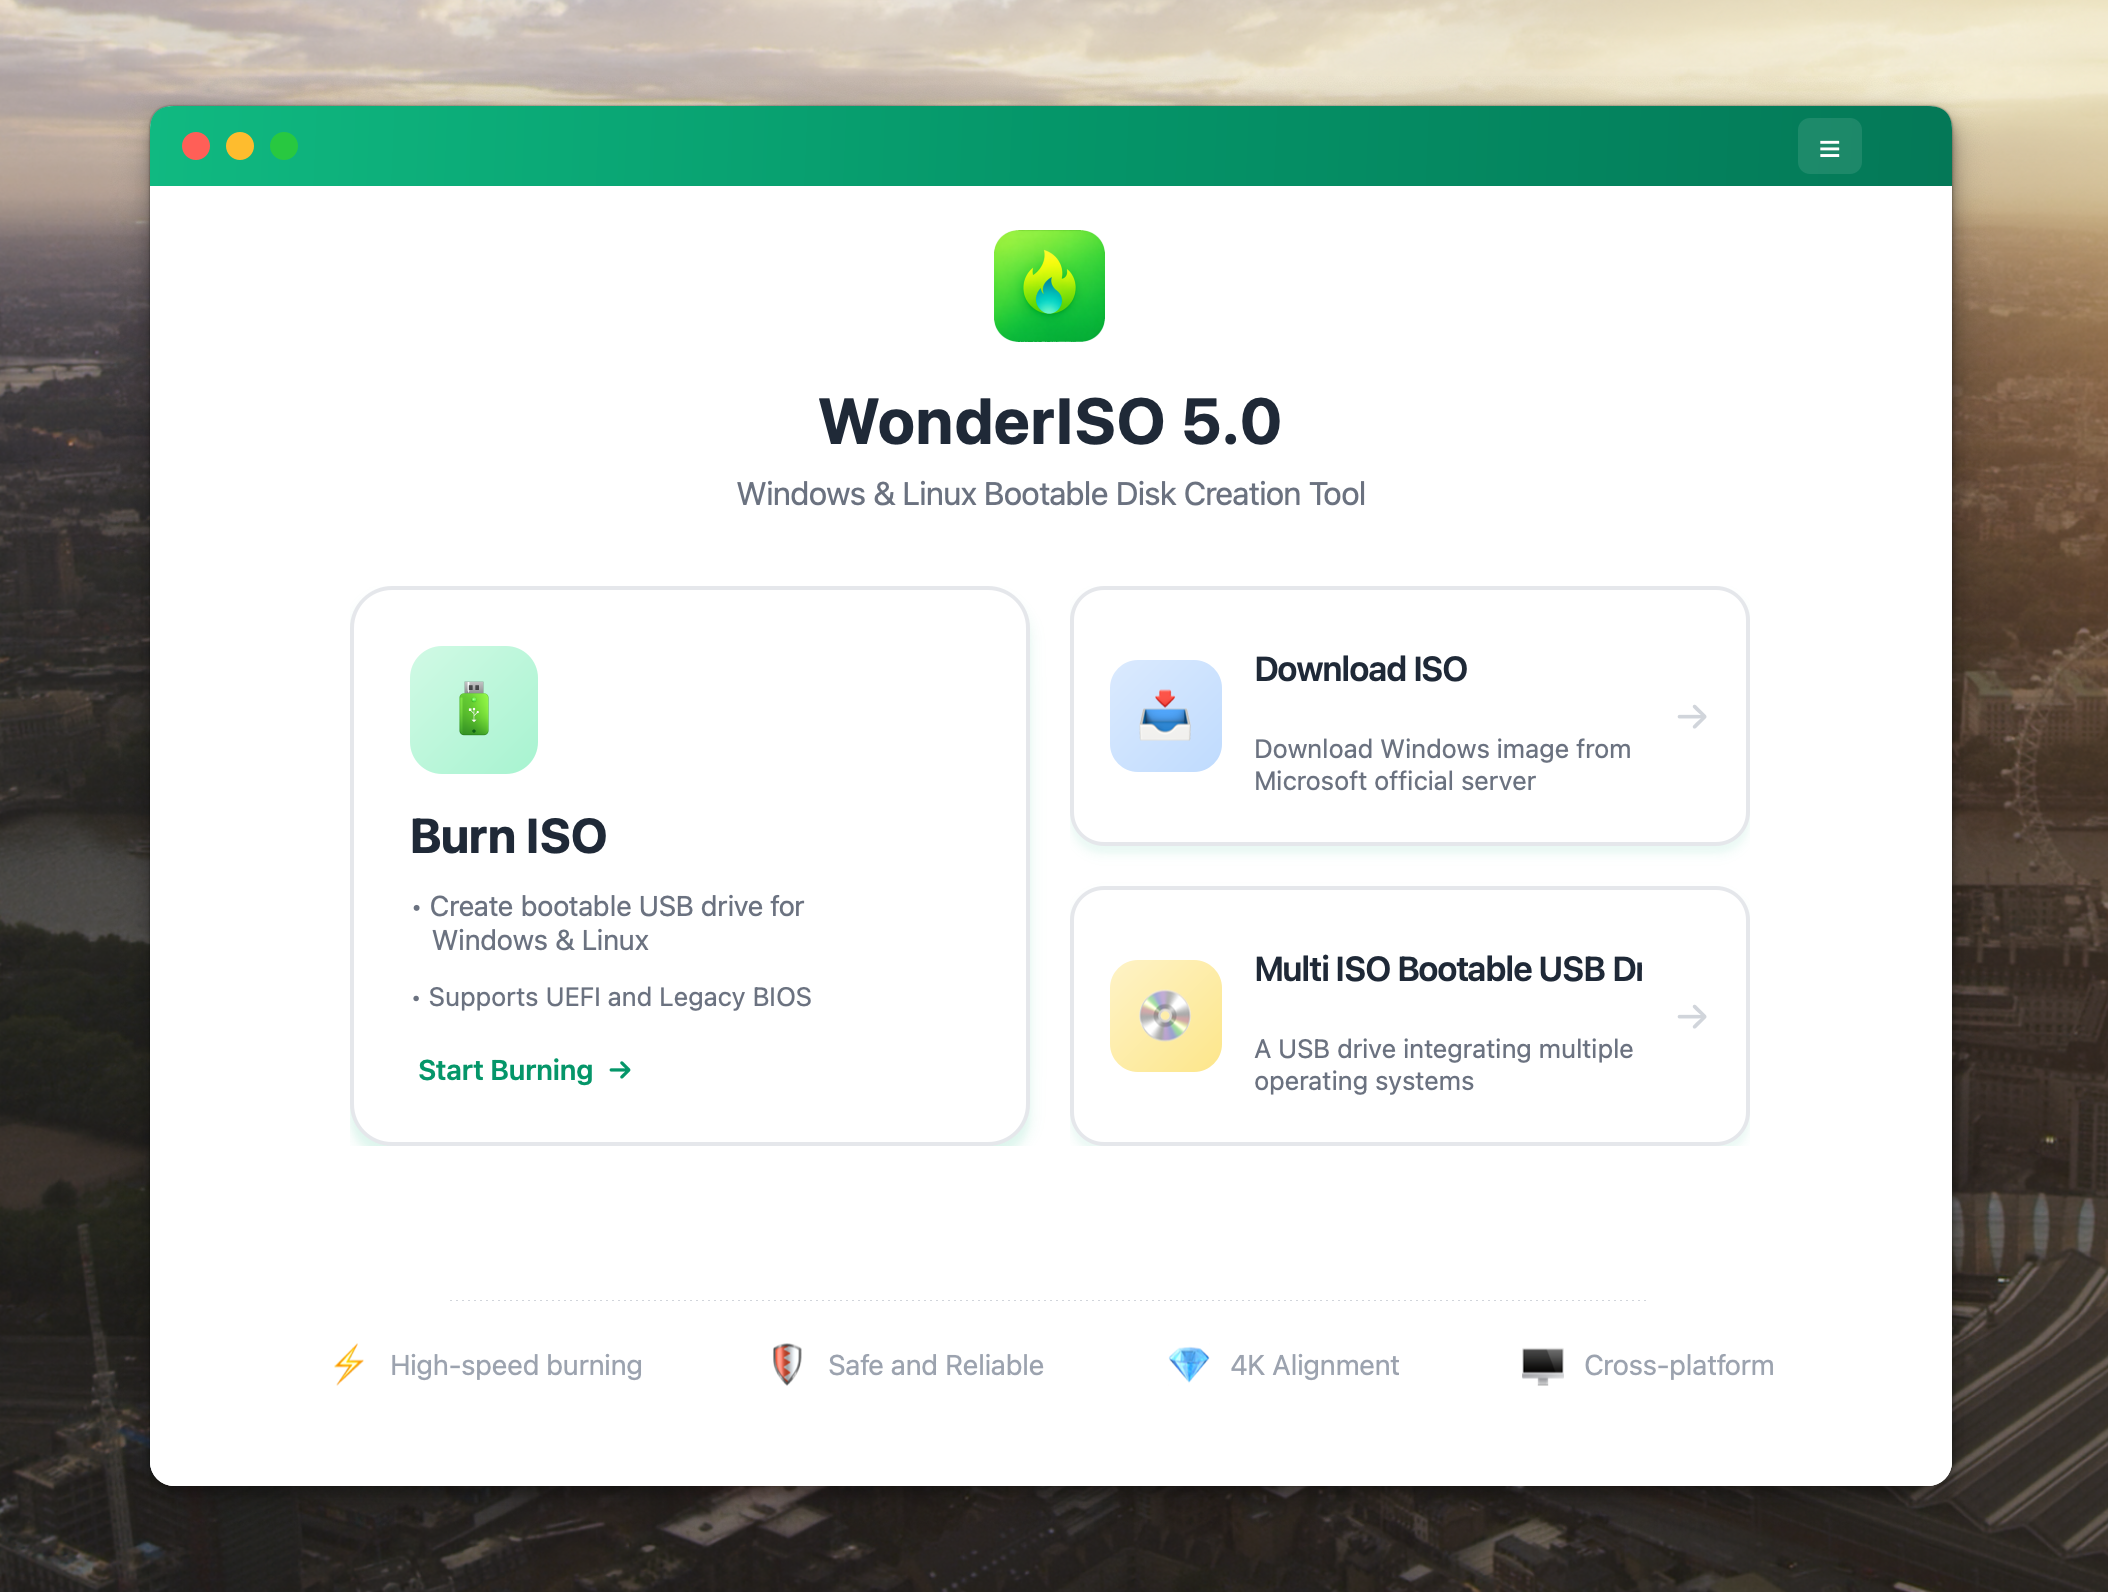
The interface is quite straightforward, so there are not many settings to figure out.
Step 2: Get the Windows ISO
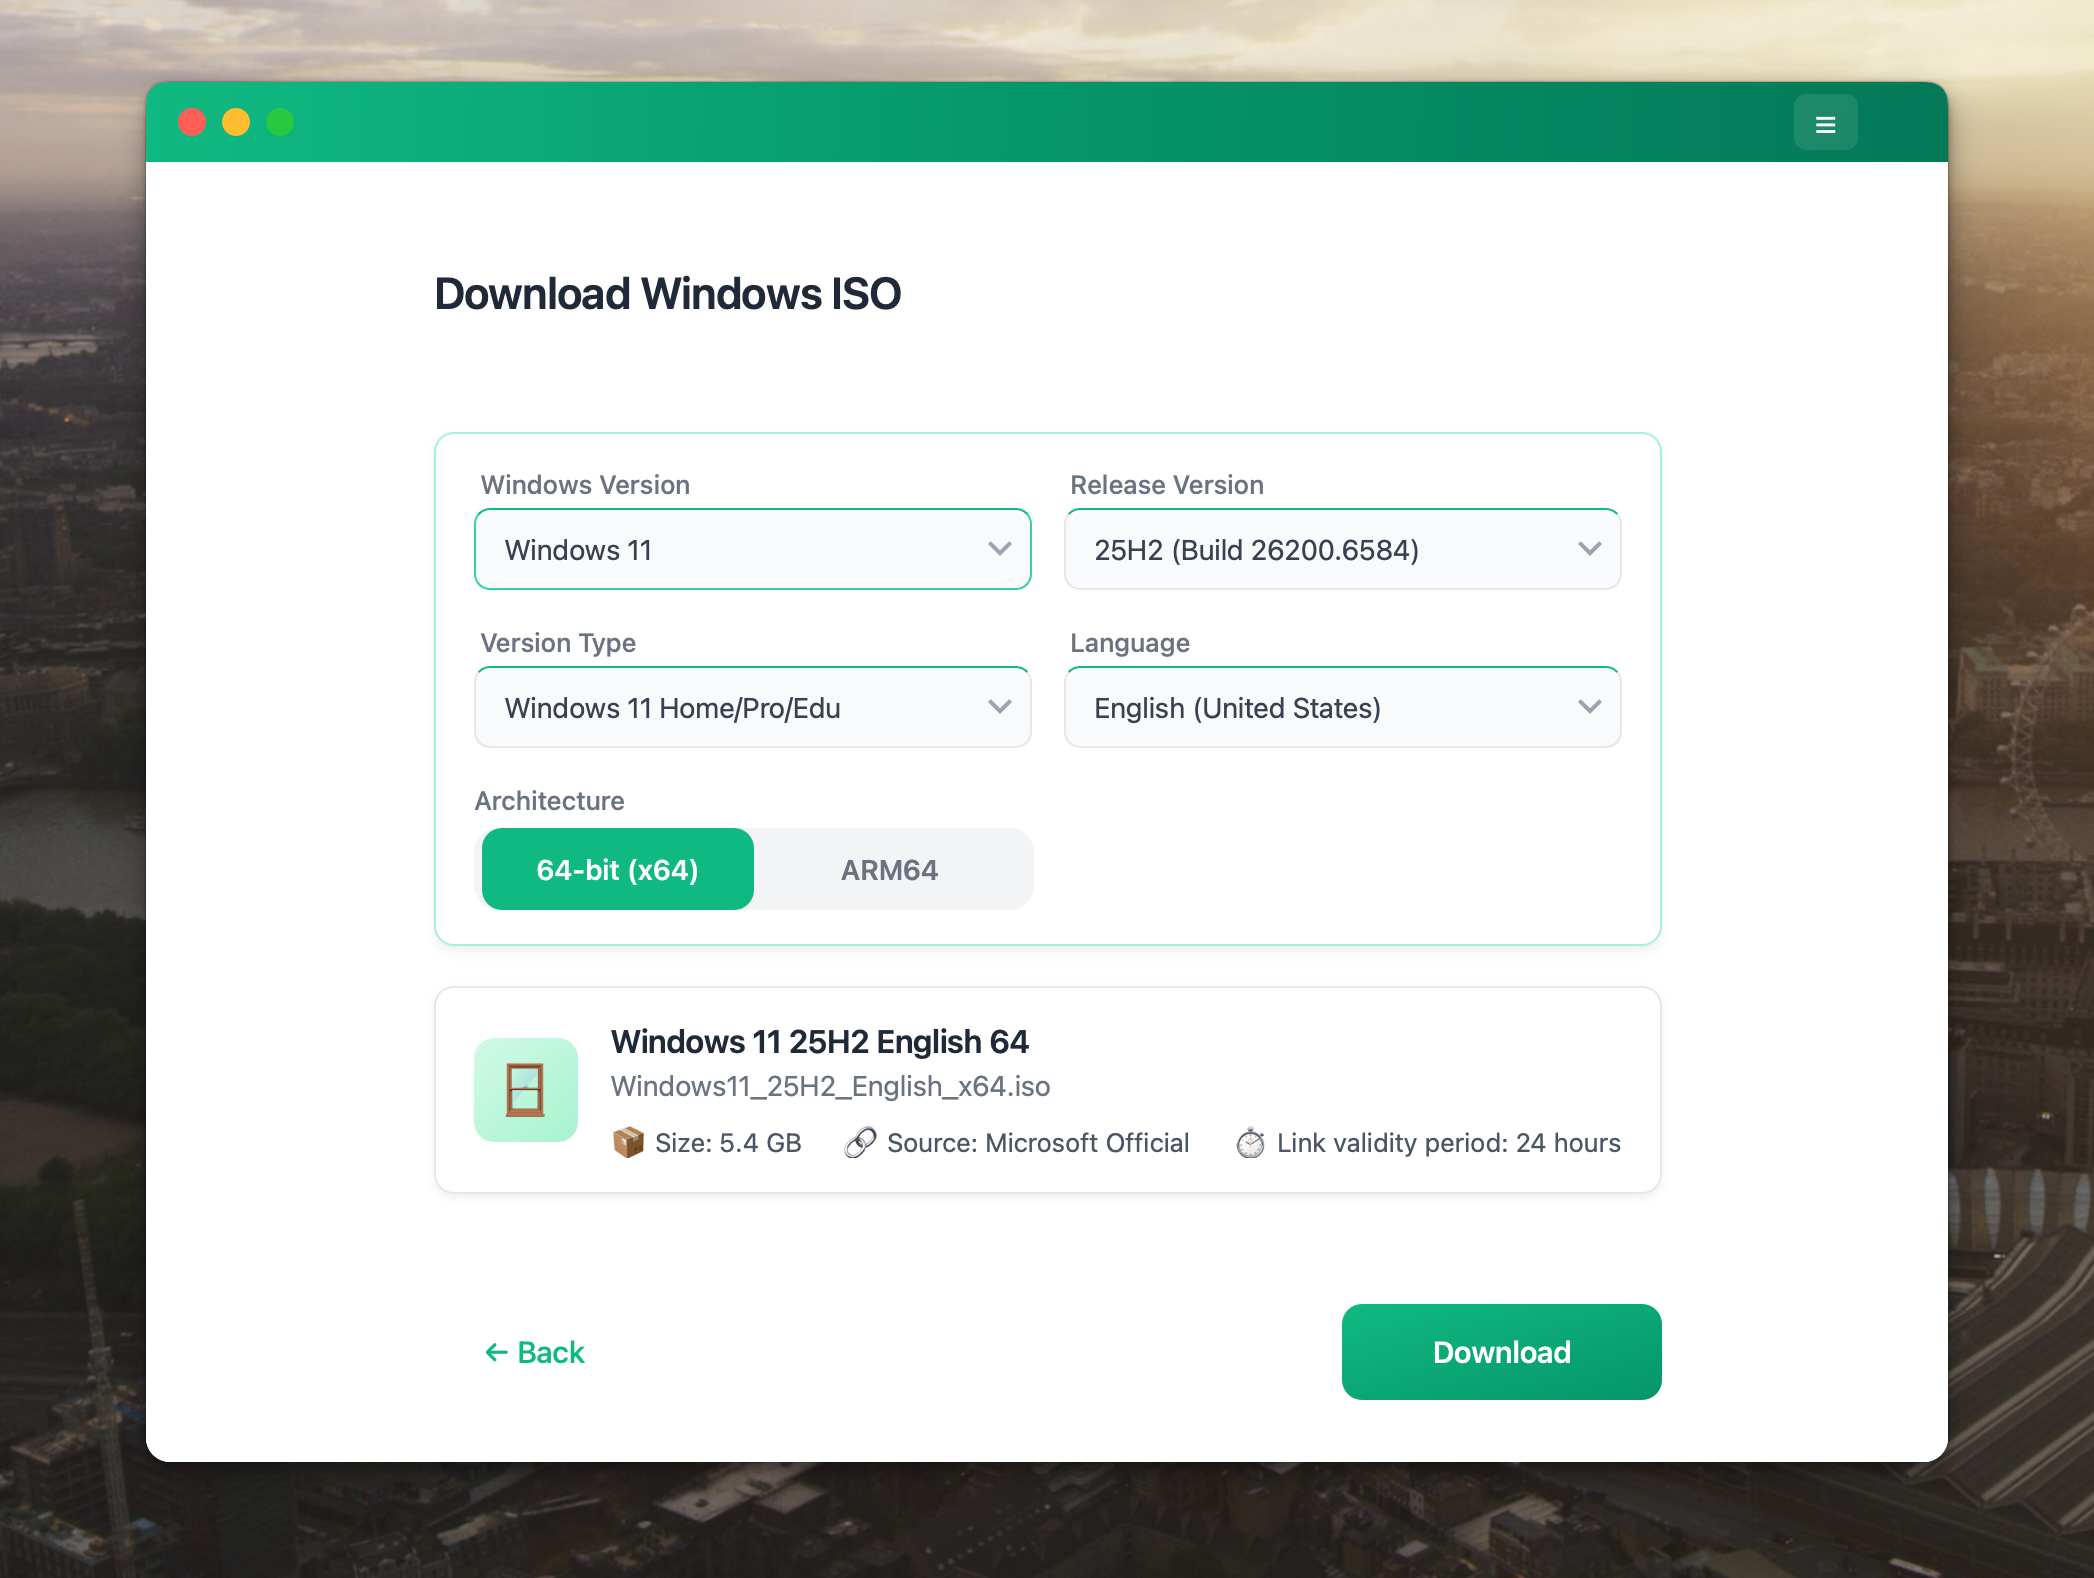
You can use a Windows ISO that is already saved on your Mac. WonderISO also has a Download ISO feature that can help you get a Windows 10 or Windows 11 ISO from Microsoft’s servers.I already had a Windows 11 ISO, so I simply selected it from my Downloads folder.
Step 3: Connect the USB Drive
Insert the USB flash drive into your Mac. WonderISO should detect it automatically. Make sure you select the correct drive, especially if you also have an external SSD or backup drive connected.
Step 4: Select the ISO and Boot Mode
Import the Windows ISO into WonderISO, then choose the connected USB drive.
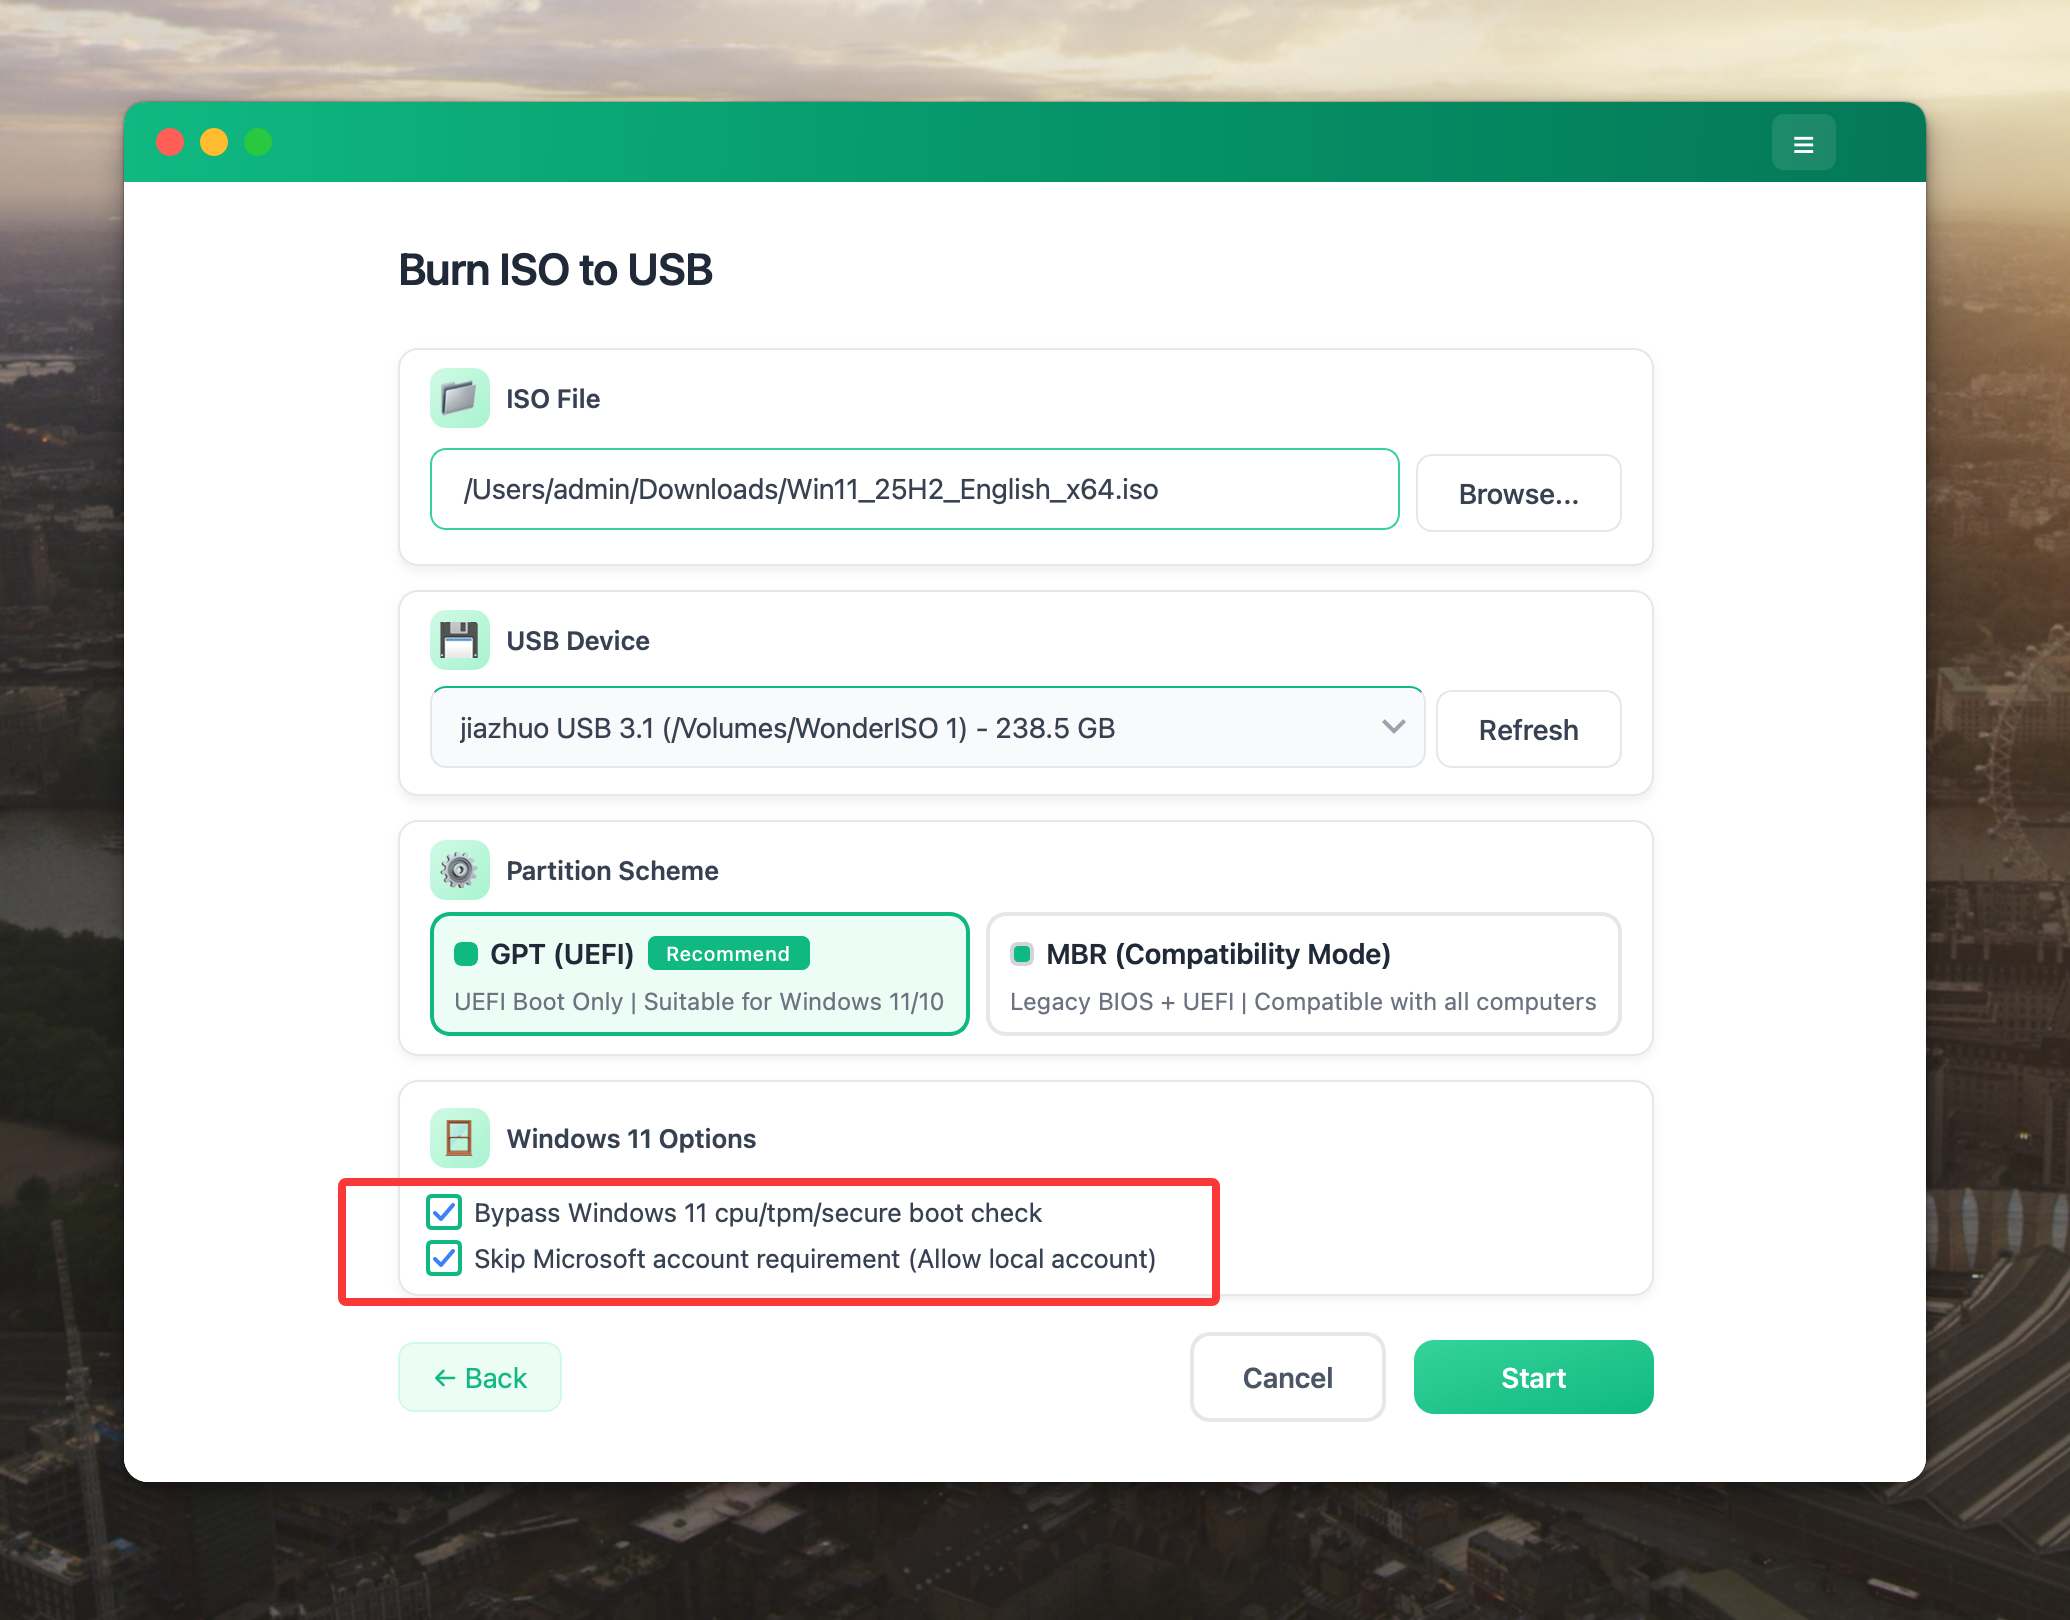
You will also need to select a boot mode:
- Choose UEFI for most modern Windows 10 and Windows 11 computers.
- Choose MBR for older computers that use legacy BIOS.
I used UEFI because the PC I was repairing was a newer model.
For Windows 11, WonderISO also provides options related to TPM, Secure Boot, CPU requirements, and Microsoft account setup. These may be helpful when installing Windows 11 on unsupported hardware.
Step 5: Create the Bootable USB
Click Start and confirm that the USB drive can be erased. WonderISO will format the drive and copy the Windows installation files automatically. It can also handle Windows ISO files that contain files larger than the FAT32 4 GB limit, so you do not need to split them manually.
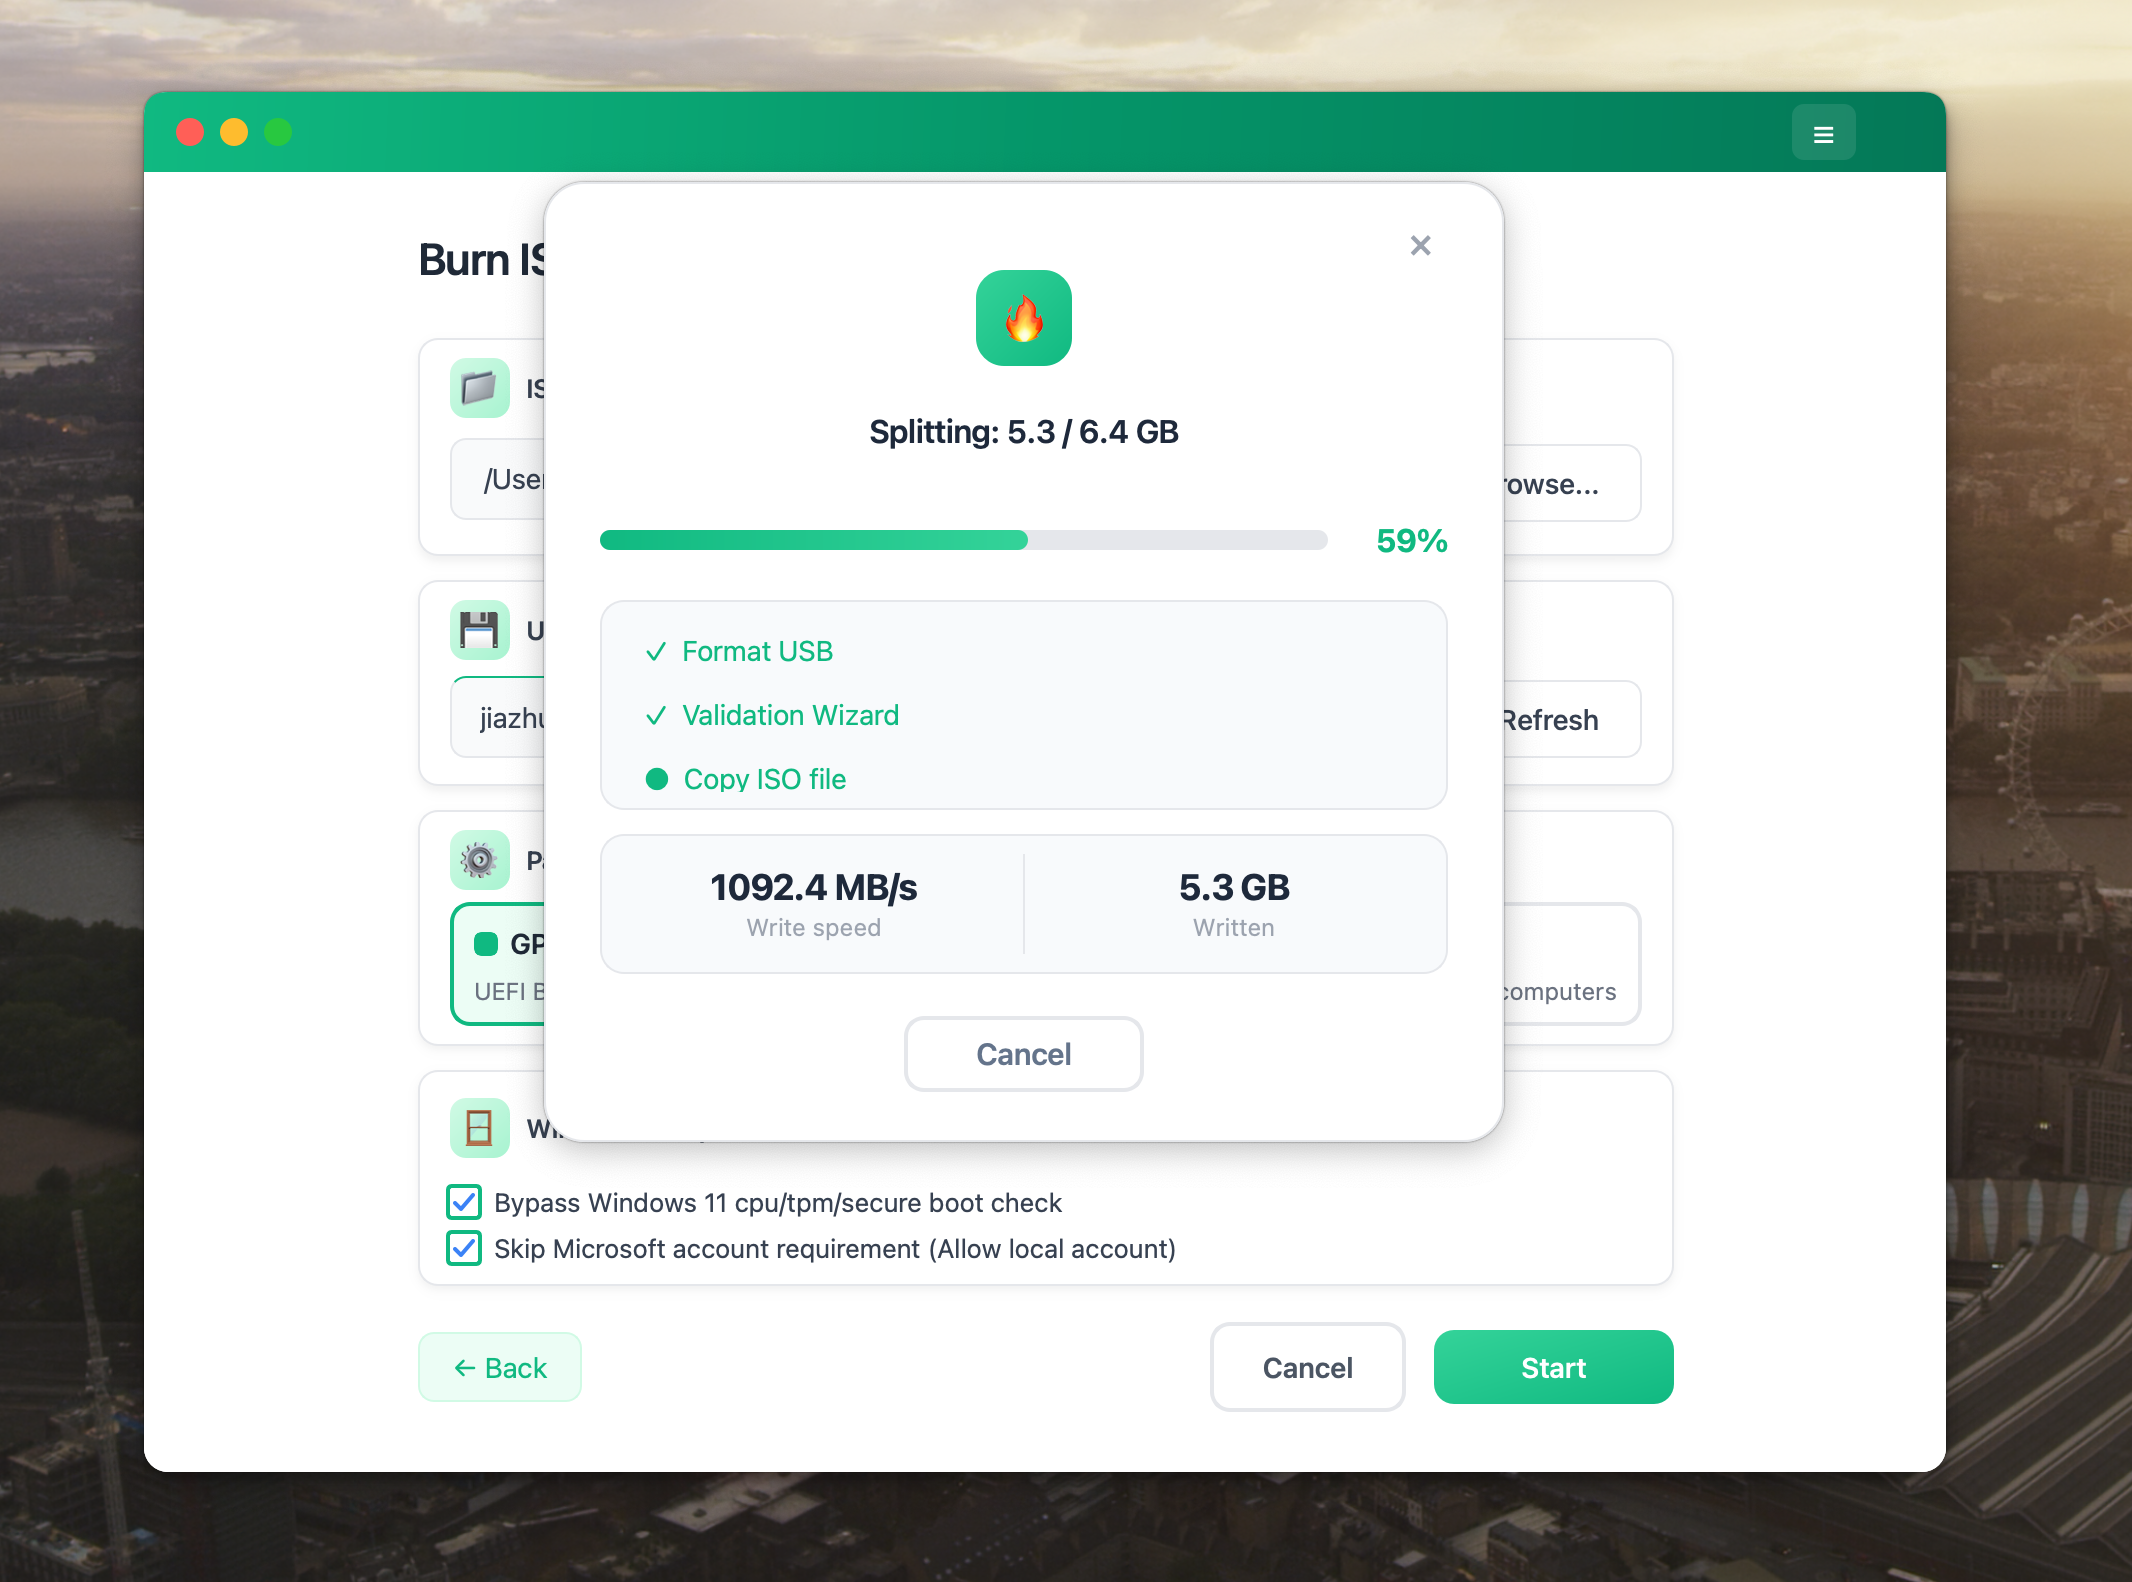
During the process, keep the USB connected and avoid closing the application.
The exact time depends on the USB drive, but mine was finished without any errors.
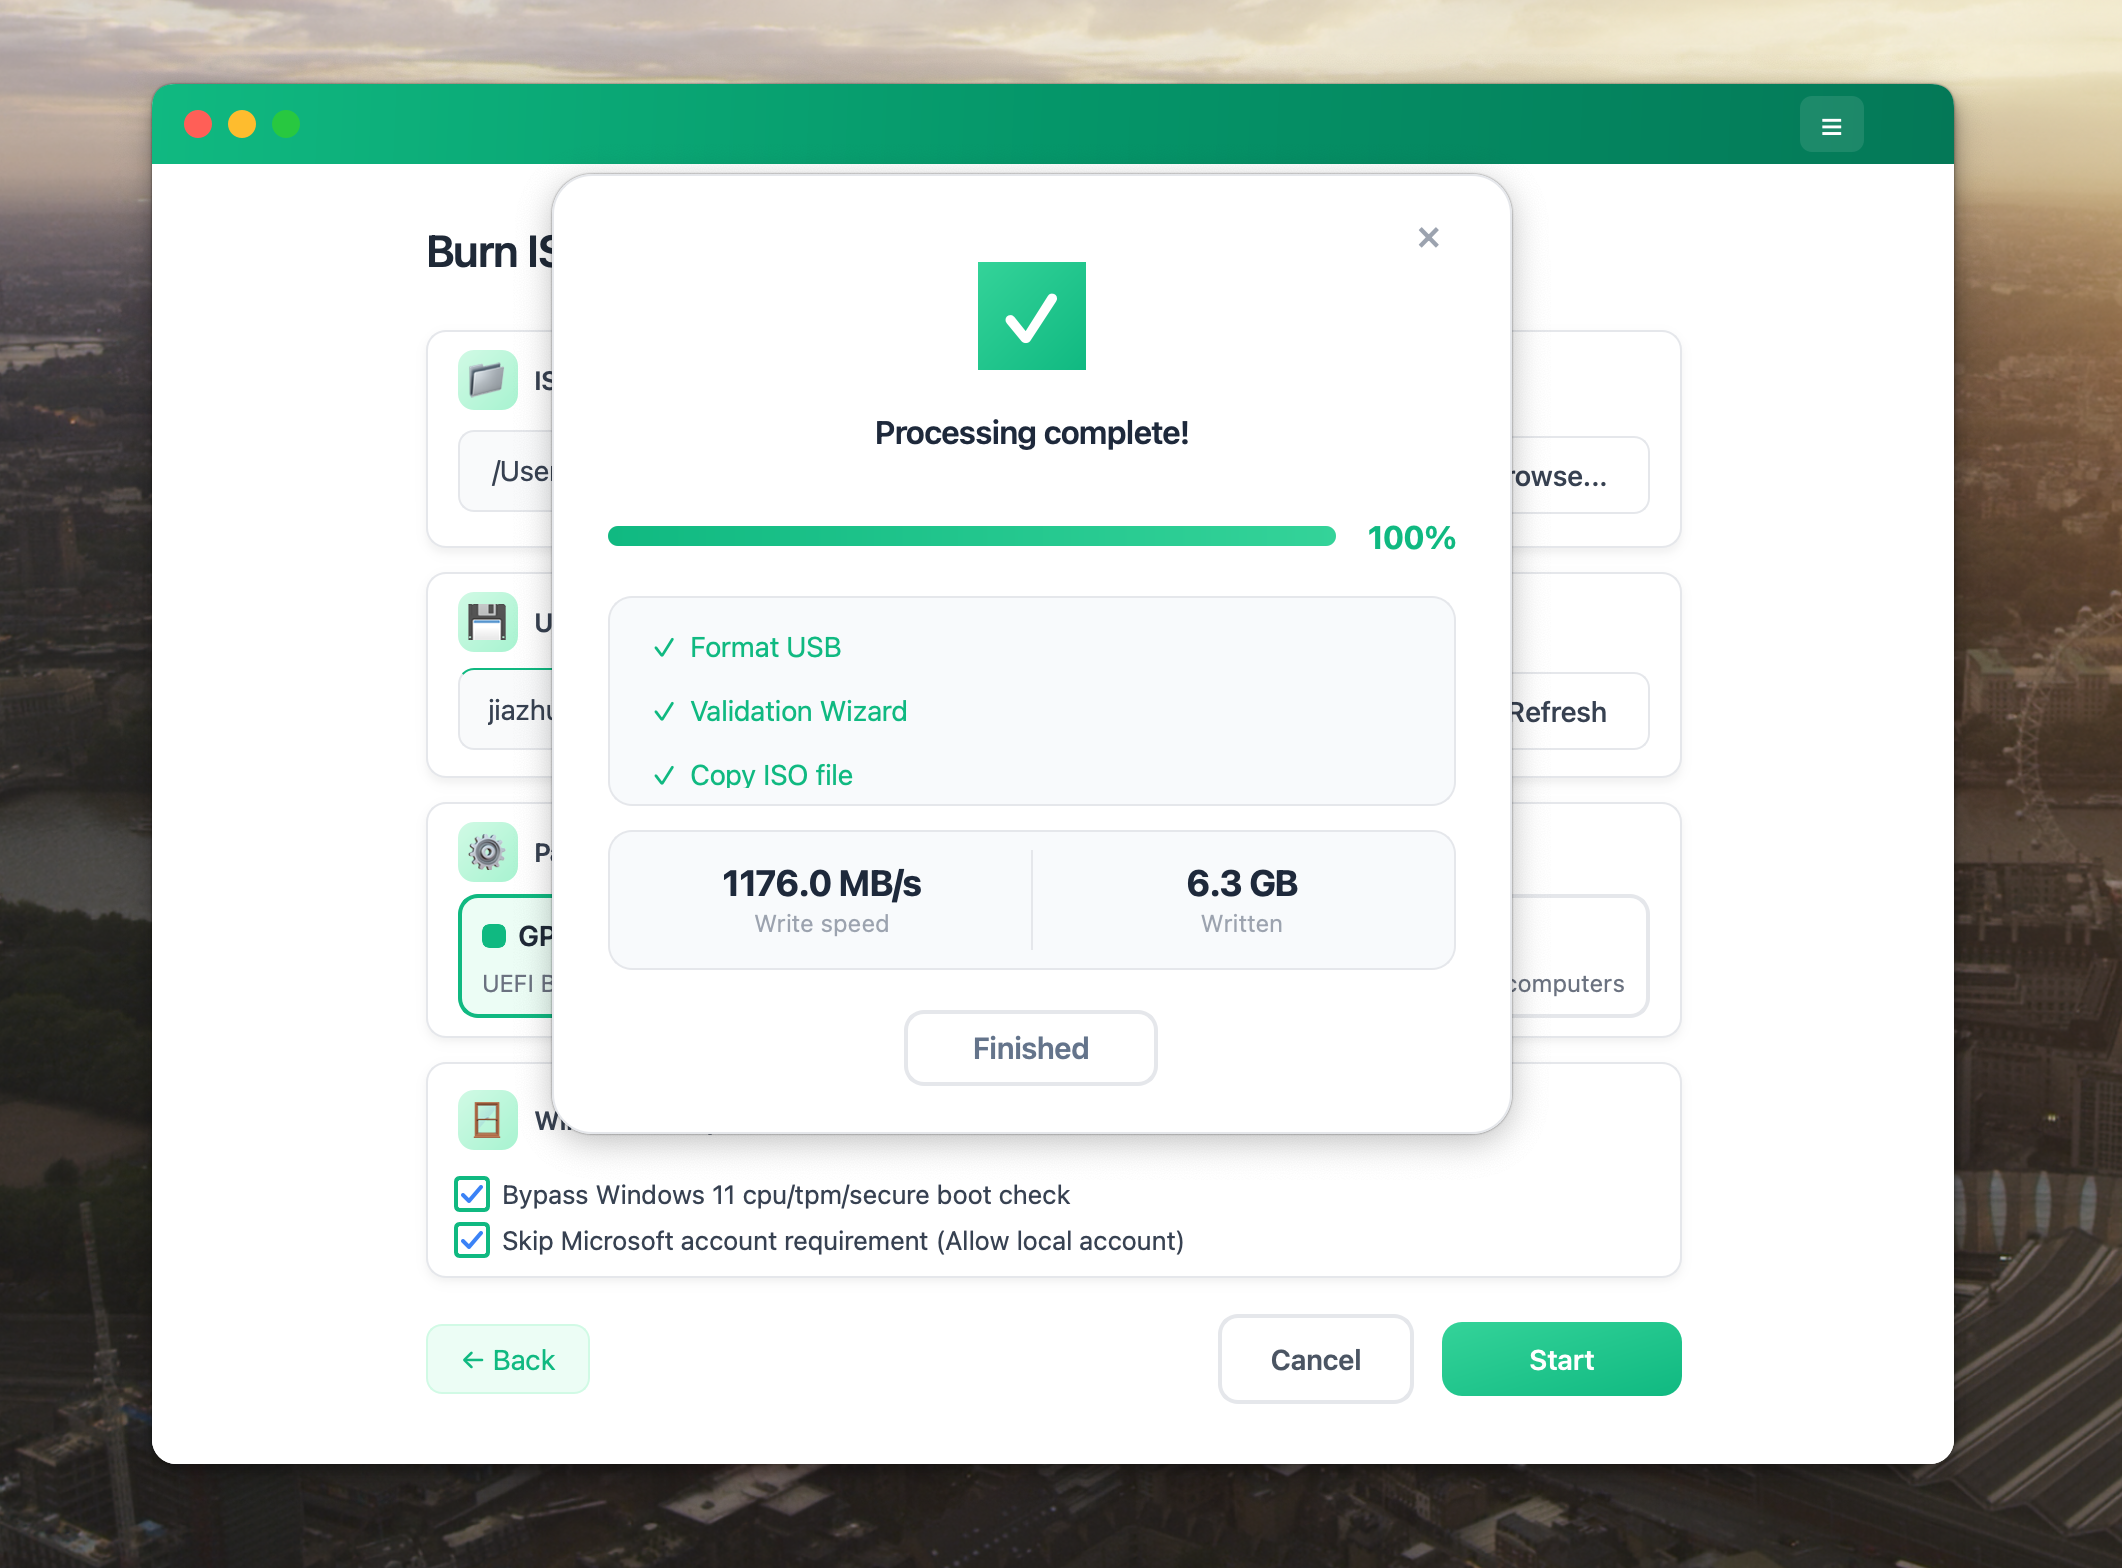
You can download WonderISO here for free.
Step 6: Boot the PC From the USB
When WonderISO shows that the process is complete, safely eject the USB and connect it to the Windows PC.
Turn on the computer and open the boot menu. Common keys include:
- F2
- F11
- F12
- Esc
- Delete
Select the USB drive from the menu.
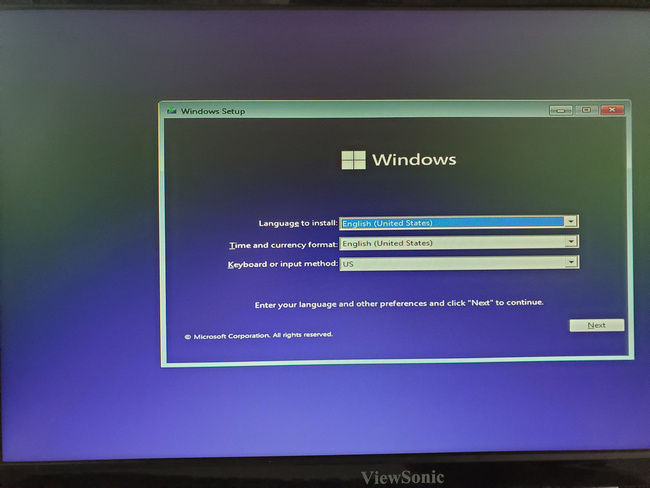
The computer should then load the Windows Setup screen. From there, you can install Windows 10 or Windows 11, or open the repair tools if you are fixing an existing system.
My Thoughts After Using It
WonderISO saved me from dealing with Terminal commands and manual file splitting.
The whole process was basically selecting an ISO, choosing the USB drive, picking UEFI, and clicking Start. The USB worked on the first attempt and successfully opened Windows Setup. The only thing you really need to be careful about is selecting the correct USB drive, since the program erases it before writing the Windows files.
Try WonderISO for free:
Final Thoughts
You can create a Windows bootable USB on Mac manually, but the process is not always beginner-friendly. WonderISO is a good choice when you want a graphical tool that handles the formatting, boot settings, and large Windows installation files for you.
Based on my experience, it is especially useful when your Windows PC is not working and your Mac is the only computer available to create the recovery or installation USB.