Whether you’re making a tutorial, capturing a Zoom moment, or recording part of a gameplay stream, sometimes you don’t want to record your entire screen—just a specific section of it.
Good news: if you’re on Windows 10 or 11, there are easy ways to screen record a certain area without needing complicated setups. In this blog, I’ll walk you through the best way to do it smoothly and with great quality.
Why Record Just a Part of the Screen?
Recording a specific window or area helps you:
-
Stay focused on what matters (no desktop clutter)
-
Save file size and editing time
-
Keep private stuff off the recording
Built-in tools like Xbox Game Bar are great for full-screen game capture, but when it comes to custom area recording? You’ll need something a little better.
Best Tool for the Job: Aiseesoft Screen Recorder
After testing a bunch of options, Aiseesoft Screen Recorder stood out as the most reliable and user-friendly. It’s lightweight, super easy to use, and—most importantly—it lets you record any part of your screen with just a few clicks.
Step 1: Download and install
Head over to Aiseesoft Screen Recorder and install it on your Windows 11 / 10 PC.


Step 2: Open Screen Recorder Software
Launch the software from desktop shortcut or start up. You will see a couple of options from the main interface. You can turn on webcam or Microphone during the process. They are turned off by default.
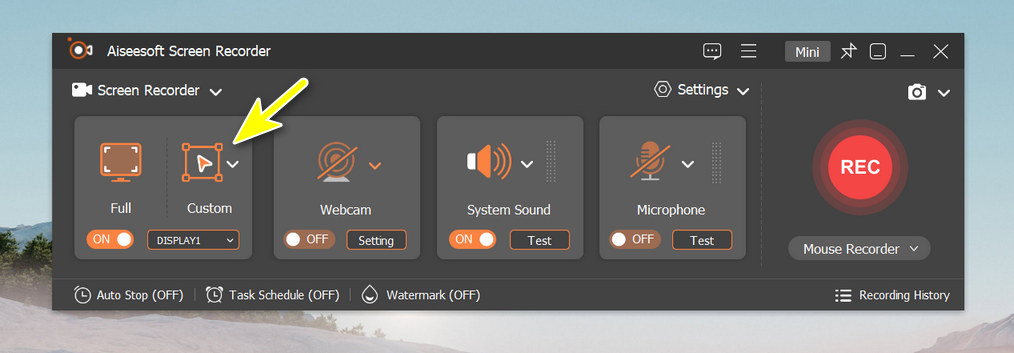
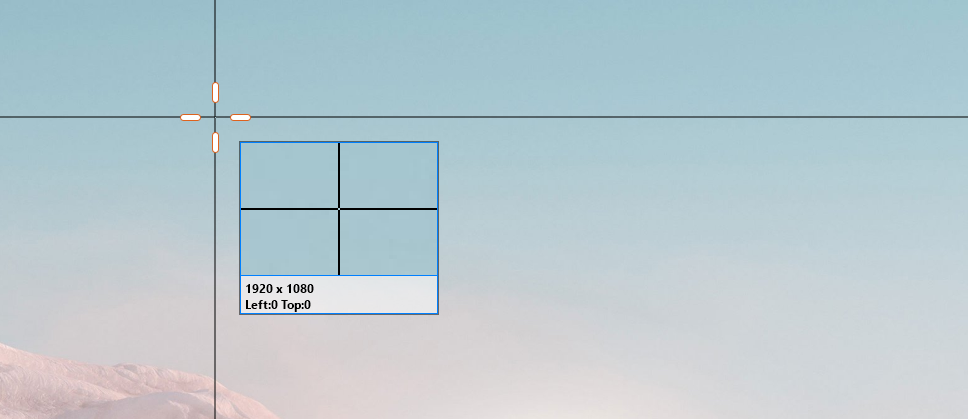
Step 3: Select the Recording Area
Click the "Custom" icon at the left and drag your cursor to select the exact area you want to record.
Step 4: Start Recording the Area
Click the REC button at the right side to start recording the selected area. You can also use hotkeys to control it hands-free. During the recording process, you can see a navigation bar floating on the screen all the times.

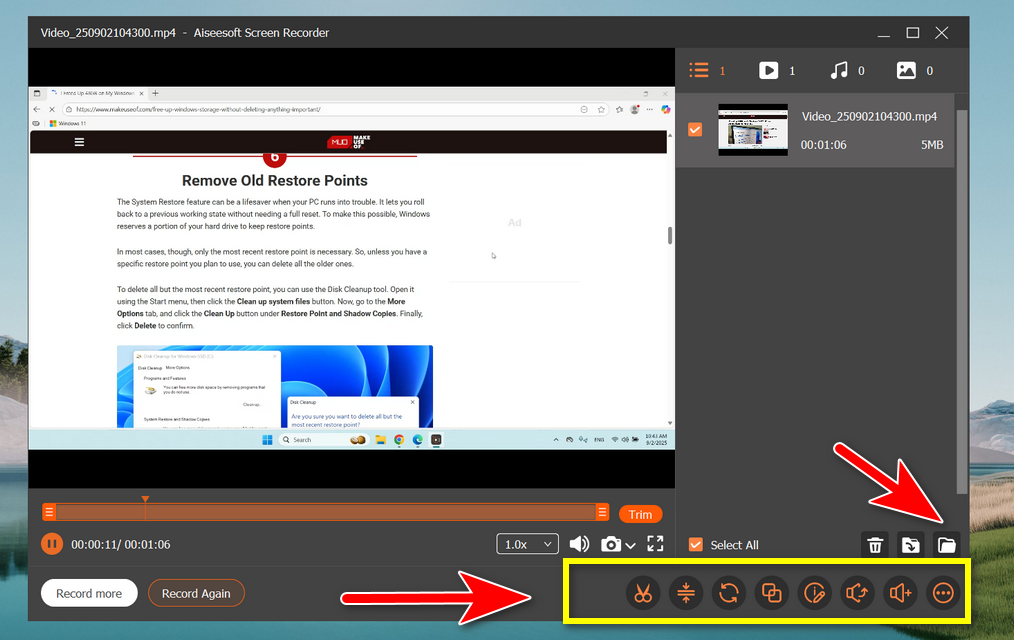
Step 5: Save and Edit
After stopping the recording, you’ll have the option to preview and trim your video. Aiseesoft also allows you to save the file in various formats, depending on what you need (MP4, MOV, AVI, etc.).
Bonus Features You’ll Love
-
Schedule recording (perfect for webinars)
-
Real-time drawing and annotations
-
Export to high-quality formats (MP4, WMV, MOV, etc.)
-
Mouse click effects and keystroke tracking
Final Thoughts
When it comes to recording a specific part of your screen on Windows 10, Aiseesoft Screen Recorder just makes life easier. It’s fast, flexible, and gives you clean, professional-looking recordings without extra editing.
Whether you’re making tutorials, recording classes, or just saving something for later—this tool gets the job done.
Give it a shot and level up your screen recording game!