

So, you’ve finally decided to replace that old, slow HDD with a faster SSD? Good move. This is probably one of the most noticeable upgrades you can make to a Windows 10 PC. Your system boots faster, apps open quicker, and the whole computer feels much more responsive.
But there’s one big question: what happens to your Windows system, installed programs, personal files, and settings?
The good news is that you don’t need to reinstall Windows from scratch. With CloneFox, you can clone your HDD to an SSD and move everything over, including Windows 10, applications, partitions, and personal data.
What You’ll Need
Before you start, prepare the following:
- Your old HDD and new SSD
Make sure the SSD has enough space to hold the used data on your current HDD. The SSD does not always need to be the same size as the HDD, but it must be large enough for the actual used space. - CloneFox
CloneFox is a disk cloning tool designed for Windows users who want to migrate systems, clone entire disks, or copy specific partitions without complicated steps.
Step 1. Connect the SSD to Your Computer
First, connect the new SSD to your PC.
- For a desktop computer, you can open the case and connect the SSD to the motherboard using a SATA cable. You also need to connect the SSD to the power supply.
- For a laptop, the easiest way is usually to use a USB-to-SATA adapter or an external SSD enclosure.
Before cloning, confirm that Windows can detect the SSD. You can check this in Disk Management.
Step 2. Open CloneFox,Select the Source HDD
Download , install and launch CloneFox on your Windows 10 computer. In CloneFox, choose Disk Clone. Then select your current HDD as the source disk. This is the drive that contains your Windows 10 system, programs, and personal files.
Download CloneFox here:

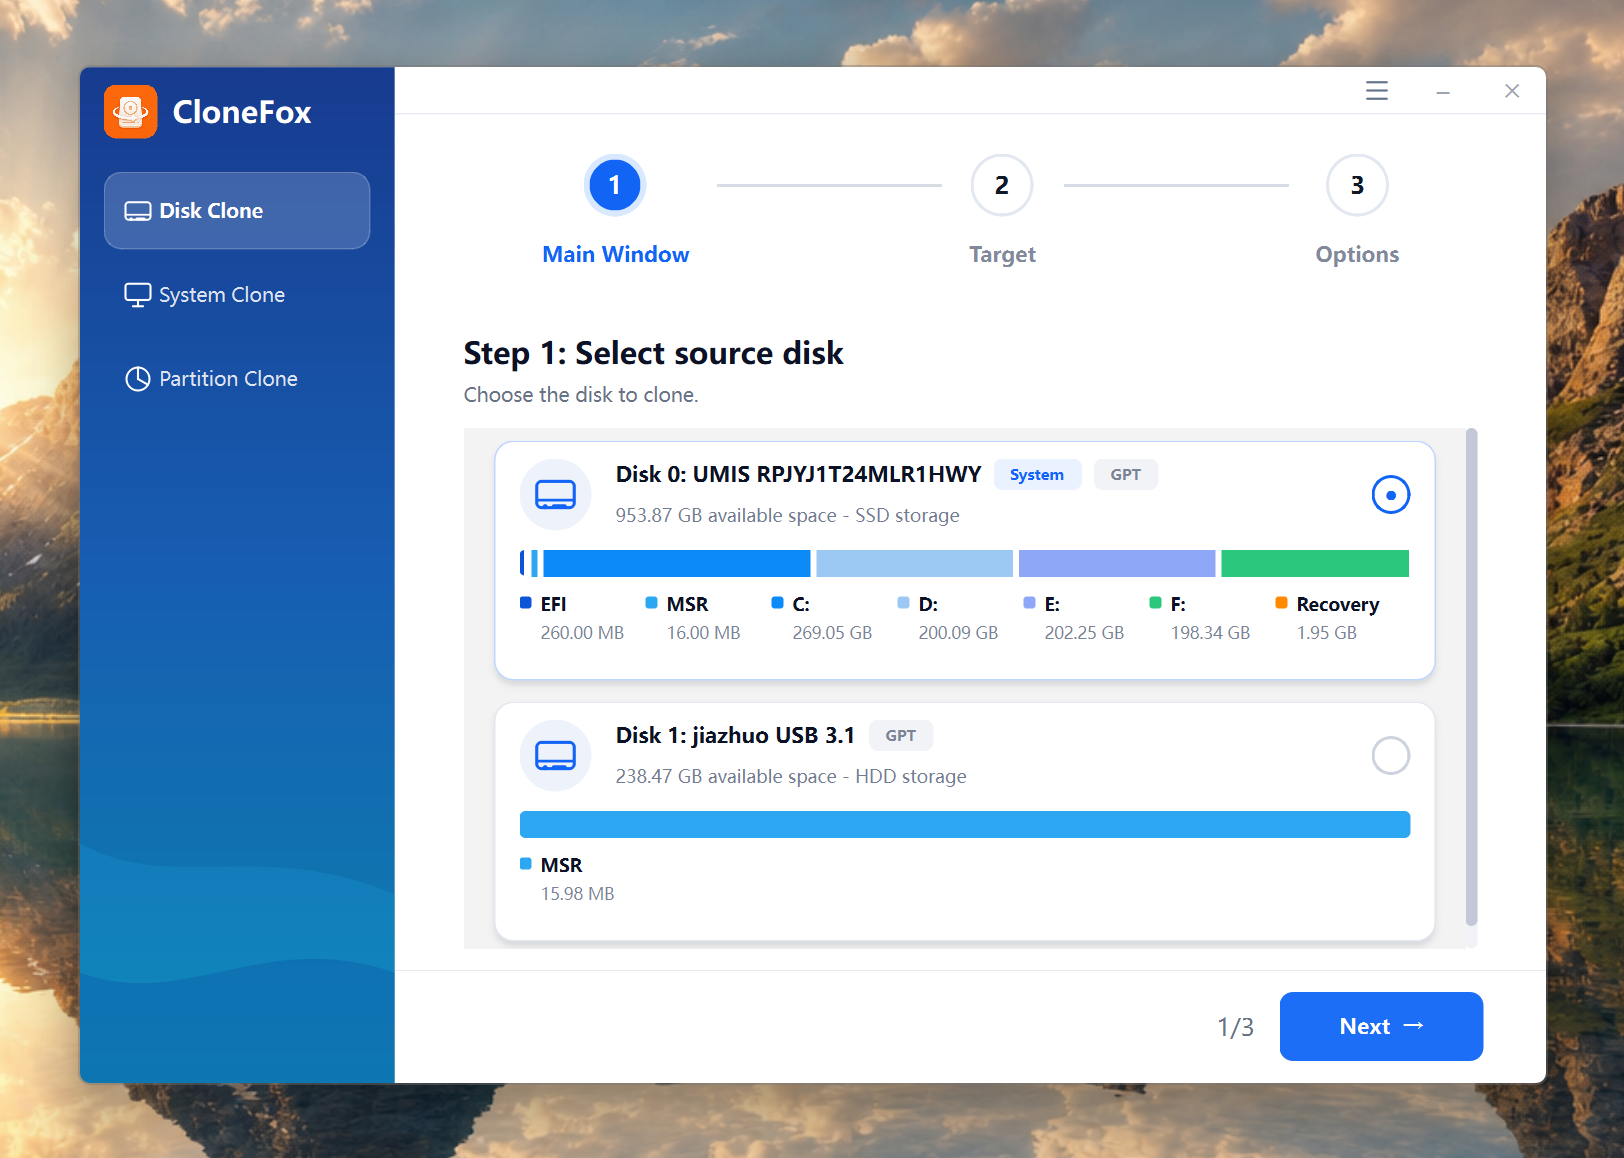
Be careful here. The source disk is the disk you want to copy from.
Step 3. Select the Target SSD
Next, select your new SSD as the destination disk. CloneFox will show a warning that all data on the target SSD will be erased during the cloning process. This is normal because the SSD needs to be overwritten with the cloned data from your HDD.
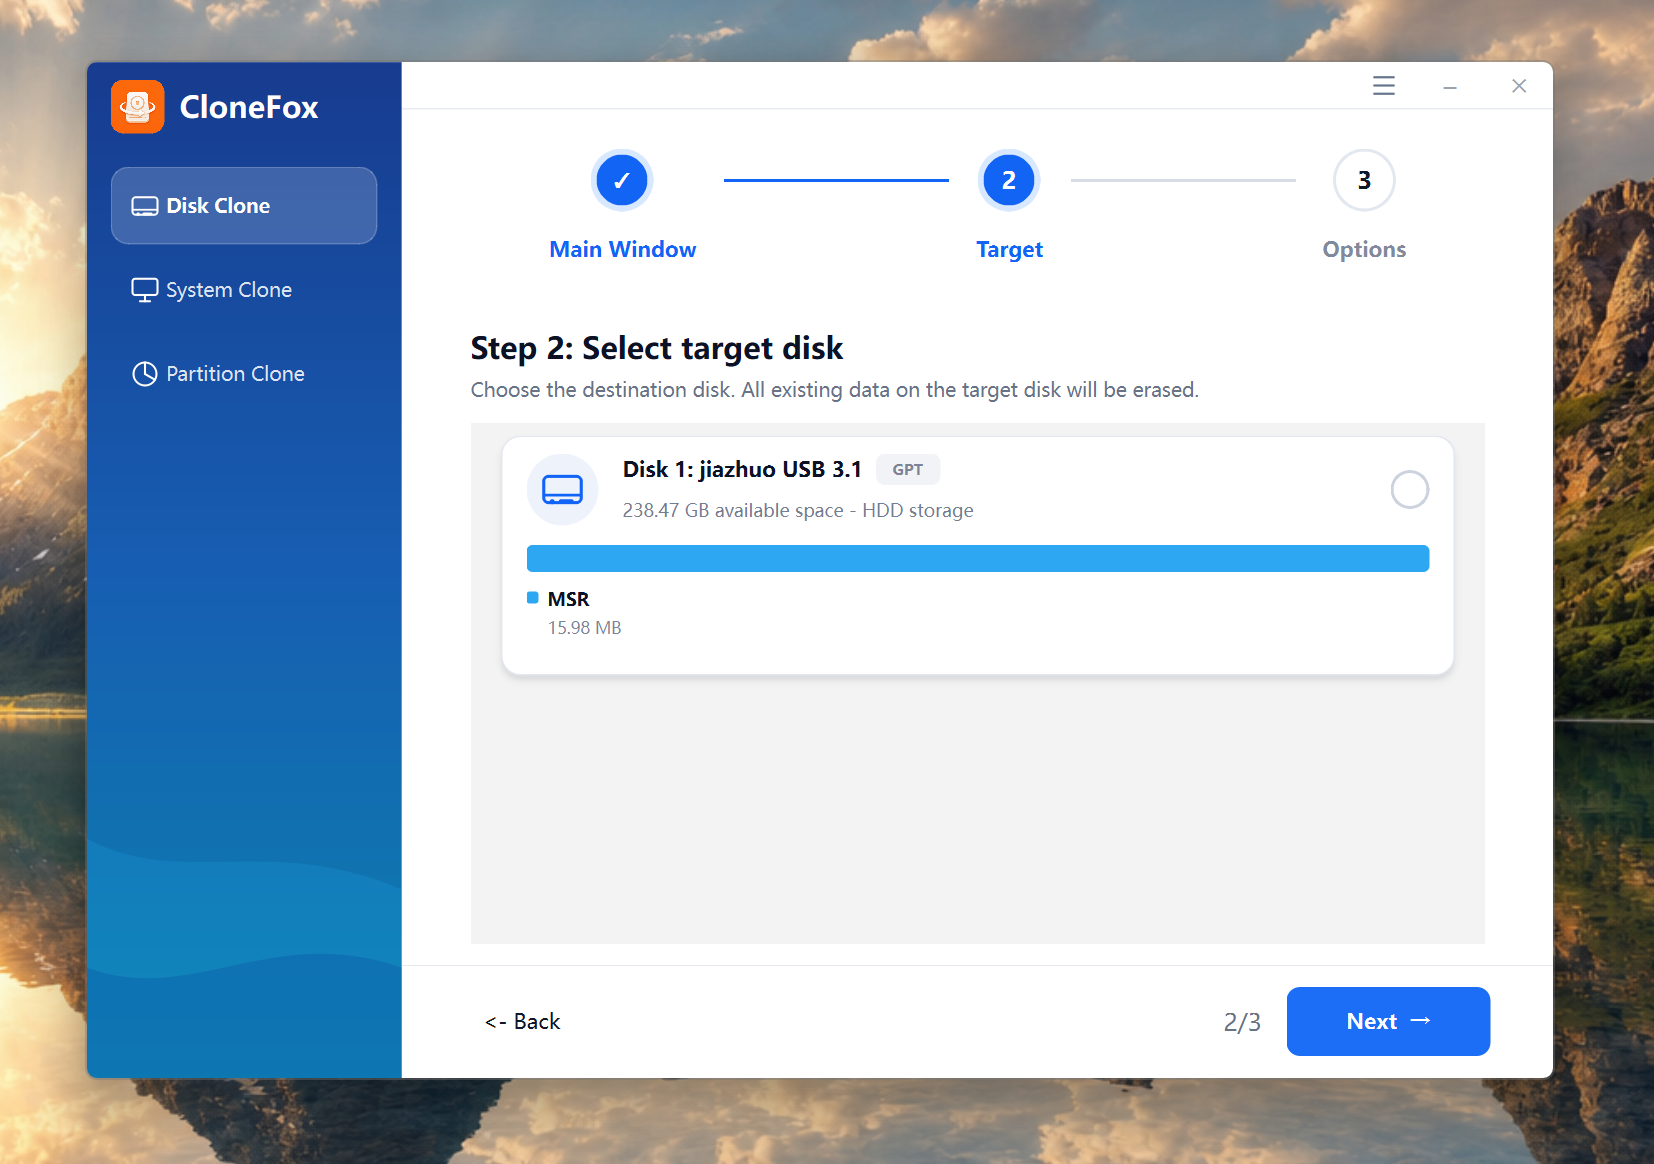
If there are important files on the SSD, back them up before continuing.
Step 4. Configure and Confirm
On the Options page, check that the source disk and target SSD are selected correctly. Keep the recommended clone settings enabled, such as Smart Clone and 4K alignment, then click Proceed to start cloning.
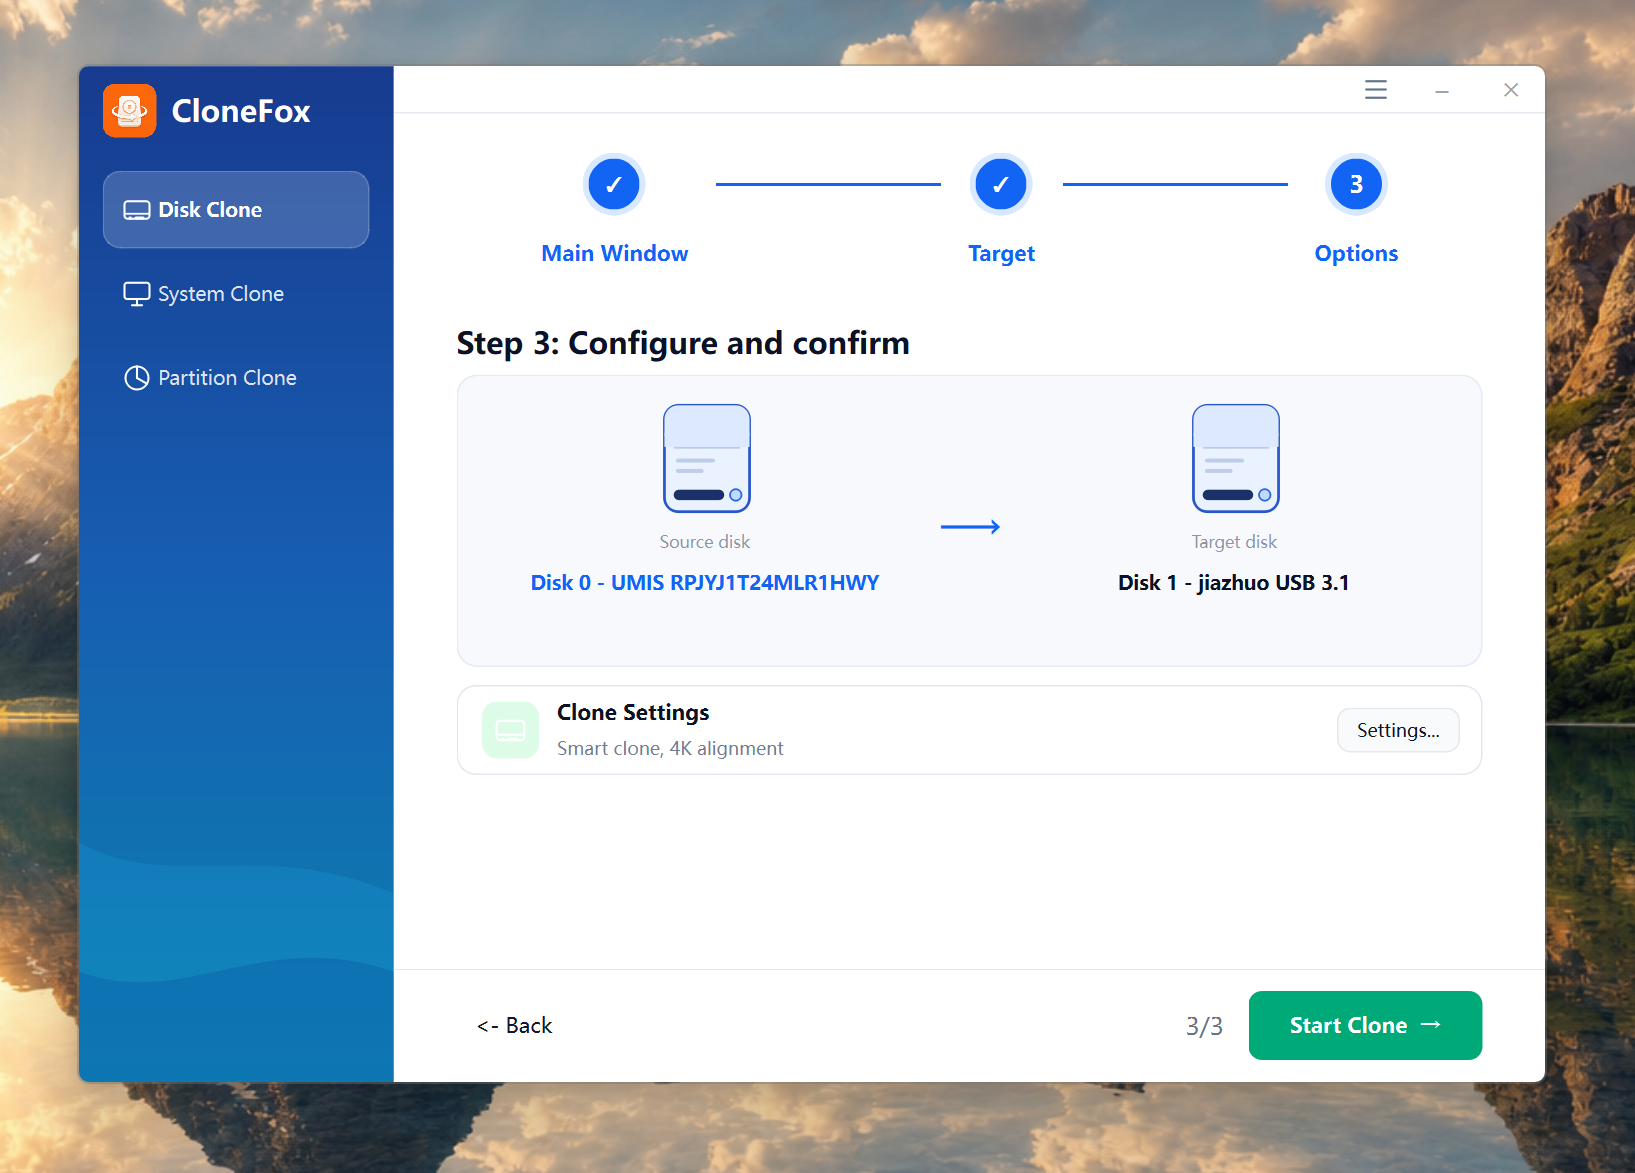
Step 5. Start Cloning
After confirming the source disk, target SSD, and layout settings, click Start Clone or Proceed. CloneFox will begin copying your HDD to the SSD. During this process, avoid shutting down the computer or disconnecting the SSD.
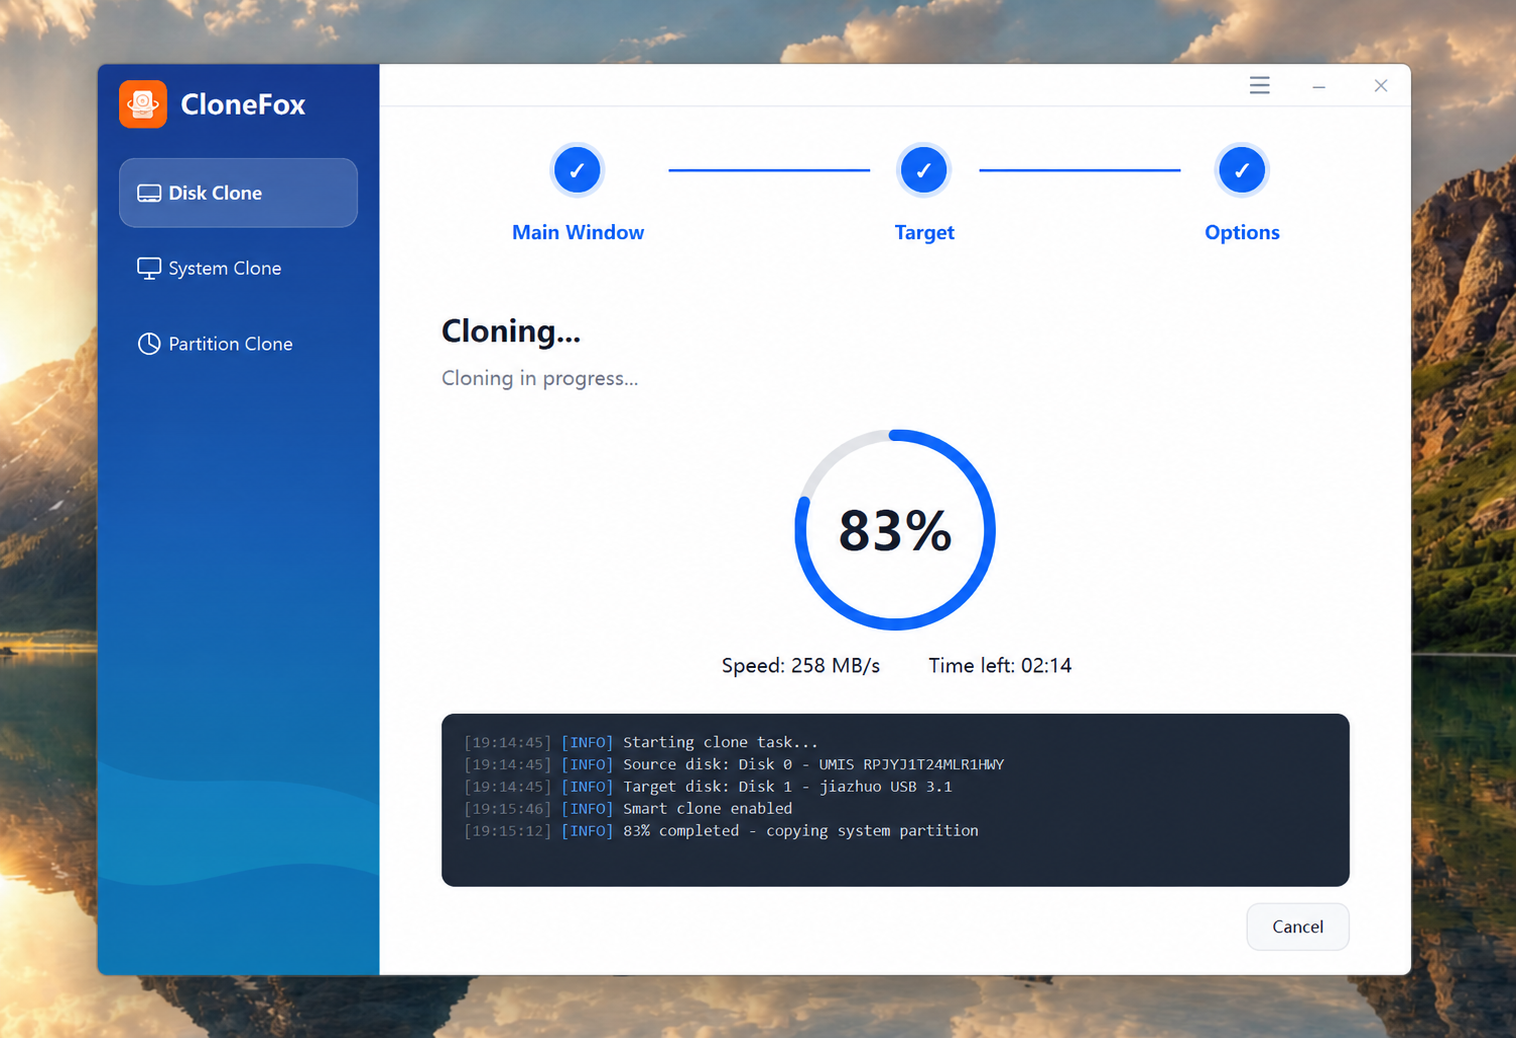
The cloning time depends on your data size and connection type. A SATA connection is usually faster than USB.
Download CloneFox here:
Step 6. Boot from the Cloned SSD
Once the cloning process is complete, you need to boot your computer from the new SSD.
Option 1: Keep Both the HDD and SSD
- Restart your PC and enter BIOS or UEFI settings. This is usually done by pressing F2, F8, F10, F12, Delete, or Esc during startup.
- In the boot menu, set the SSD as the first boot drive.
- Save the settings and restart your computer.
Option 2: Replace the Old HDD with the SSD
If you are using a laptop or only want to keep the SSD, shut down the computer, remove the old HDD, and install the SSD in its place. Then start the computer normally. If the cloning was successful, Windows 10 should boot from the SSD just like before, but much faster.
Final Thoughts
Upgrading from HDD to SSD is one of the easiest ways to make a Windows 10 PC feel new again. With CloneFox, you don’t have to reinstall Windows, set up your apps again, or manually move everything piece by piece.
Just connect the SSD, choose the source and target disks, adjust the layout, and let CloneFox handle the cloning process.
After that, boot from the SSD and enjoy a much faster Windows experience.