

I have an old Windows 10 PC that has been used for many years. Recently, I built a new computer with a faster CPU, more RAM, a new SSD, and a better graphics card.
The problem was: I didn’t want to reinstall Windows and all my programs from zero. I wanted to move everything from the old computer to the new one, including Windows, apps, files, desktop settings, and personal data.
After checking a few options, I decided to use CloneFox to migrate the system.
Why I Chose System Migration
Reinstalling Windows sounds clean, but it takes too much time. You have to reinstall programs, copy files, set up browsers, log into accounts, and adjust settings again. For me, cloning the old Windows system was easier. With CloneFox, I could move the existing Windows 10 system to the new SSD and keep most things the same.
What I Prepared
Before starting, I prepared:
A new SSD
The old Windows 10 PC
CloneFox app
A USB-to-SSD adapter or enclosure
Even if you are cloning the whole drive, it is still better to back up important files first.
Step 1: Connect the New SSD
First, I connected the new SSD to the old computer. You can connect it with a USB adapter, SSD enclosure, or install it directly inside the PC. After that, I checked that Windows could detect the new SSD.
You can download and install CloneFox below before starting.

Step 2: Open CloneFox and Select the Source Drive
Then I opened CloneFox and chose System Clone. In CloneFox, I selected my old Windows 10 drive as the source drive. This is the drive that contains my current Windows system, installed programs, files, and settings. Usually, it is the disk that has the C: drive on it. I checked the drive size and name carefully to make sure I selected the correct old drive.
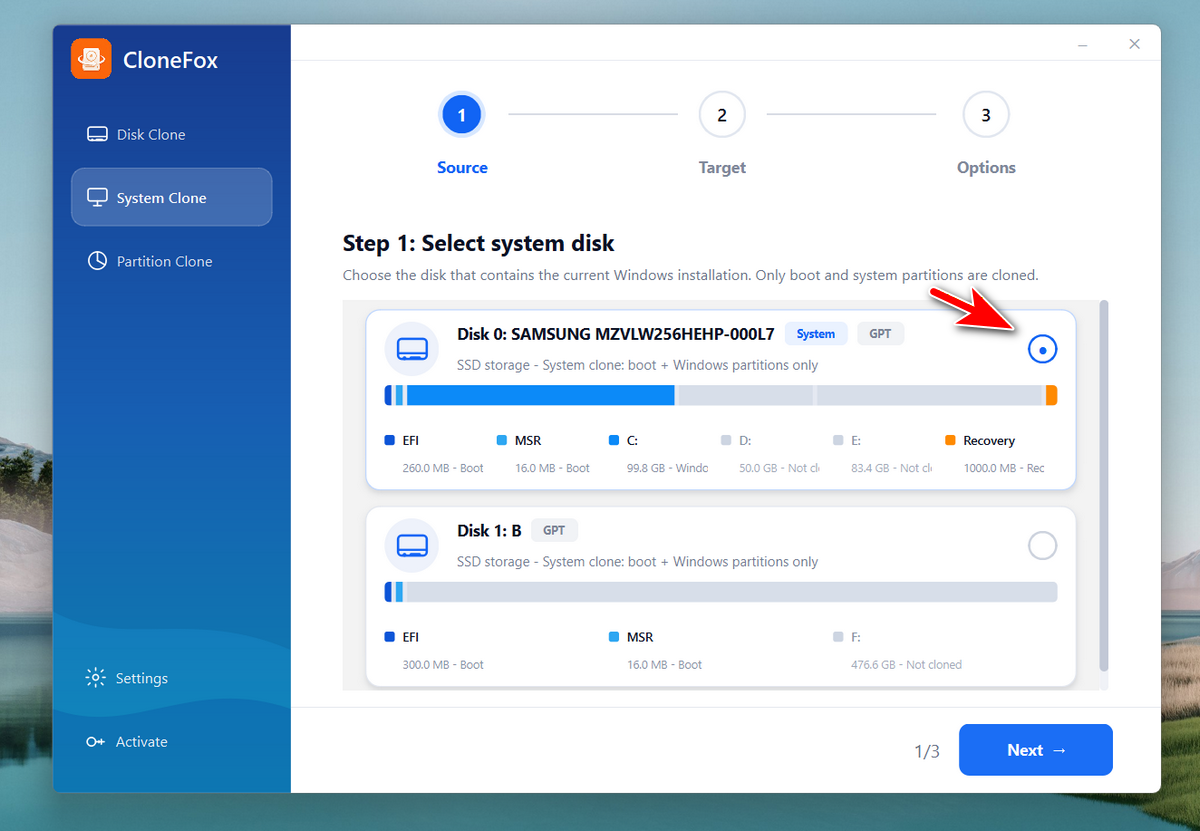
This option is made for moving Windows to another drive. It can copy the Windows system, boot partitions, installed programs, files, and settings.
Step 3: Select the Target Drive
Next, I selected the new SSD as the target drive. This is the drive where Windows 10 will be migrated to. One important thing to remember: the target drive will be overwritten during the cloning process. So before clicking Next, I made sure there were no important files on the new SSD.
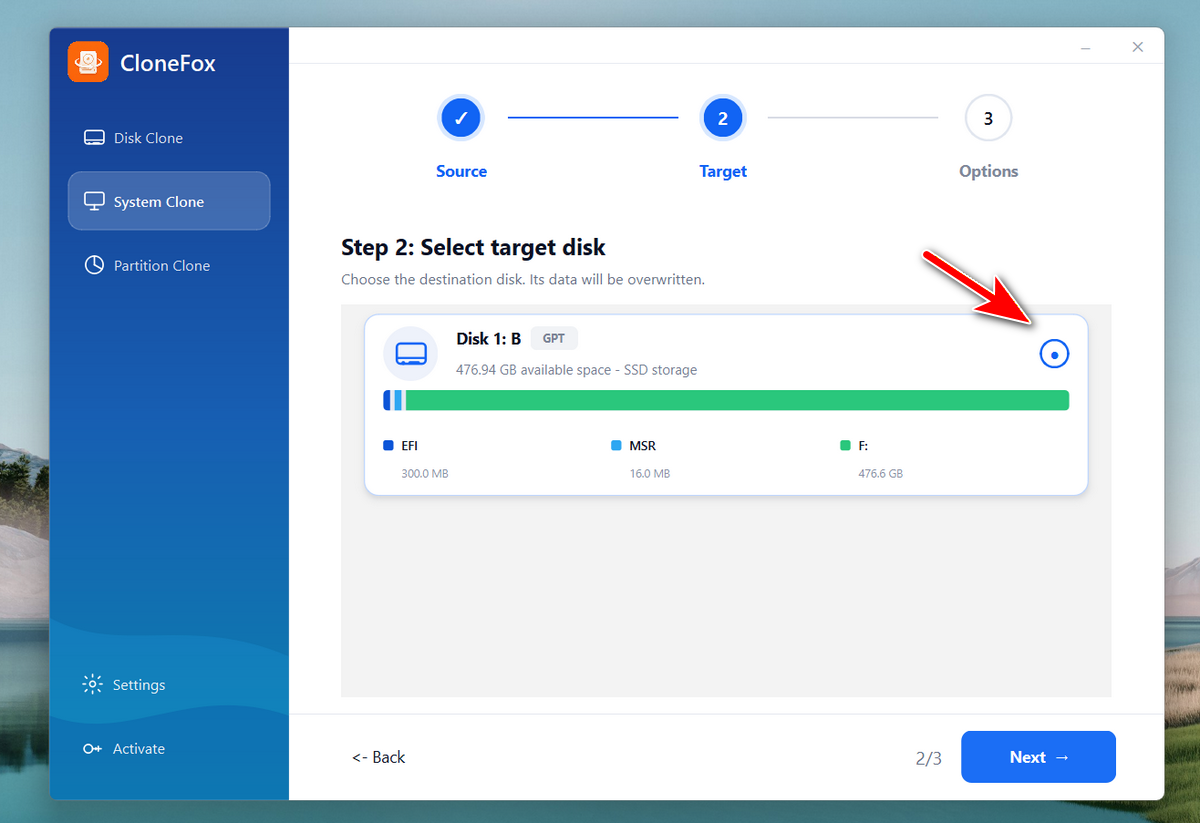
After confirming the source and target drives, I started the clone.
Step 4: Start the Clone
I kept the default options and started the clone. CloneFox handled the system migration automatically. I just waited until the process finished.
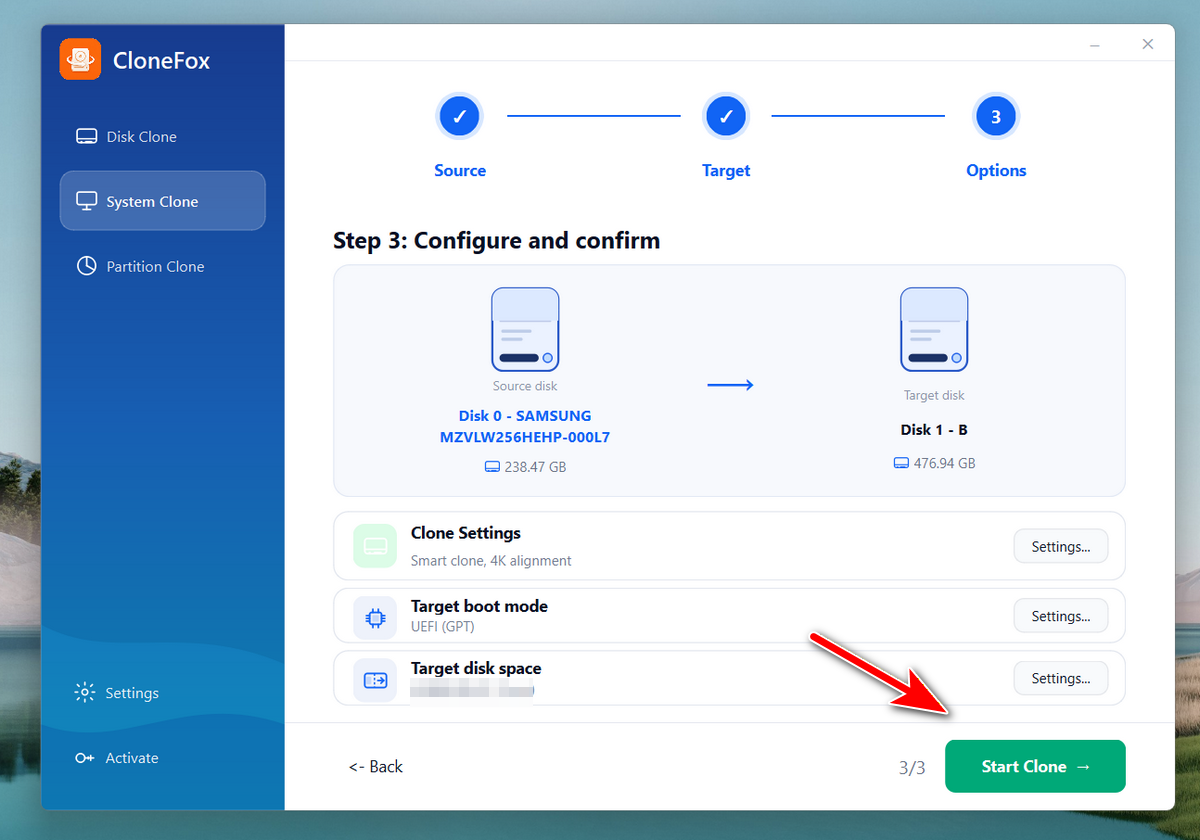
Do not unplug the SSD or shut down the computer during cloning.
5. Complete the Clone
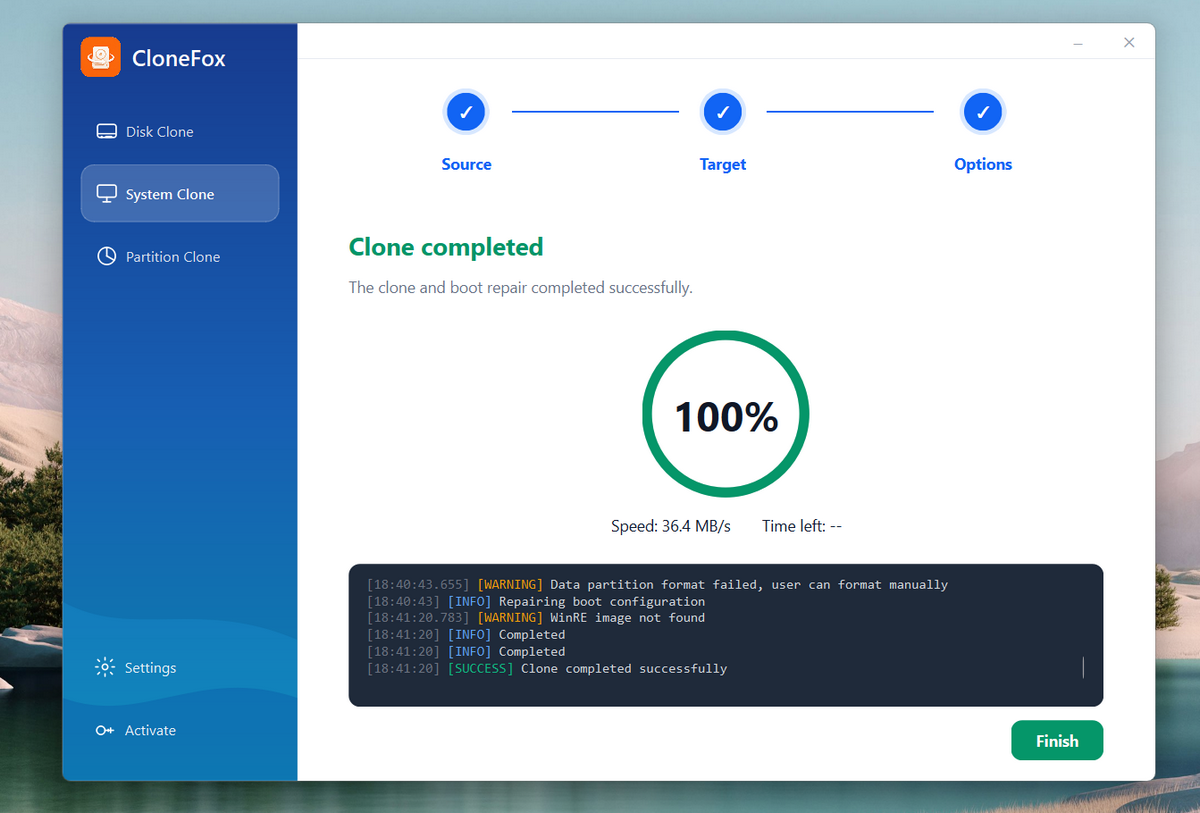
When the cloning process reaches 100%, CloneFox will show that the clone and boot repair have been completed successfully. You can check the final status and log information to make sure there are no critical errors before shutting down the PC and booting from the new SSD.
Step 6: Install the SSD in the New Computer
- After the clone finished, I shut down the old PC and installed the cloned SSD into the new computer.
- Then I entered BIOS and set the new SSD as the first boot drive.
- The first boot took a little longer because Windows was detecting the new hardware.
Step 6: Check Windows and Drivers
After Windows started, I checked my files, programs, and settings. Most things were still there. Because the new computer had different hardware, I installed the latest motherboard, network, and graphics drivers.
Now, download CloneFox and give it a try!
Final Thoughts
If you want to transfer Windows 10 to a new computer without reinstalling everything, cloning is the easiest way.
CloneFox made the process simple for me. I didn’t need to reinstall Windows, copy files manually, or set up all my apps again.
My suggestion is:
Clone Windows 10 first
Boot it on the new computer
Install drivers
This way is safer and less stressful than doing everything at once.