Let’s be real: dealing with legal stuff is stressful enough, so the last thing you need is to fight with your phone just to get those text messages printed for court. Whether it’s for evidence, records, or just to cover your own back, you want something that works fast and doesn’t get complicated.
I’ve been in this boat before, and honestly, after trying a couple of “free” apps that either crashed or spammed me with ads, I found TunesBro DroidGeeker. It’s been a lifesaver—it just works, and it’s way less hassle than most other methods I’ve tried.
Why Use DroidGeeker for This?
DroidGeeker is super straightforward and doesn’t require any weird setup or tech wizardry. It can handle pretty much any Android phone, and the best part? Your messages stay readable and well-formatted, which is pretty important if you’re handing them over to a judge or lawyer.
Step-by-Step: Printing Android Text Messages for Court
What You’ll Need:
-
Your Android phone
-
A computer (Windows or Mac)
-
A USB cable
-
TunesBro DroidGeeker (grab it from the official website)
Here’s What to Do:
You can directly download DroidGeeker app below, then install it. It’s your basic “next, next, done” setup.


Step 1. Use your USB cable to connect your phone to your computer. You might need to enable USB debugging on your phone (the app will tell you how if you’re not sure).

Step 2. Connect your Android device to the computer using a USB cable.
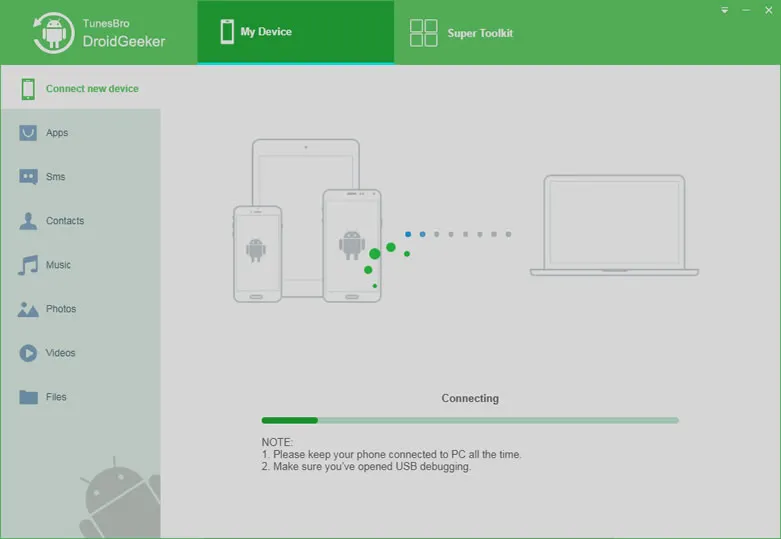
Step 3. Enable USB Debugging:
- If you haven’t enabled USB debugging on your Android device, you might need to do so. USB debugging allows the software to access your device’s data.
- You can enable USB debugging in the "Developer options" section of your Android device’s settings. If you don’t see "Developer options," go to "About phone" and tap on the build number several times to unlock it.
Step 4. In the software on your computer, you should see various data types that can be transferred. Look for "Messages" or "Text Messages" and select it.
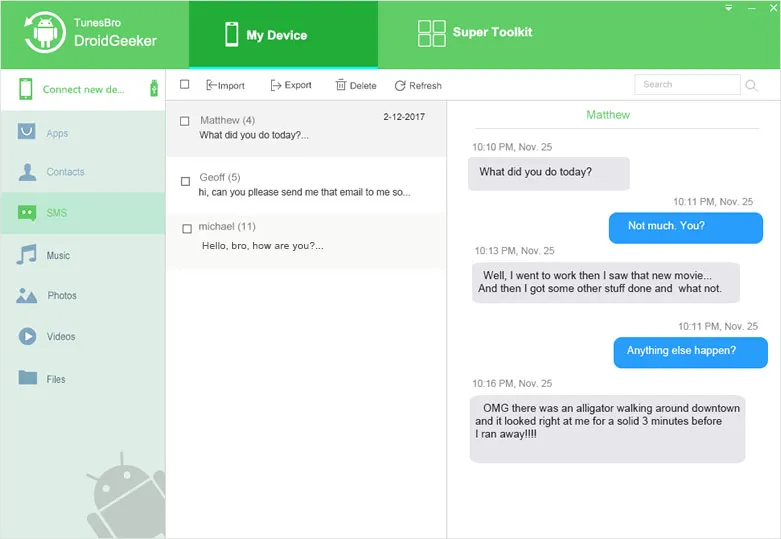
Step 5. Follow the prompts to start the transfer process. The software might analyze your device’s data and display a preview of the text messages that can be transferred.
Step 6. Select the text messages you want to transfer. You might have options to select specific conversations or individual messages.
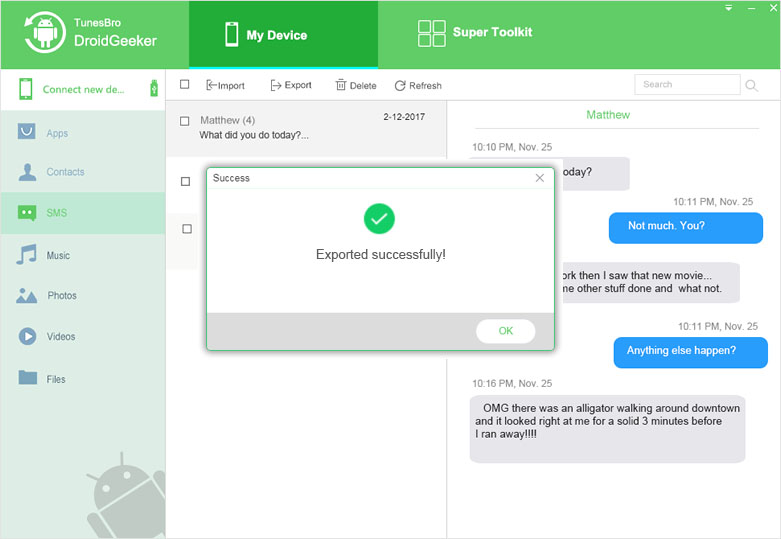
Step 6. Once the transfer is complete, go to the destination folder on your computer to verify that the text messages were successfully transferred.
Step 7. Open the file on your computer. If it’s HTML, open it in your browser. Double-check everything is there (timestamps, numbers, etc.), then just click ‘Print’ from your browser menu.
Bonus Tips
-
Highlight Important Messages: Before printing, you can highlight or circle important messages in the file, or just print those specific pages for court.
-
Include Timestamps & Names: DroidGeeker keeps all this info visible—very handy for legal stuff.
-
Keep a Backup: Always keep a digital backup of your exported messages, just in case the court needs an electronic copy too.
That’s It!
Honestly, the whole process is way less scary than it sounds. DroidGeeker takes care of all the tricky parts. Once you’ve got your messages printed and neatly organized, you’ll feel a lot better walking into court knowing you’ve got solid records in your hands.
If you’re facing this for the first time, don’t stress—just follow the steps above, and you’ll be sorted. Good luck!