Table of Contents
Whether you’re looking to backup some of your favorite photos, share a bunch of documents with a colleague, or simply free up some space on your Mac, zipping files is a convenient method. While many Mac users zip files using the built-in Finder options or third-party apps. One popular method of file compression on Mac is using the Terminal. The Terminal offers various commands and functions that allow users to manipulate files and folders efficiently. In this blog post, we will explore the challenge of zipping files on Mac using Terminal and provide detailed methods and alternatives for achieving this task.
The Challenge of Zipping Files on Mac using Terminal
Zipping files on Mac using Terminal may seem like a daunting task for many users, especially those who are not familiar with command-line interfaces. However, this method offers several advantages, such as faster compression and unzipping speeds, and the ability to automate and script the process. Despite these benefits, there are a few challenges that users may face. Let’s take a look at some of these challenges:
- Compatibility: The Terminal commands may vary depending on the version of macOS you are using, which can lead to confusion and errors.
- Complexity: The command-line interface can be intimidating for users who are not tech-savvy. Memorizing the commands and understanding their syntax can be a challenge.
- No Graphic User Interface (GUI): Unlike traditional file compression software, such as WinZip or 7-Zip, the Terminal does not provide a graphical user interface, which may be more intuitive for some users.
Video Tutorial:
Is It Safe to Zip Files on Mac using Terminal?
Before we dive into the methods of zipping files on Mac using Terminal, it’s important to address the concern of safety. Many users worry that using Terminal commands might result in data loss or corruption. However, when used correctly, zipping files with Terminal is a safe process.
To ensure the safety of your files, it’s essential to follow the instructions carefully and double-check the commands before executing them. Additionally, it’s always a good practice to create a backup of your files before attempting any modifications. With that said, let’s explore two methods of zipping files on Mac using Terminal.
Method 1: How to Zip Files on Mac using Terminal (zip command)
Method 1 involves using the "zip" command in Terminal to compress files and folders. Follow these steps to zip a file on Mac using Terminal:
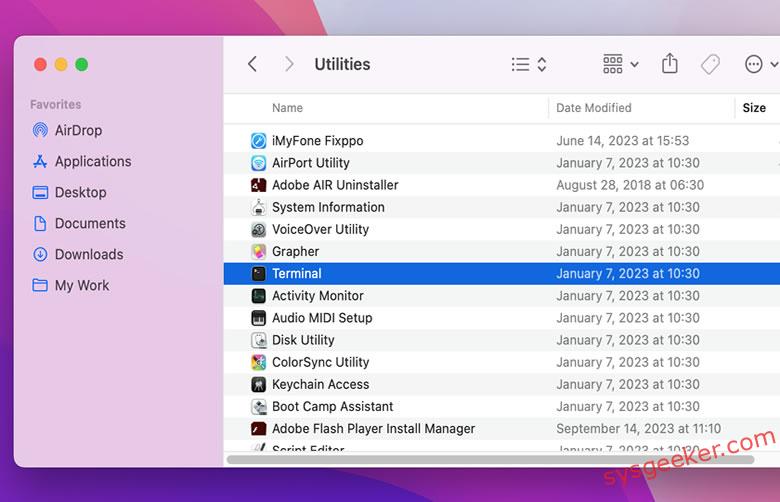
Step 1. Open Terminal by navigating to "Applications" > "Utilities" > "Terminal".
Step 2. Navigate to the directory where the file or folder you want to zip is located. Use the "cd" command followed by the path to the directory. For example, if the file is located in the "Documents" folder, the command would be: cd /Users/YourUsername/Documents/
Step 3. Once you are in the correct directory, use the following command to create a zip file: zip -r .zip

Step 4. Replace "" with the desired name for your zip file, and "" with the name of the file or folder you want to zip.
Step 5. Press "Enter" to execute the command, and Terminal will compress the file or folder into a zip file.
| Pros | Cons |
|---|---|
| 1. Quick and efficient compression method. | 1. Requires familiarity with Terminal commands. |
| 2. Offers flexibility in choosing the name of the zip file. | 2. No graphical user interface, which may be challenging for some users. |
| 3. Can be easily automated and scripted for repetitive tasks. | 3. May encounter errors if the command syntax is incorrect. |
Method 2: How to Zip Files on Mac using Terminal (ditto)
Method 2 involves using the "ditto" command in Terminal to create a compressed archive. Follow these steps to zip a file on Mac using Terminal:
- Open Terminal by navigating to "Applications" > "Utilities" > "Terminal".
- Navigate to the directory where the file or folder you want to zip is located. Use the "cd" command followed by the path to the directory.
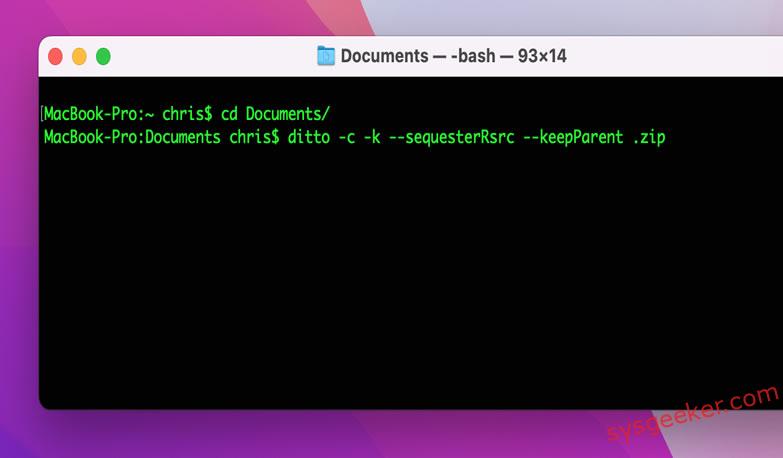
- Once you are in the correct directory, use the following command to create a zip file: ditto -c -k –sequesterRsrc –keepParent .zip
- Replace "" with the name of the file or folder you want to zip, and "" with the desired name for your zip file.
- Press "Enter" to execute the command, and Terminal will compress the file or folder into a zip file.
| Pros | Cons |
|---|---|
| 1. Maintains resource forks and file metadata during compression. | 1. Requires familiarity with Terminal commands. |
| 2. Retains the folder structure of the original file or folder. | 2. No graphical user interface, which may be challenging for some users. |
| 3. Can compress multiple files and folders simultaneously. | 3. May encounter errors if the command syntax is incorrect. |
Alternatives: What to Do If You Can’t Zip Files on Mac using Terminal
If you find the Terminal methods too complex or challenging, there are alternative ways to zip files on Mac:
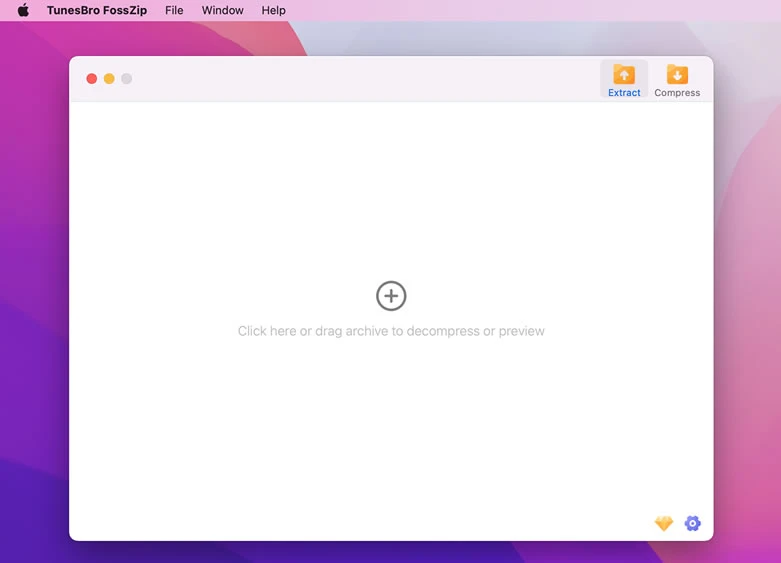
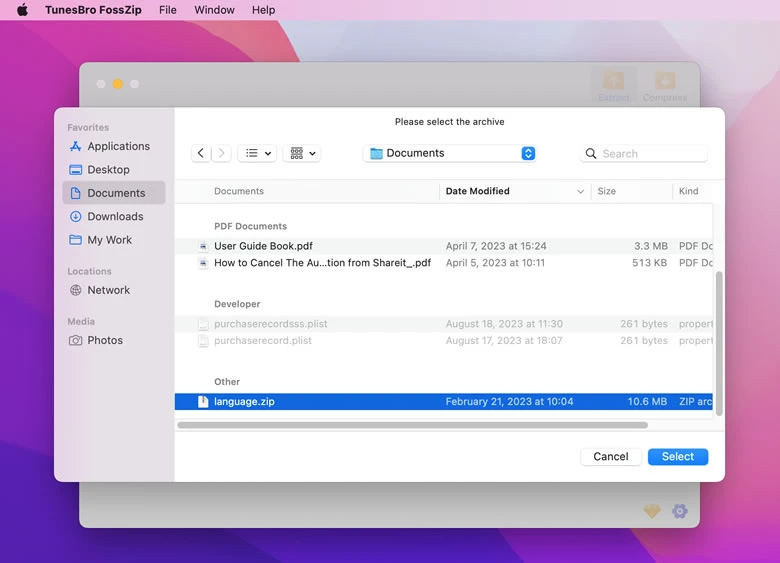
- Use Third-party Compression Software: There are various third-party applications available for Mac, such as FossZIP, The Unarchiver, or iZip, that provide a user-friendly interface for zipping files. Here I personally recommend FossZIP as your first option. FossZIP is primarily a Mac application, it’s more common to use native Mac applications like the built-in "Compress" feature or third-party tools like The Unarchiver to zip files on macOS. Here is steps to use FossZIP to zip file on Mac without Terminal.
Step 1. Install The FossZIP : If you don’t already have it installed, download and install The FossZIP from their official website.

Step 2. Open The FossZIP : Launch The Unarchiver application.
Step 3. Configure Preferences (Optional): You can configure preferences for how you want the ZIP file to be created, such as the compression level and destination folder.
Step 4. Drag and Drop Files: To create a ZIP file, simply drag and drop the files or folders you want to compress onto the window.
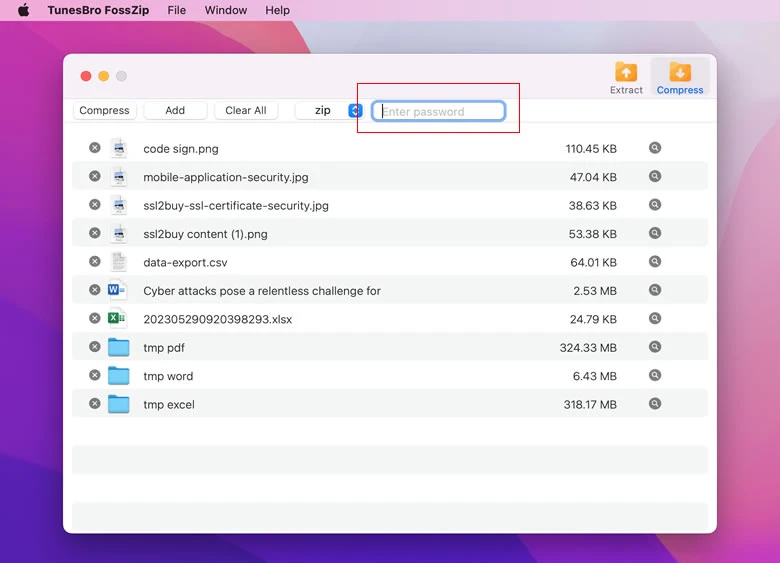
Step 5. Wait for Compression: The FossZIP will automatically create a ZIP archive with the same name as the first item you dragged in. It will be saved in the same location as the original files, or in the destination folder you specified in preferences. You can also add a password to your zip file. Enter your desired password, and then confirm it by entering it again.
- Use Finder: Mac’s built-in file manager, Finder, also allows you to compress files and folders. Simply select the files or folders you want to zip, right-click, and choose the "Compress" option.
- Use Automator: Automator is a native Mac application that allows you to automate tasks. You can create a custom script or workflow using Automator to compress files and folders with a single click.
Bonus Tips
Here are a few bonus tips to enhance your experience with zipping files on Mac using Terminal:
- Learn Basic Terminal Commands: Familiarize yourself with basic Terminal commands to navigate through directories and modify files. This will make the zipping process more efficient.
- Automate Zipping Process: If you frequently need to zip the same files or folders, consider creating a bash script or an alias to automate the zipping process.
- Combine Compression You can combine the Terminal methods with third-party compression software to leverage the strengths of both approaches.
5 FAQs about Zipping Files on Mac using Terminal
Q1: Can I password protect the zip file using Terminal?
A1: Yes, you can password protect the zip file by adding the "-e" flag followed by your desired password to the zip command. For example, ‘zip -r -e .zip ‘.
Q2: Can I exclude specific files or folders from the zip using Terminal?
A2: Yes, you can exclude files or folders from the zip by adding the "-x" flag followed by the file or folder name to the zip command. For example, ‘zip -r .zip -x excluded_file.txt’.
Q3: How can I unzip a file created with Terminal?
A3: To unzip a file created with Terminal, use the "unzip" command followed by the path to the zip file. For example, "unzip .zip".
Q4: Can I compress files into different archive formats using Terminal?
A4: Yes, you can compress files into different archive formats using the "tar" command in Terminal. For example, "tar -cf .tar " creates a .tar file.
Q5: Is there a file size limit when zipping files with Terminal?
A5: There is no specific file size limit when using Terminal to zip files on Mac. However, keep in mind that extremely large files may take longer to compress and might require more system resources.
In Conclusion
Zipping files on Mac using Terminal can be a powerful and efficient method for file compression. Despite the challenges that come with using the command-line interface, the benefits of faster compression speeds, automation, and scripting make Terminal an attractive option. However, if Terminal proves too complex or if you prefer a graphical interface, there are alternative solutions available. Hopefully, this blog post has provided you with a comprehensive guide on zipping files on Mac using Terminal, as well as alternative methods and bonus tips to enhance your file compression experience. Whether you choose to dive into the world of Terminal commands or opt for a user-friendly compression software, remember to always prioritize the safety of your files and keep backups before attempting any modifications.