Table of Contents
If you’re experiencing audio issues in Windows 10, it’s possible that your audio settings may be to blame. In some cases, resetting your audio settings can help to fix the problem.
Why Is My Sound Not Working on My Windows 11/10?
There are a few reasons why your sound may not be working on your Windows 11 computer. Here are a few troubleshooting steps you can try:
1. Audio Driver. Outdated or corrupted audio drivers can cause sound problems. You can try updating your audio driver to see if that fixes the problem.
2. Audio Dettings. Make sure the volume isn’t muted and that the volume slider is turned up. You can also try changing the audio output device to see if that helps.
3. Hardware Issues. If you’re still having sound problems after trying all of the above, there may be a problem with your sound card or speakers.
4. Check your audio cables and connections. Make sure that all of your audio cables are plugged in securely and that there are no loose connections.
Will Resetting PC Fix Audio Issues?
If you’re experiencing issues with your audio, resetting your PC may help resolve the issue. A reset will restore your PC to its default settings, which can help fix audio problems. However, a reset will also erase any personal files and data on your PC, so be sure to back up your files before resetting. In some cases, resetting your PC may not fix the audio issue, and you may need to try other troubleshooting steps.
But before you reset your PC, be sure to check if there’s a simpler solution to your audio issue. For example, if you’re having trouble with your headphones, make sure they’re properly plugged in or try using a different pair of headphones. If you’re having trouble with your speakers, try adjusting the volume or using a different set of speakers. If you’re still experiencing audio issues after trying these simple steps, then resetting your PC may be the best option.
How to Reset Audio Settings to Default Windows 11?
If you’re having audio issues on your Windows 11 computer, one of the first things you should try is resetting your audio settings to default on Windows 11/10. This can be done in just a few steps:
1. Open the Start menu and search for "Sound."
2. Click on "Sound" to open the sound settings.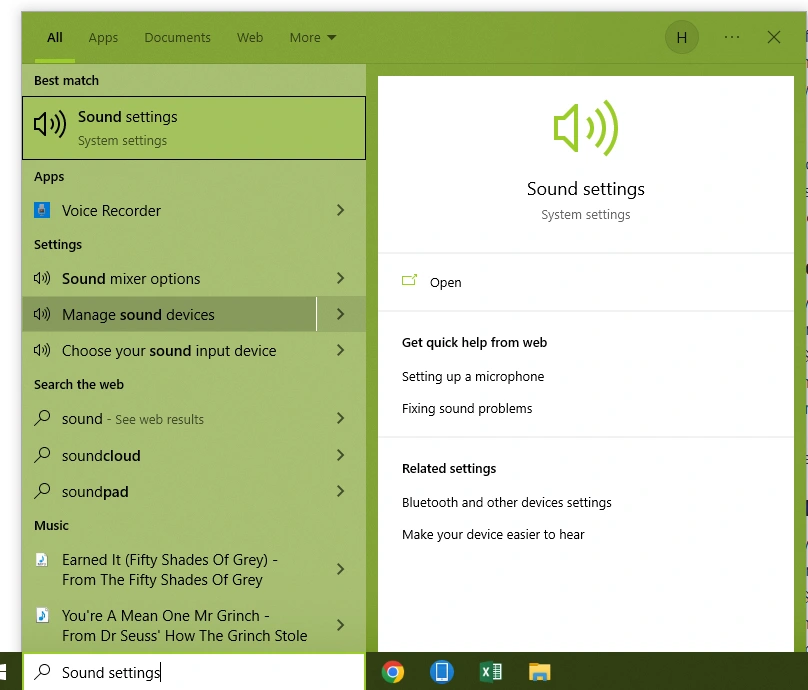
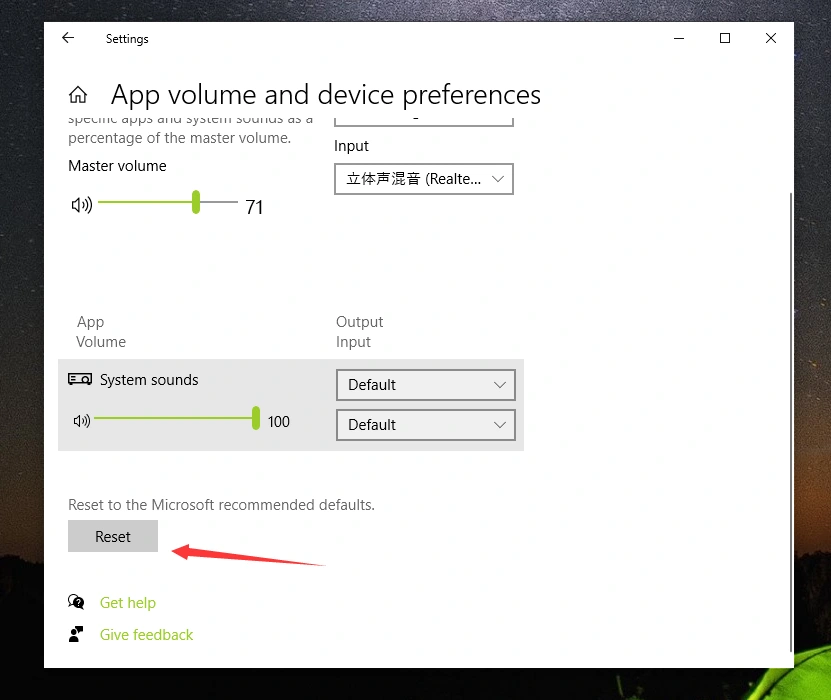
3. In the "Sound" settings, scroll down to the "Reset" section.
4. Click the "Reset" button.
After resetting your audio settings, you may need to adjust your volume levels or restart your computer for the changes to take effect. If you’re still having audio issues, there are a few other things you can try, like updating your audio drivers or troubleshooting your audio devices.
1.Troubleshoot Your Audio Driver.
1. In the Start menu, search for "Device Manager."
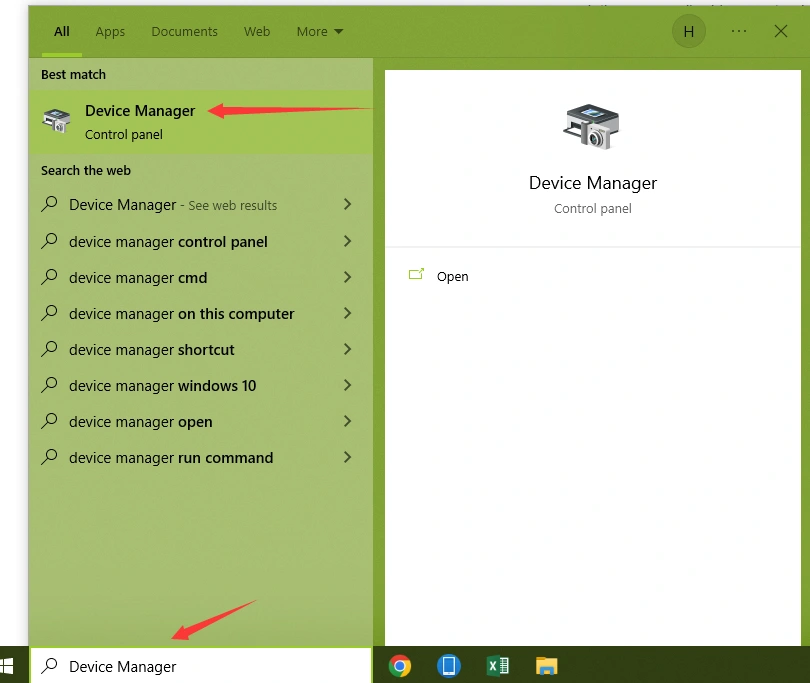
2. Click on "Device Manager" to open it.
3. In Device Manager, expand the "Sound, video and game controllers" section.
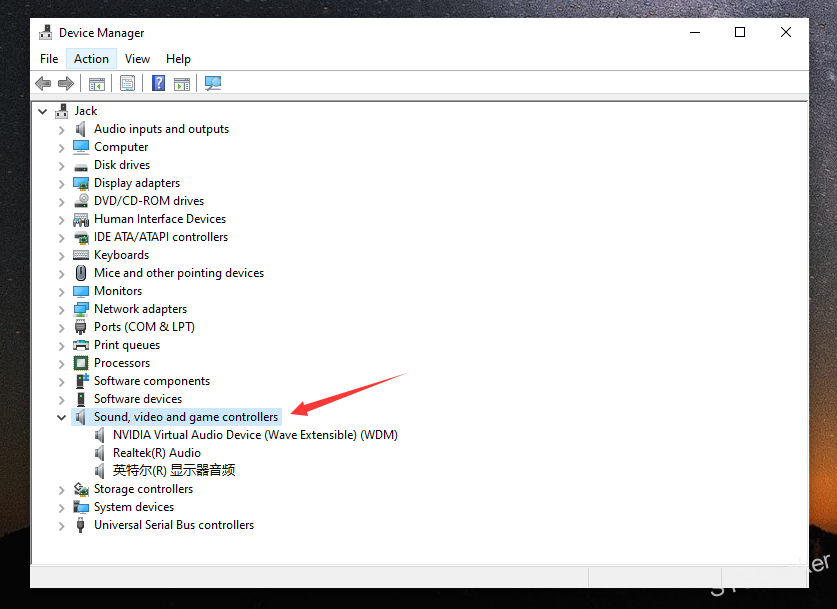
4. Right-click on your audio driver and select "Update driver."

5. Follow the prompts to update your driver.
If you’re still having audio issues after updating your driver, you can try uninstalling and reinstalling it.
2. Uninstall Your Audio Driver
1. In the Start menu, search for "Device Manager."
2. Click on "Device Manager" to open it.
3. In Device Manager, expand the "Sound, video and game controllers" section.
4. Right-click on your audio driver and select "Uninstall."
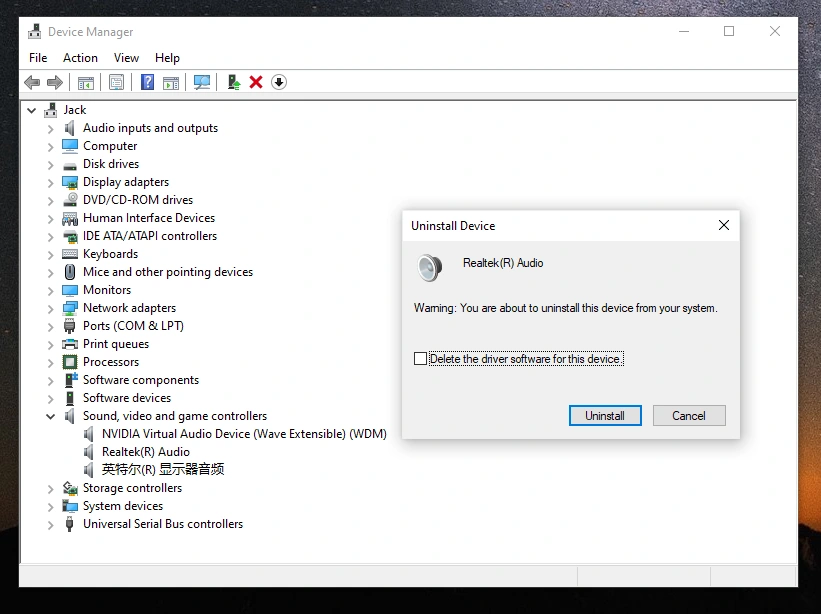
5. Confirm the uninstallation and follow the prompts to uninstall your driver.
Once your driver has been uninstalled, you can install it again by downloading it from your computer’s manufacturer website.
If you’re still having audio issues, there are a few other things you can try, like troubleshooting your audio devices.
3. Troubleshoot Audio Devices
1. In the Start menu, search for "Sound."
2. Click on "Sound" to open the sound settings.
3. In the "Sound" settings, scroll down to the "Input" section.
4. Select your audio device from the drop-down menu.
5. Click the "Configure" button.
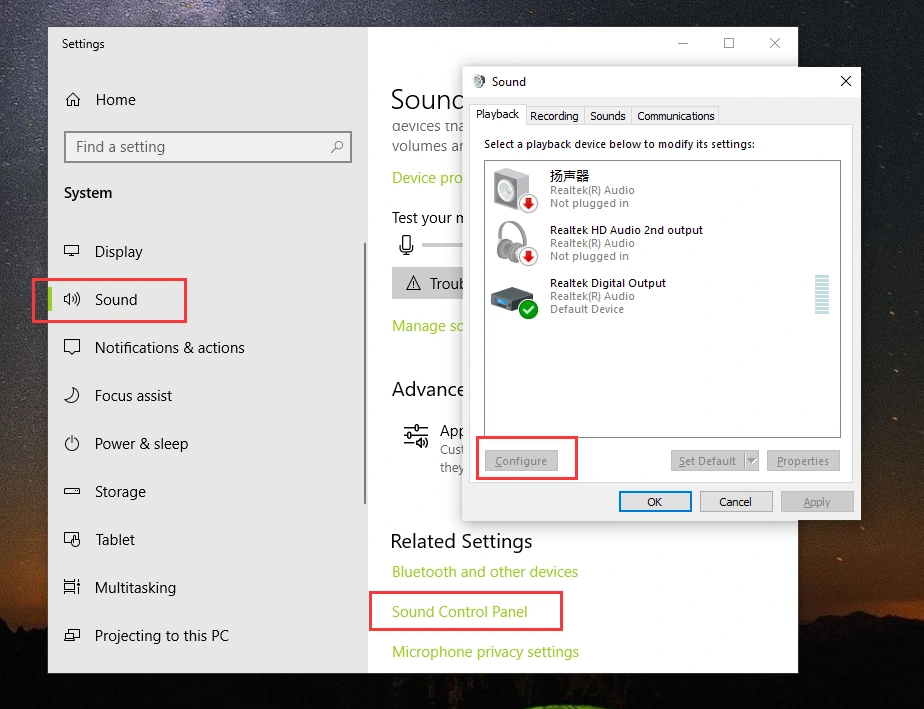
6. Follow the prompts to troubleshoot your audio device.
4. Restart Windows Audio Services
If you’re having audio issues in Windows, one potential solution is to restart the Windows audio services. Here’s how to do that:
1. Press the Windows key + R to open the Run dialog box.
2. Type "services.msc" and press Enter.
3. Locate the "Windows Audio" service in the list and right-click it.

4. Select "Restart" from the context menu.
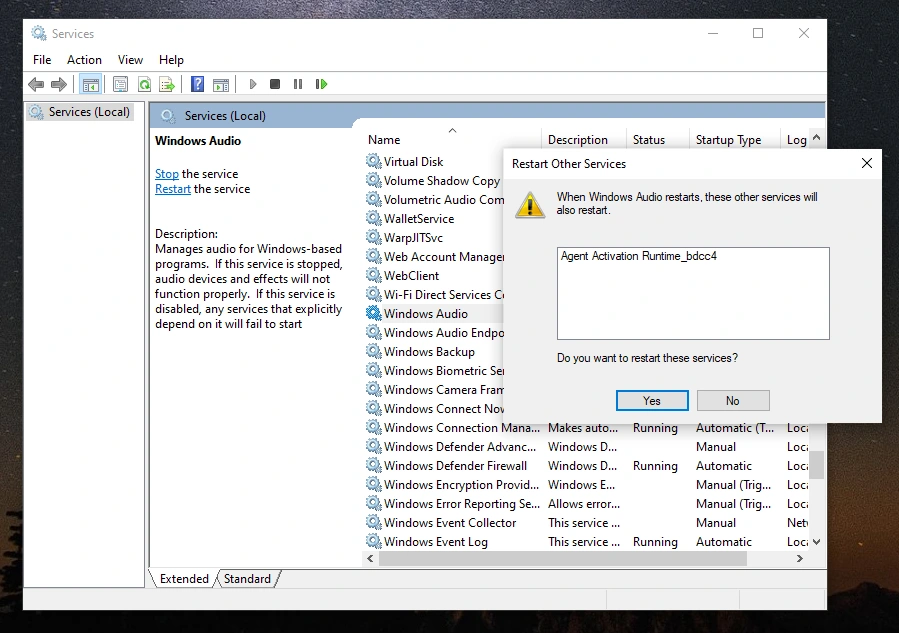
5. Once the service has been restarted, check to see if your audio issue has been resolved.
There are a few things to keep in mind when restarting Windows audio services on Windows 11/10. First, if you’re using a laptop, you may need to restart your computer after restarting the service. Second, this potential solution may not work if the issue is being caused by hardware problems. However, it’s still worth a try if you’re having audio issues in Windows.
5. Fix A Corrupted Realtek Audio driver?
If you have a Realtek audio driver that has become corrupted, there are a few ways to try and fix it.
- First, you can try uninstalling and then reinstalling the driver. If that doesn’t work, you can try downloading and installing a new driver from Realtek’s website.
- Second, if neither of those solutions work, you can try restoring your computer to an earlier point in time.
6. Perform a factory reset
If you’re still having audio issues after trying the other solutions on this list, you may need to perform a factory reset. This will erase all of the data on your computer, so be sure to back up your files before proceeding.
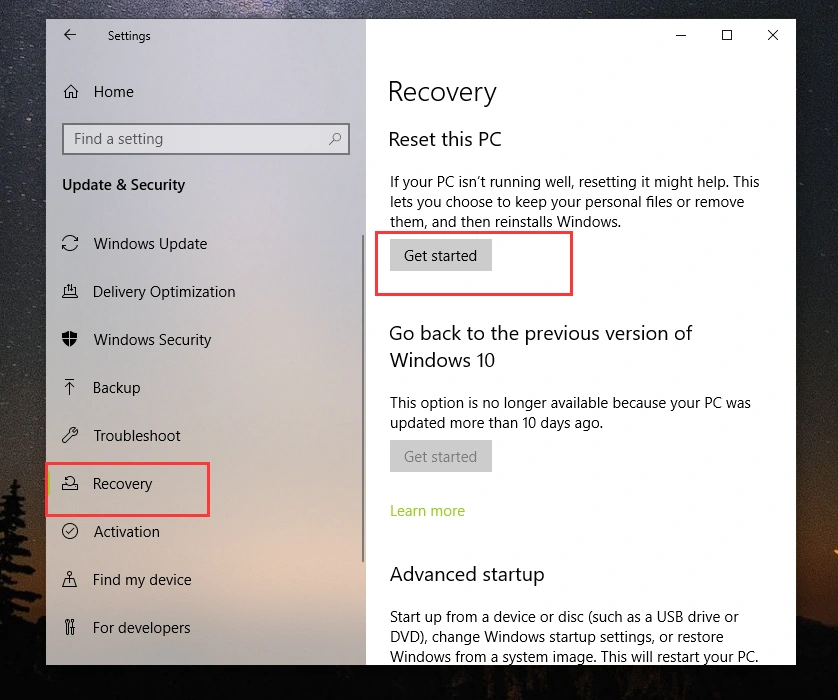
To reset your computer, go to the "Update & Security" settings in the Windows Control Panel and select "Recovery." From there, click "Get started" under the "Reset this PC" section.