Table of Contents
Installing macOS from a USB drive is a great way to clean install the operating system, or to install it on multiple Macs without having to download it each time. It’s also a good way to create a bootable installer for macOS in case your Mac doesn’t have an optical drive, or you want to install macOS on a Windows PC.
In this blog, we will be discussing how to install macOS from USB on your mac. This is a process that is not difficult but does require some specific steps in order to be completed correctly.
Why Would You Need to Install macOS From a USB?
There are a few reasons why you might need to install macOS from a USB drive.
1. The most common reason is if your Mac is having issues starting up from its internal hard drive. If this is the case, you can use a USB drive to start up your Mac and then install macOS on it.
2. Another reason is if you’re trying to install an older version of macOS on a computer that doesn’t support that version.
3. Another reason you might need to install macOS from a USB drive is if you want to create a "clean install" of macOS. This means that you will erase everything on your Mac and then install a fresh copy of macOS. This can be helpful if you are having issues with your Mac that you cannot seem to fix.
How to Install macOS From a USB on Mac?
What You Need
In order to install macOS from USB on your mac, you will need the following items:
– A USB drive that is at least 8 GB in size
– The macOS installer (this can be downloaded from the App Store)
– A Mac that is compatible with the version of macOS that you are installing
Step 1. Download macOS
There are many ways to download macOS. One of these ways is to directly download macOS from Apple servers. Another way is to download macOS from third-party servers. Even if you download macOS directly from Apple servers, you will still have to download macOS through third-party servers. Apple servers are very slow when you download macOS. Therefore, we recommend that you download macOS from third-party servers. Each macOS download is going to send to the Applications folder on your Mac.
Step 2. Back up Your Mac
Before you erase your Mac, you should make a backup of all your important files. This way, you will not lose any important data if something goes wrong during the installation process. There are a few different ways that you can back up your Mac, so choose the method that works best for you. Here we recommend back up your Mac using Time Machine.
To use Time Machine
- First connect your external hard drive to your Mac.
- Then open Time Machine from the Applications folder.
- Select your external hard drive as the backup destination, and click Use for Backup.
- Time Machine will start backing up your Mac.
Step 3. Create A Bootable USB Flash Drive
There are two ways to create a bootable USB flash drive on a Mac. The first is to use the Terminal application, and the second is to use the third-party application like UltraDMG.
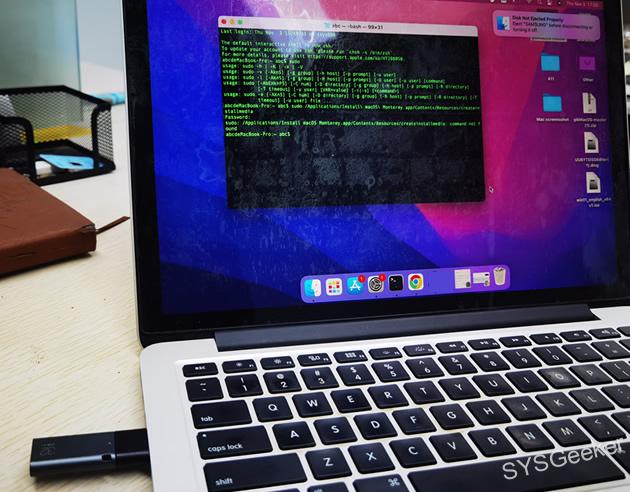
Use Terminal
Terminal is a built-in application on Mac that provides a command-line interface to the operating system. It can be used to create bootable USB flash drives.
To create a bootable USB flash drive using Terminal, follow these steps:
1. Connect the USB flash drive to your Mac.
2. Launch the Terminal application.
3. Type the following command and press the "Return" key:
For Mondery
sudo /Applications/Install\ macOS\ Monterey.app/Contents/Resources/createinstallmedia –volume /Volumes/MyVolume
For Big Sur
sudo /Applications/Install\ macOS\ Big\ Sur.app/Contents/Resources/createinstallmedia --volume /Volumes/MyVolume
For Catalina
sudo /Applications/Install\ macOS\ Catalina.app/Contents/Resources/createinstallmedia --volume /Volumes/MyVolume
For Mojave:
sudo /Applications/Install\ macOS\ Mojave.app/Contents/Resources/createinstallmedia –volume /Volumes/MyVolume
Replace "system name" with the name of the macOS installer you are using.
4. Type your password and press the "Return" key. Type ‘Y’ to confirm that you want to erase the volume. If asked,
5. When the process is complete, type the following command and press the "Return" key. Replace "Untitled" with the name of your USB flash drive.
diskutil eject /Volumes/Untitled
Your bootable USB flash drive is now ready to be used.
Use UltraDMG
If you are a novice, it is not recommended to use Terminal because it can be difficult to use and you may not be able to figure out how to do what you want to do. UltraDMG is a graphical user interface for the Terminal application. It can be used to create bootable USB flash drives.
To create a bootable USB flash drive using UltraDMG, follow these steps:
1. Connect the USB flash drive to your Mac.
2. Launch the UltraDMG application.
3. Select the "Create bootable macOS installer USB drive" option.
4. Click the "Browse" button and select the macOS installer you want to use.
5. Click the "Create" button.
6. When the process is complete, click the "Eject" button.
Your bootable USB flash drive is now ready to be used.
Step 4: Start to Install MacOS from USB on Mac
Once the process is complete, you can then use the USB drive to install Mac OS on your Mac
- Connect the USB drive to your Mac. Once the USB drive is connected, you will need to restart your Mac.
- Once your Mac has restarted, you will need to hold down the Option key. This will bring up the Startup Manager.
- Once the Startup Manager appears, you will need to select the USB drive that you want to boot from.
- Once the USB drive is selected, your Mac will boot from the USB drive.
- Next, select the Disk Utility option.
- In the Disk Utility window that appears, select the USB Installer drive in the left column, then click the Erase button in the main pane.
- In the Erase window, give your drive a name (like “My USB Installer”), choose the Mac OS Extended (Journaled) format, and click the Erase button.
- When it’s done, close the Disk Utility window.
- Now select the Install macOS option.
- On the next screen, choose your newly formatted drive as the destination to install macOS, then click the Install button.
- The installer will copy some files to your drive, then restart your Mac.
- When it restarts, you’ll see the macOS Utilities window. Choose the option to restore from a Time Machine backup, then follow the on-screen instructions.
Troubleshooting
If you run into any issues while trying to install macOS from a USB drive, there are a few things you can try.
First, make sure that the USB drive you are using is formatted correctly. The macOS installer can only be installed on a drive that is formatted as HFS+ or APFS. If your drive is not formatted correctly, you will need to format it using Disk Utility.
Second, try using a different USB port on your Mac. Sometimes, certain USB ports can cause issues when trying to install macOS.
Finally, if you are still having issues, you can try using a different USB drive. Some USB drives are not compatible with the macOS installer. If you are using a USB drive that is not compatible, you will need to use a different drive.
In Conclusion
One of the first things you need to do when you get a new Mac is install the operating system. If you’re selling your Mac, you’ll want to make sure you’ve wiped it clean first. And if you’re upgrading from an older version of macOS, you’ll want to do a clean install to make sure everything is up to date. The process is pretty simple, but there are a few things you need to know before you get started. The method introduced in this article can help you easily make a boot disk and install macOS from USB on Mac, I hope it will be helpful to you.