Table of Contents
MacOS Ventura is a new operating system from Apple that is designed to work on the latest Mac computers. If you have a Mac that is compatible with this new OS, then you may be wondering how you can create a bootable USB drive so that you can install the OS on your computer. Luckily, the process is relatively simple and only requires a few steps.
Why You Need A macOS Ventura Bootable USB?
1. The main reason to create a macOS Ventura Bootable USB is for convenience. Having a bootable USB drive allows you to boot your Mac from the drive, rather than from the macOS Recovery partition. This can be helpful if you’re troubleshooting your Mac or need to install macOS on a different Mac.
2. Creating a bootable USB drive is also a good way to backup your Mac’s Recovery partition, which can be helpful if you ever need to reinstall macOS.
3. Maybe you want to install macOS Venture on multiple Macs, and you don’t want to keep downloading the installer each time. Maybe you’re a developer who wants to create a bootable USB drive for installing macOS Venture on testing and development Macs. Or maybe you just want to have a macOS Catalina emergency boot drive on hand, in case your Mac’s startup disk fails.
4. Another advantage of creating a bootable USB is that it’s much faster than using a DVD. The process of creating a bootable USB drive is also very simple and straightforward.
Prerequisites:
In order to create a bootable USB for macOS Ventura, you will need the following:
– A USB drive that is at least 16 GB in size
– A computer running macOS High Sierra or later
– The macOS Ventura installer (which can be downloaded from the Mac App Store)
In theory, the external drive can be just about any hard drive, SSD, or USB flash drive that’s big enough to hold the installer and all its data. However, for best results, you should use a drive that’s specifically designed for use with macOS, such as the
Apple USB SuperDrive.
Download the macOS Ventura installer
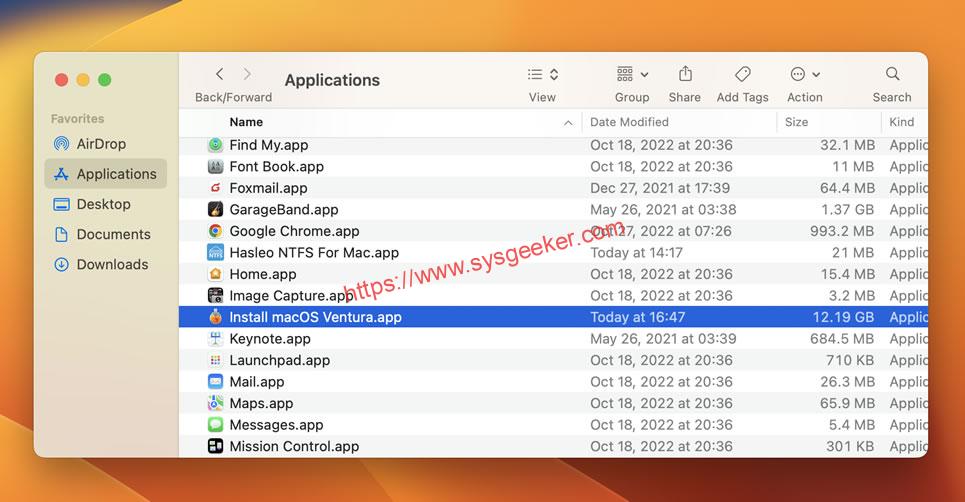
In order to download the macOS Ventura installer, you will need to visit the Apple website and click on the "Download" button. Once the file has downloaded, you will need to double-click on it and follow the prompts to install the software. The app you’ve downloaded will be called "Install macOS Ventura," and will be at least 13GB in size. Once the installer is done downloading, move it to the Applications folder.
Make sure you have a good internet connection and enough free storage space on your computer before beginning the download. It might take a while, so go grab a coffee or take a walk while it downloads.
2 Ways to Create A macOS Ventura Bootable USB
-
Use Terminal (on Mac)
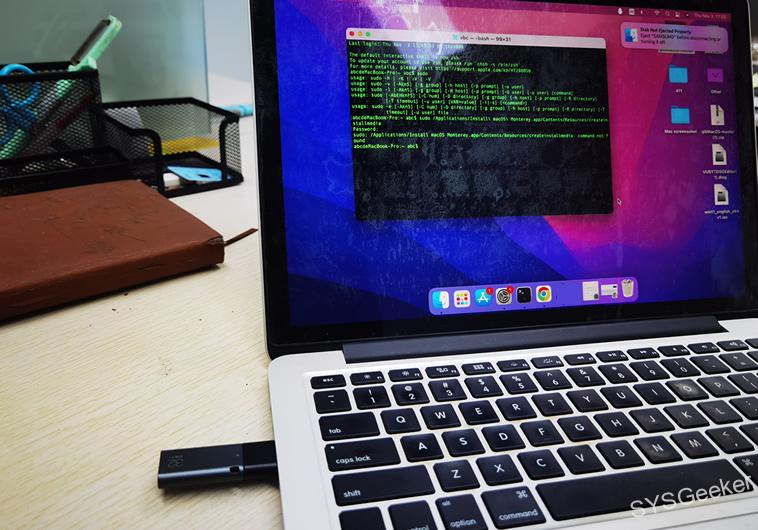
Once you have all of the necessary equipment, you can begin the process of creating your macOS Ventura bootable USB installer on Mac computer. To do this, you’ll need to use the Terminal app, which can be found in the Utilities folder of your Applications folder.
1. Insert your USB drive to your Mac, then open the Terminal application. Copy and past the following command line, then replace the final "BootDrive" part with the name of your actual drive:
sudo /Applications/Install\ macOS\ Ventura.app/Contents/Resources/createinstallmedia — volume /Volumes/BootDrive
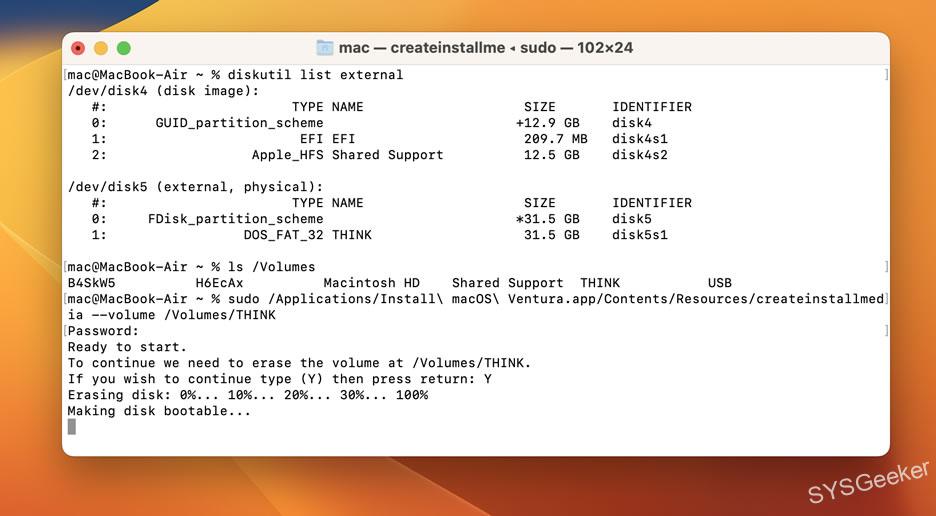
2. Press the Return key and you will be prompted to enter your password. This is necessary in order to run the createinstallmedia command as a superuser.
3. The Terminal will now begin the process of creating the bootable USB drive. This will take a few minutes, so be patient.
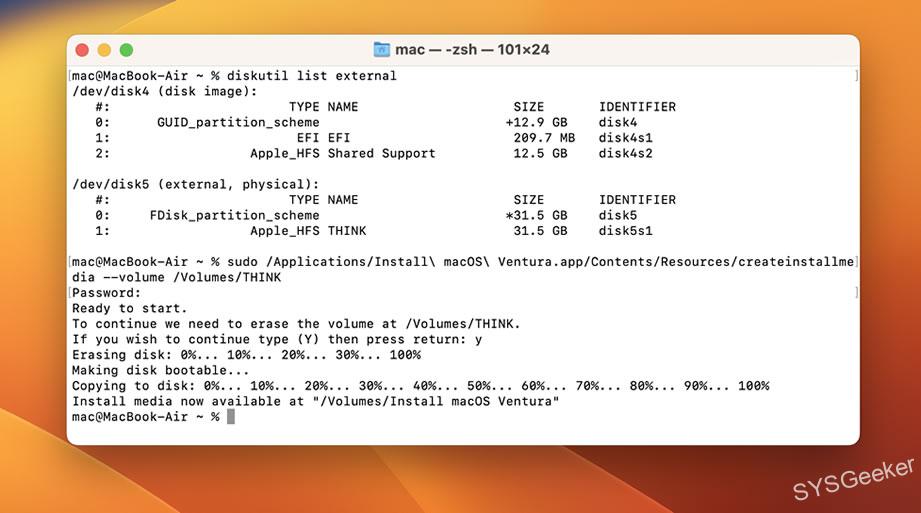
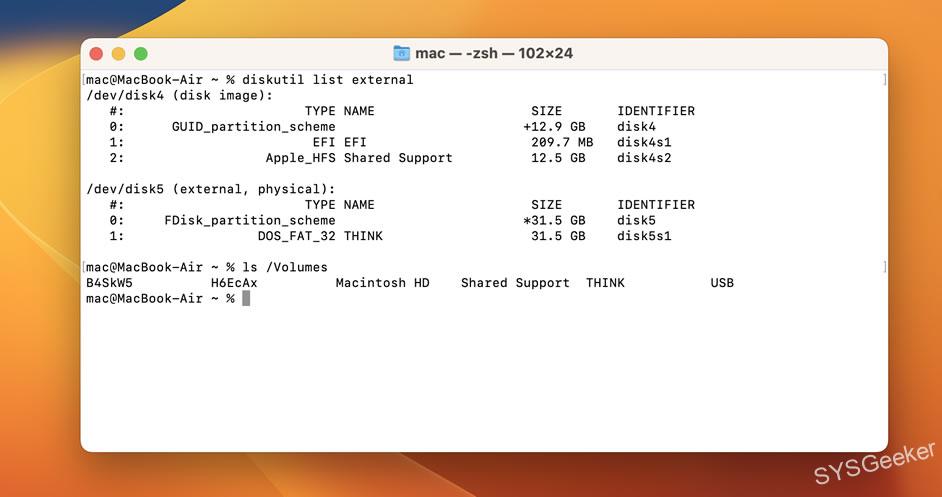
4. When the process is complete, you will see the following message:
5. You can now close the Terminal and eject the USB drive. Congratulations, you have now created a bootable macOS Ventura USB drive!
-
UltraDMG Tool (on Win and Mac)
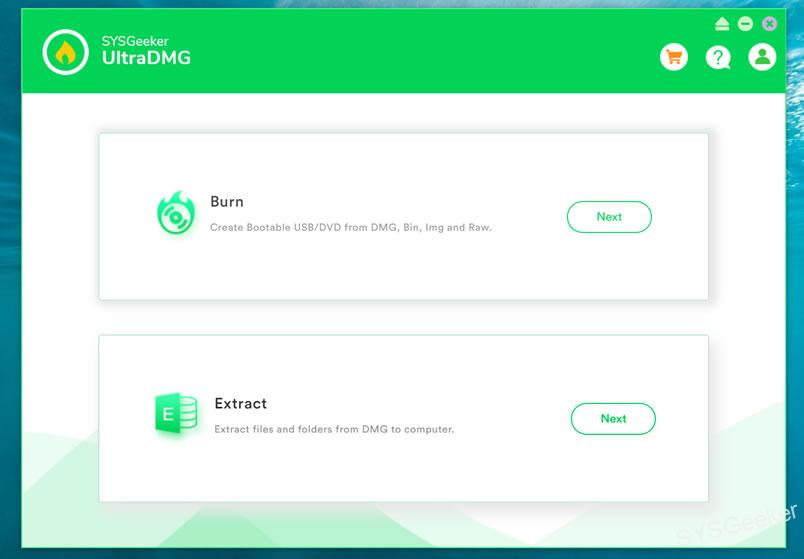
UltraDMG is a tool that can be used to create and manage DMG files on your computer. It allows you to create, extract, and convert disk images. It supports a variety of disk image formats, including DMG, ISO, and BIN. This tool can be used to create bootable DMG USB drive, as well as to create and manage ISO files. The UltraDMG tool allows you to create a bootable USB installer for macOS Ventura. This is a great way to install the operating system on a new Mac, or to simply create a backup installer in case you need to reinstall the OS in the future.
Here are the steps to create a bootable USB installer for macOS Ventura using the UltraDMG tool:
First, you need to download the macOS Ventura DMG file from the internet. Download macOS Ventura DMG File (Google Drive by TechRechard)
1. Download and install the UltraDMG tool on your Windows computer.
2. Insert a USB flash drive into your computer.
3. Open the UltraDMG tool and select the "BURN" option to enter the burning window. Then click Browse to import your macOS Ventura DMG file and select USB drive from the drop-down menu.
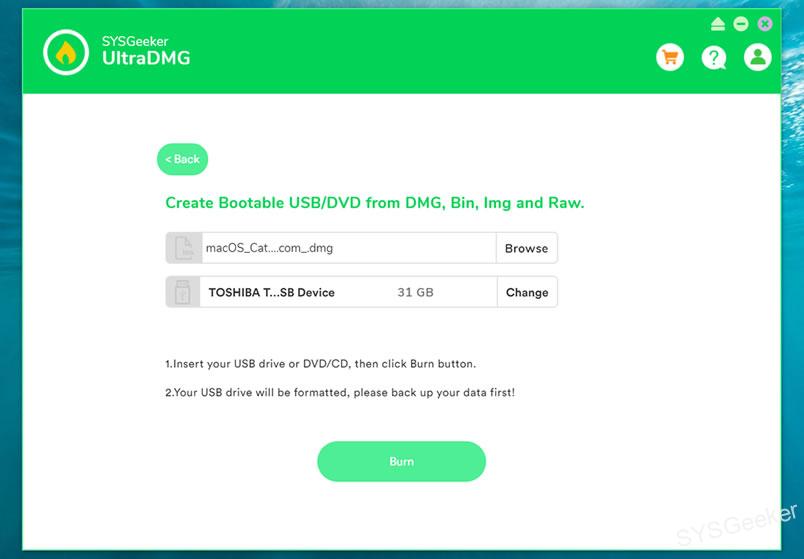
4. Click the "BURN" button to start write macOS Ventura file to your USB drive.
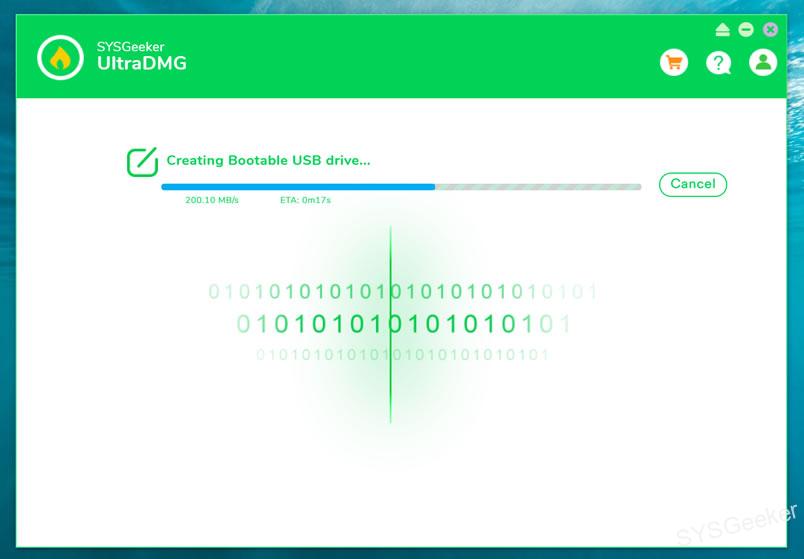
5. The tool will now create the bootable USB installer.
Once the process is complete, you can boot your Mac from the USB drive and install macOS Ventura.
Troubleshooting
If you’re having trouble creating a bootable USB drive for macOS Ventura, there are a few things you can try:
1. Use a different USB drive. Some drives just don’t work well with the createinstallmedia command. If you’re having trouble, try using a different USB drive.
2. Use a different method. If you’re still having trouble, you can try using a different method, such as the UltraDMG tool.
3. Check your internet connection. If you’re having trouble downloading the macOS Ventura installer, it could be due to a poor internet connection. Try downloading the installer on a different computer or from a different location.
4. Check your computer’s storage. If you’re having trouble installing macOS Ventura, it could be because your computer doesn’t have enough storage space. Try deleting some files or uninstalling some apps to free up space.
5. Make sure that you’re using a USB drive that is at least 16 GB in size.
6. If you’re using a Mac, make sure that you’ve downloaded the macOS Ventura installer from the Apple website.
7. Try erasing the USB drive using Disk Utility before attempting to create the bootable installer.
How to Boot Your Mac from An External Drive
How to boot from the macOS Ventura beta installer differs depending on whether the Mac is based on Apple Silicon or Intel architecture.
For Apple Silicon (M1, M2, etc.):
– Connect the USB drive to the Mac.
– Turn off the Mac or reboot it.
– Press and hold the Power button until you see the Startup Options screen.
– Choose the macOS Ventura beta installer as your boot volume.
For Intel Mac:
– Connect the USB drive to the Mac.
– Turn off the Mac or reboot it.
– Press and hold Option key until you see boot volumes available to select from.
Once you’re booted onto the macOS Ventura installer, regardless of system architecture, follow these instructions to install macOS Ventura:
Summarize
Creating a bootable USB drive for macOS Ventura is a simple process that can be done using the Terminal app on a Mac, or by using the UltraDMG tool on a Windows computer. This is a great way to install the operating system on a new Mac, or to simply create a backup installer in case you need to reinstall the OS in the future. However, if you’re having trouble creating the bootable USB drive, there are a few troubleshooting tips that might help.