I’ve run into this so many times: I plug an external NTFS drive into my Mac, I can see all my files… and macOS basically says, "You can look, but you can’t touch."
If you move data between Windows and Mac a lot, that limitation is super annoying. I eventually got tired of juggling formats and just installed an NTFS tool on my Mac so I can read and write to NTFS like a normal person.
Here’s how I handle it now, and how SYSGeeker NTFS for Mac fits in.
The Best Way (What I Use): SYSGeeker NTFS for Mac
Personally, I just use SYSGeeker NTFS for Mac and let it handle everything in the background. Once it’s installed, my NTFS drives behave like normal Mac drives — I can read, write, edit, and delete files directly in Finder.
What I like about it in a nutshell:
- Full read & write access to NTFS drives
- Fast transfers for big files like videos and backups
- Runs quietly in the background, no extra steps every time
That’s really all I need, and then I jump straight into the setup steps below.
Step-by-Step: How I Write to NTFS on Mac with SYSGeeker
Here’s roughly how I set it up and use it in real life.
Step 1: Install SYSGeeker NTFS for Mac
Download the installer on your Mac from SYSGeeker, then plug in your NTFS external hard drive or USB stick.
- Your NTFS drive should appear like usual, ,but it’s read only mode.

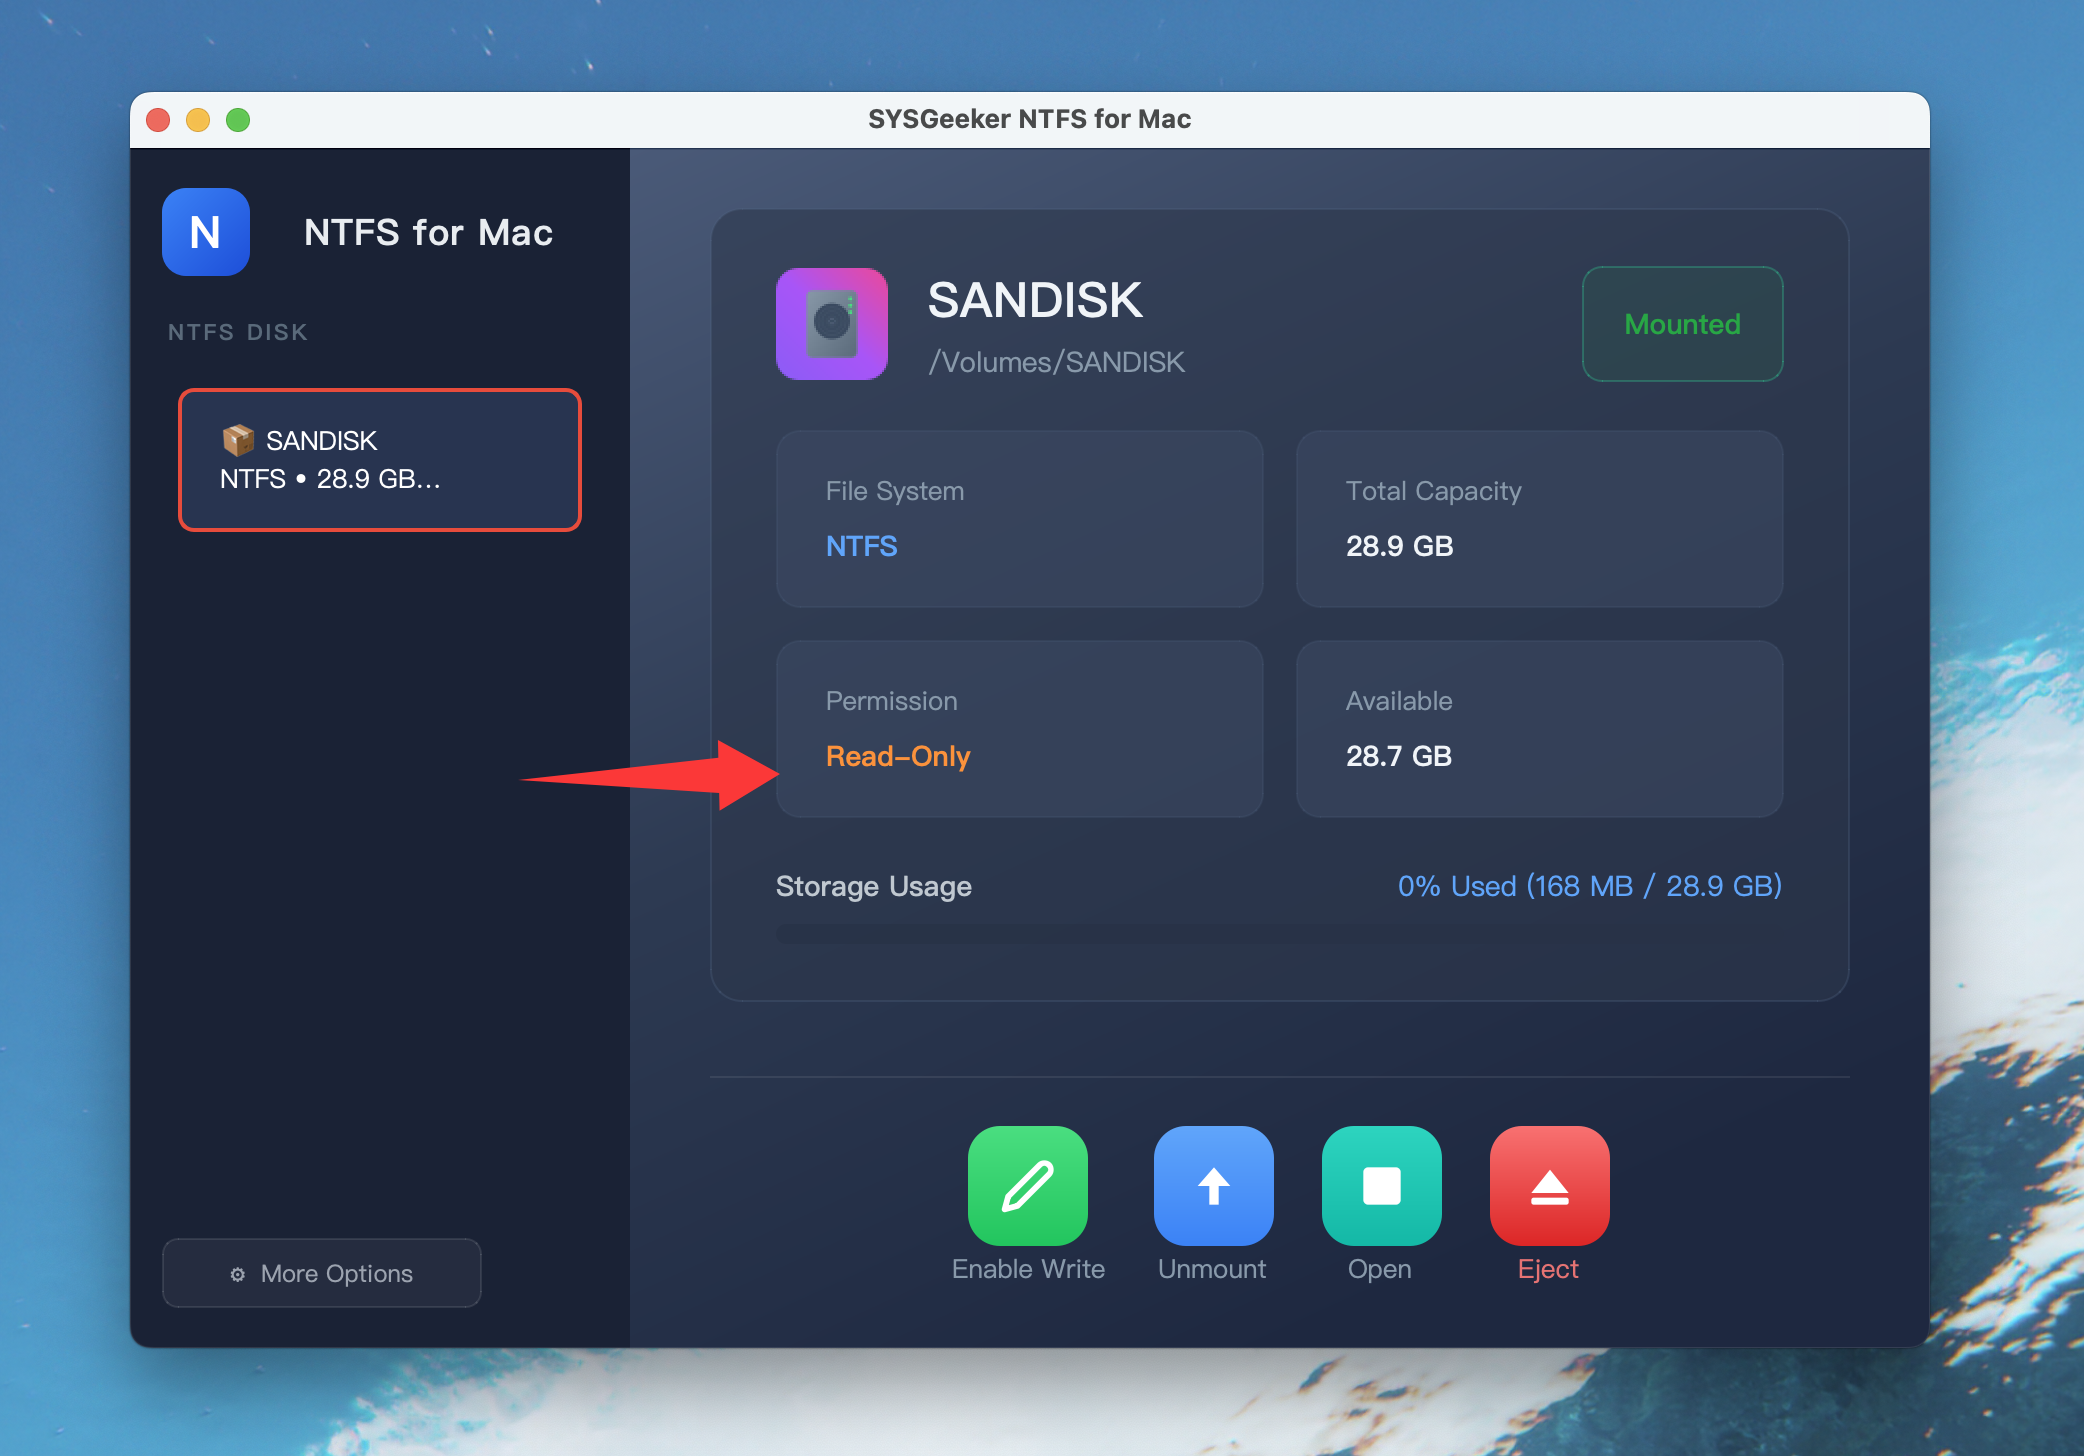
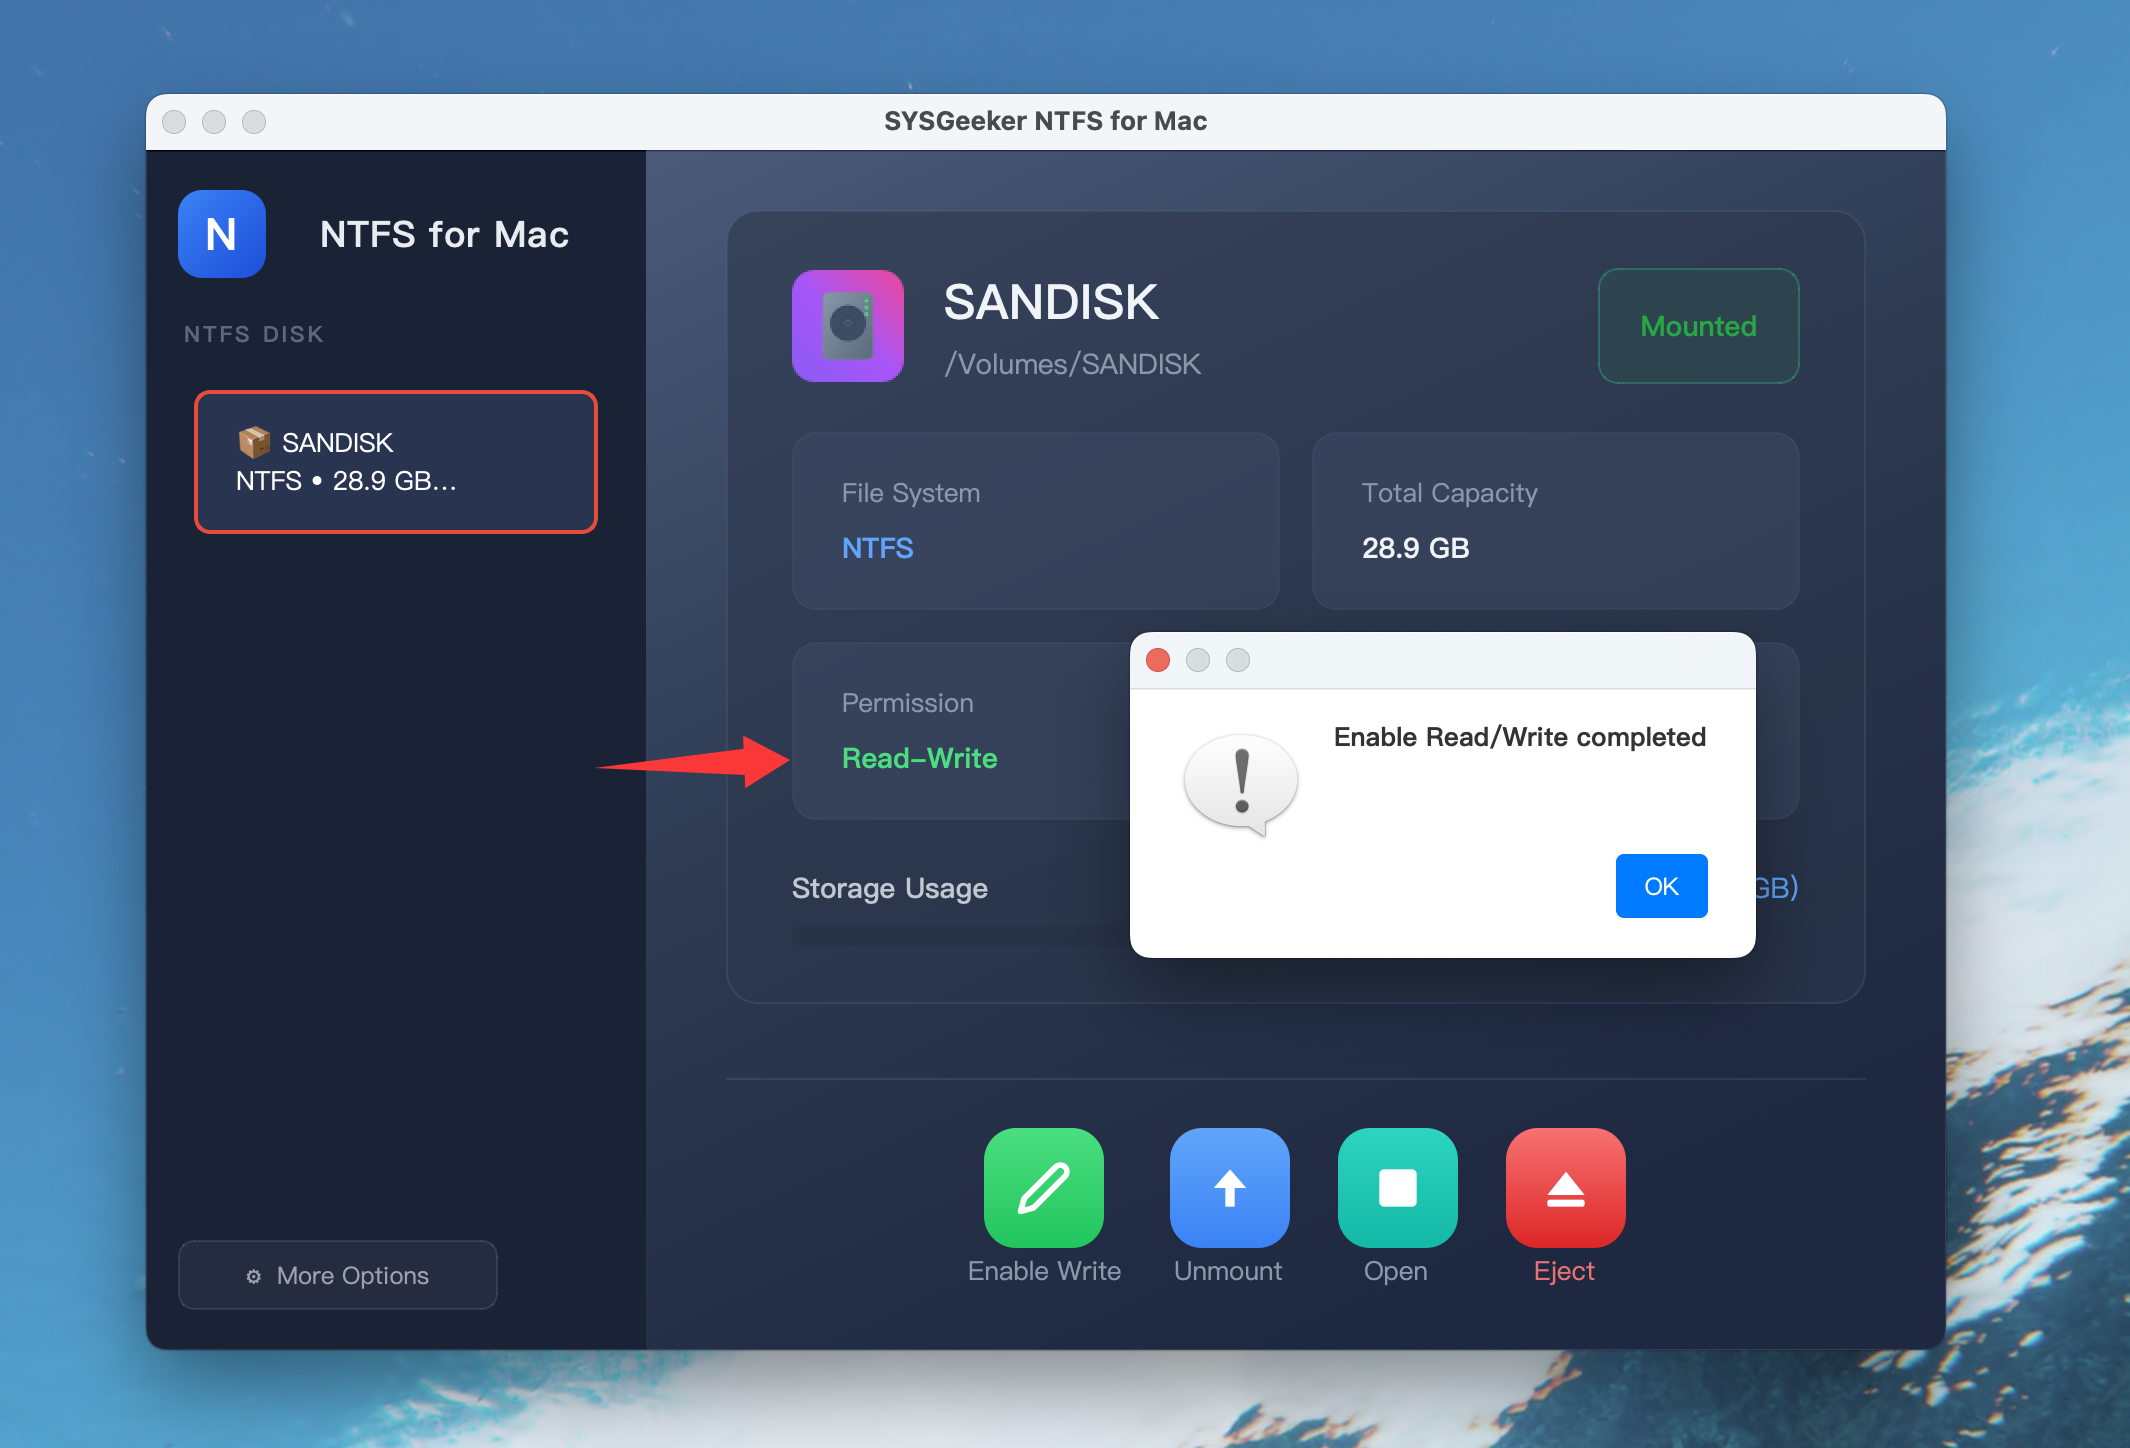
Step 2: Enable Write.
Just click Enable Write button, behind the scenes, SYSGeeker mounts it with full read/write support.
You can also open the SYSGeeker NTFS for Mac app to see a list of detected NTFS drives and their status, but for daily use I rarely need to open the app.
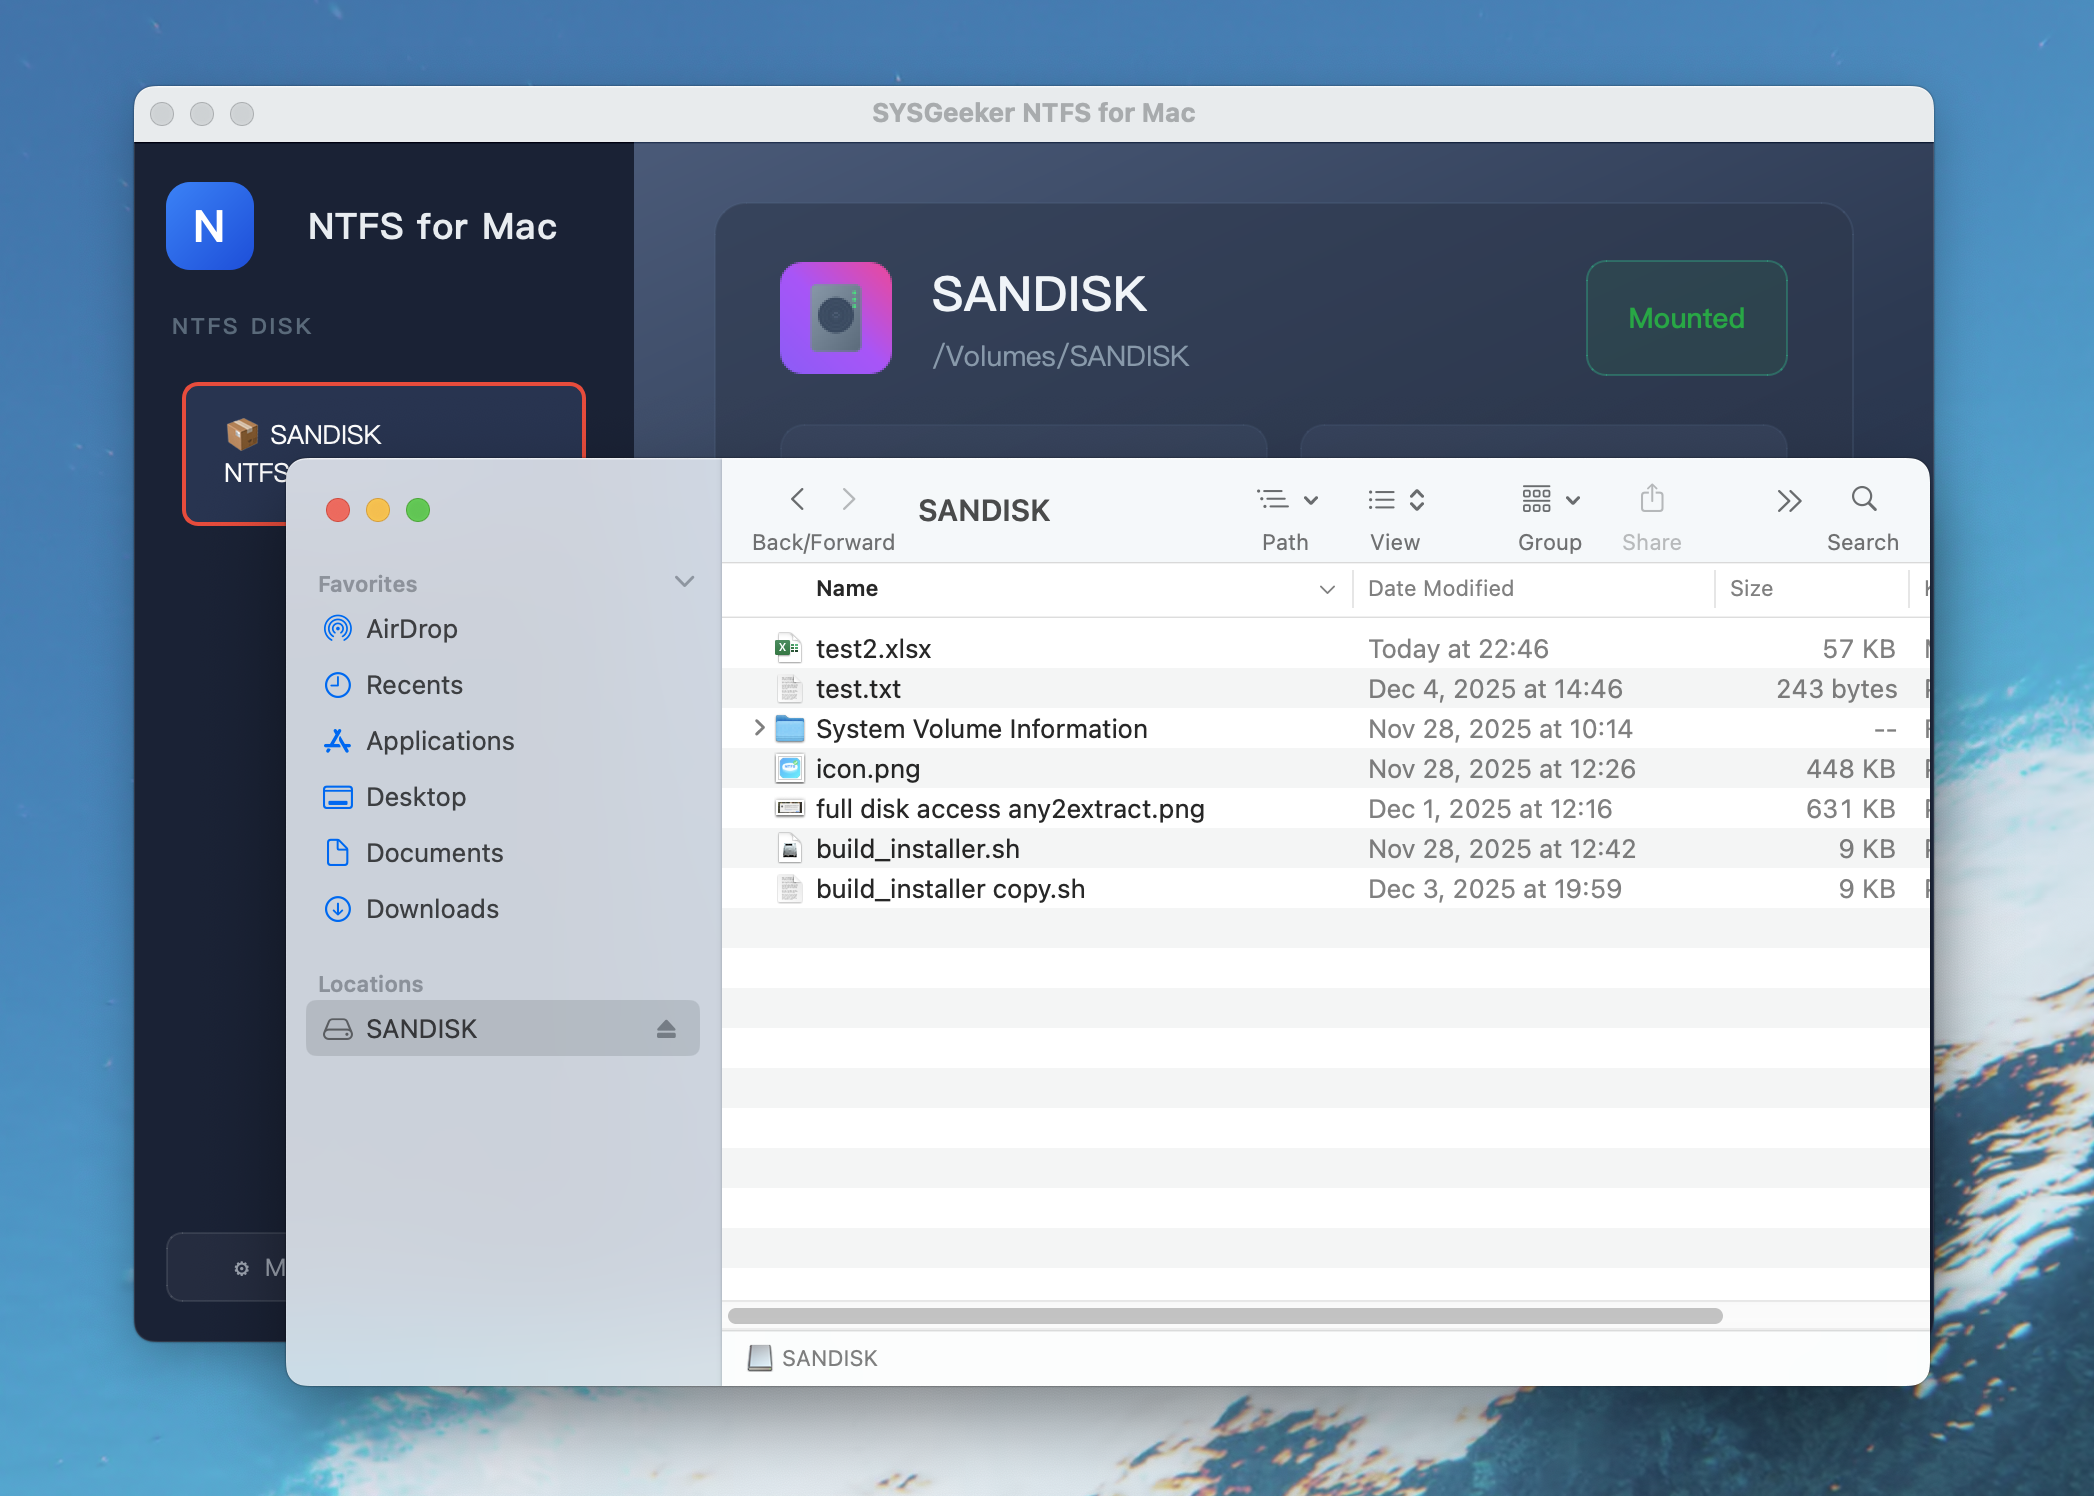
Step 3: Use the NTFS Drive Like a Normal Mac Drive
This is where it becomes “boringly good” — it just works:
- I can drag and drop files and folders from my Mac into the NTFS USB drive.
- I can rename, delete, and edit files directly on the NTFS drive.
- Apps can save directly to the NTFS drive (video editors, backup tools, etc.).
So my typical workflow looks like this:
- Work on a project on my Mac.
- When I’m done, I drag the project folder into the NTFS external drive.
- Unplug it, connect it to a Windows PC, and everything opens natively there.
No converting, no reformatting, no “read-only” surprises.
Why Mac Can’t Normally Write to NTFS
Short version: Windows uses NTFS, and macOS can only read it by default — not write to it.
| Action | On Mac with NTFS by default |
|---|---|
| Open files | Yes |
| Copy files from NTFS to Mac | Yes |
| Create / edit / delete files on NTFS | No |
| Copy files from Mac to NTFS | No |
If you don’t want to reformat the drive, the easiest fix is to install an NTFS for Mac driver.
Final Thoughts
If you only move a tiny file once in a blue moon, you can get away with workarounds.
But if you:
- Regularly share external drives between Windows and Mac
- Already have NTFS drives full of important data
- Don’t want to reformat or reorganize everything
Then installing an NTFS driver is by far the most convenient way.
For me, SYSGeeker NTFS for Mac became the “set it once and forget it” solution:
- Full read/write access to NTFS
- Fast transfers
Now when I plug in an NTFS drive, I don’t even think about formats anymore — I just drag files and folders into my NTFS USB drive on my Mac and move on with my day.