Text messages can serve as crucial evidence in legal proceedings. Whether you’re dealing with a civil case, a family law issue, or any other legal matter, having a printed record of your text messages can be imperative. For iPhone users, printing text messages for court purposes might seem challenging, but it’s quite doable with the right steps. Here’s a comprehensive guide on how to print text messages from your iPhone for court.
Since iOS doesn’t have a native feature to export texts in a printable format, using third-party software is the most straightforward way to print your text messages. Apps like iExplorer, Decipher TextMessage, and PhoneView are popular choices. These apps allow you to export messages in readable and printable formats such as PDF or Excel.
- D-back: Connect your iPhone to your computer, open iExplorer, and select your device. Navigate to the Messages app, select the needed texts, and export them.
- Decipher TextMessage: Install the software on your computer, connect your iPhone, and follow the prompts to download your messages. The software automatically converts them into a PDF file.
- PhoneView: Similar to the others, connect your iPhone, open PhoneView, and export your messages.
Part 1. How to Export iPhone Text Messages from iPhone to PC
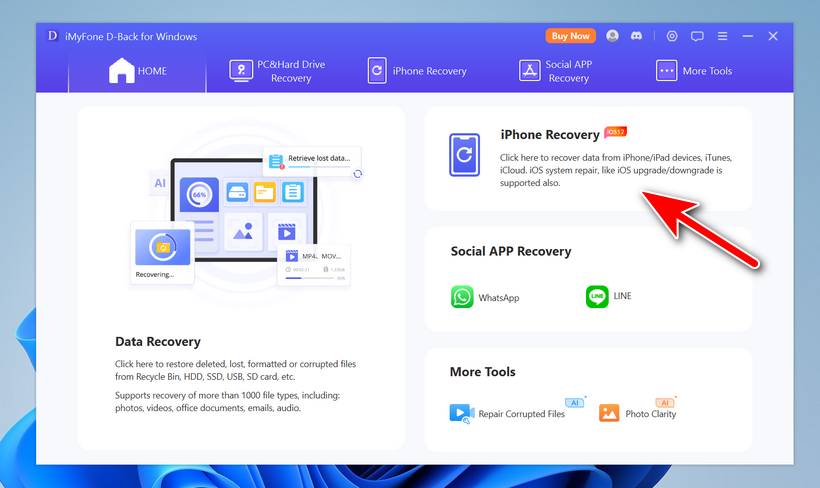
Using D-back to manage your iPhone data is straightforward. D-back is a powerful tool that allows you to access and transfer files between your iOS device and your computer, including music, messages, photos, and more. Here’s a step-by-step guide on how to use D-back effectively:


Step 1: Download and Install D-back
Download the version suitable for your operating system (Windows or macOS). Once the download is complete, open the installer and follow the instructions to install D-back on your computer.
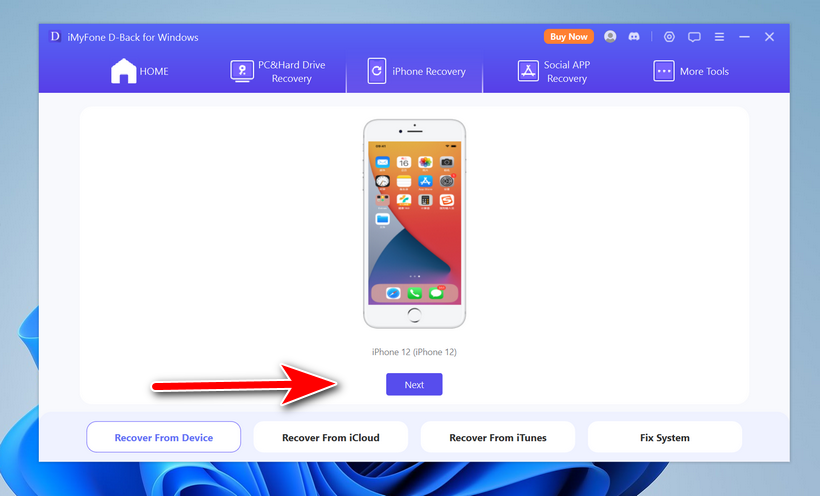
Step 2: Connect Your iPhone
Connect your iPhone to your computer using a USB cable. Open D-back on your computer. It should automatically detect your iPhone.
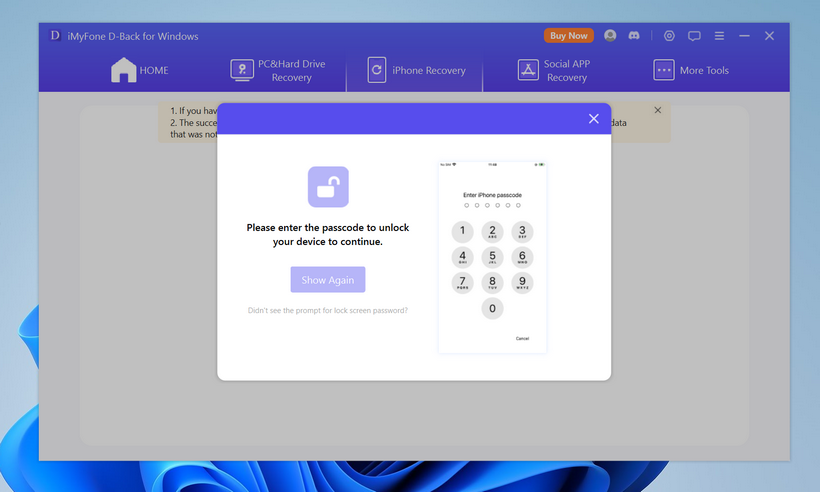
Step 3. Enter Lockscreen Passcode on iPhone
To grant the permission for accessing text messages on your iPhone, you need to enter the lockscreen passcode to proceed. Please do as it asks..
Step 3: Access Your iPhone Data
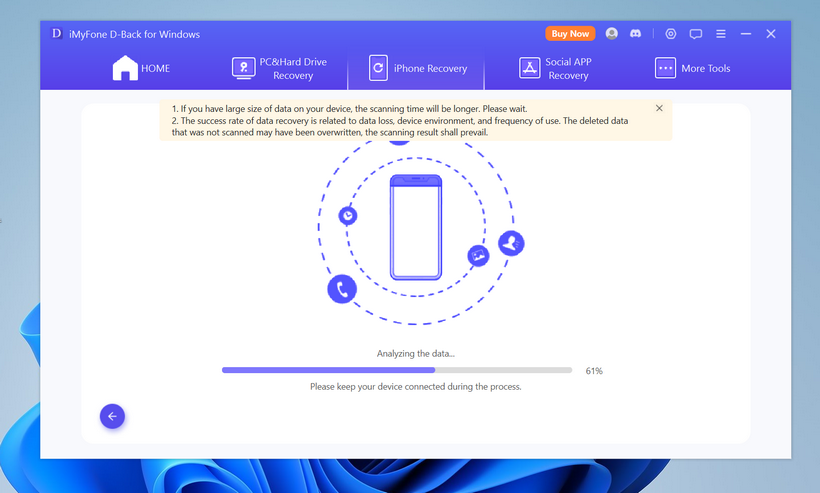
Once you have the right permission to iPhone, D-Back software will start scanning personal data on this device. This will take a few minutes.
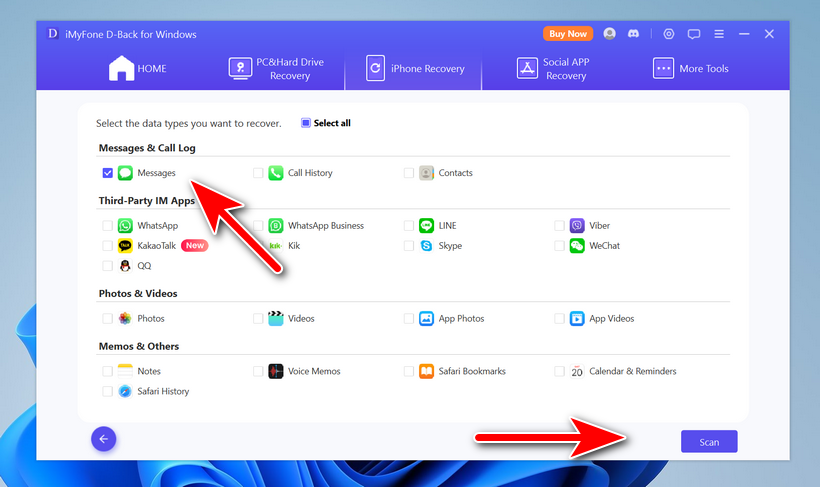
Step 4. Select Text Messages to Scan
D-Back presents a simple, intuitive interface that resembles Windows Explorer or Finder on macOS. You can see different data categories such as Media, Apps, and more. After the device scanning, D-Back lists all the available data types that you can export to the computer. In here, we only choose ‘Messages‘.
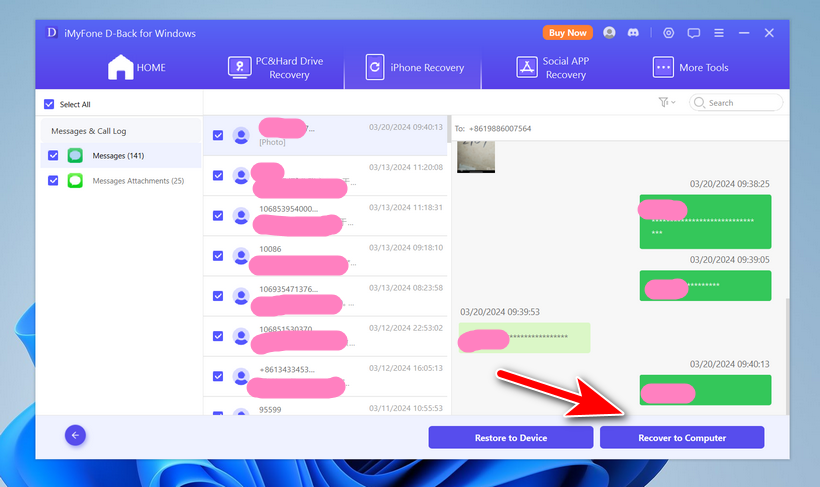
Step 5. Preview Messages and Transfer Them to Computer
All messages and attachments will be listed on the screen. Please preview and select the messages you want to transfer. Next, click the ‘Recover to Computer‘ button for transferring messages to computer.
Once you have your text messages exported as PDFs or in another printable format, you can open them on your computer and print them. Ensure your printer settings are adjusted to print all the details needed for legal purposes, including the date and time stamps.
D-back is a versatile tool that simplifies the management of your iPhone’s data from your computer. Whether you’re looking to backup your data, transfer files, or save important messages, D-back provides a user-friendly interface to accomplish these tasks efficiently. Always make sure to keep your D-back software updated to ensure compatibility with the latest iOS versions.